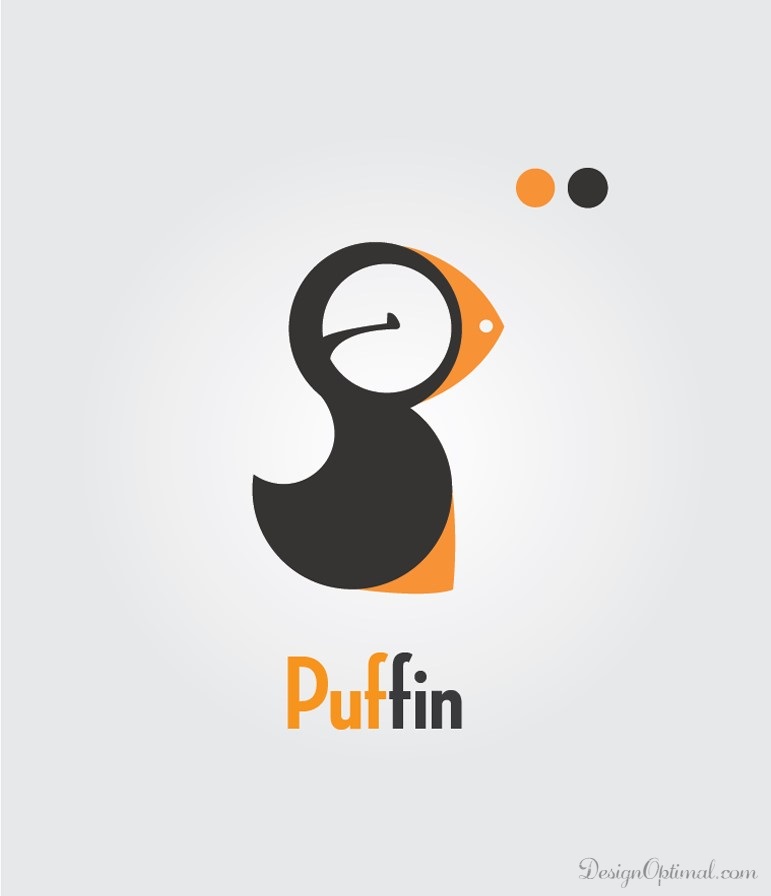
Hello Guys, today we are going to show you how to create a simple and cool logo in Adobe Illustrator. This logo will be featuring a Puffin actually!
It’s yet simple but you have to balance the circles that we are going to use to the logo.
Resources
- Fonts Used :
- MYRIAD PRO
- NeutraDisp-Bold
- Neutraface condensed-bold
Step 01
- Open Adobe Illustrator and create a new document of A4 size, make it a Landscape mode and save it as Puffin_logo.ai.
Step 02
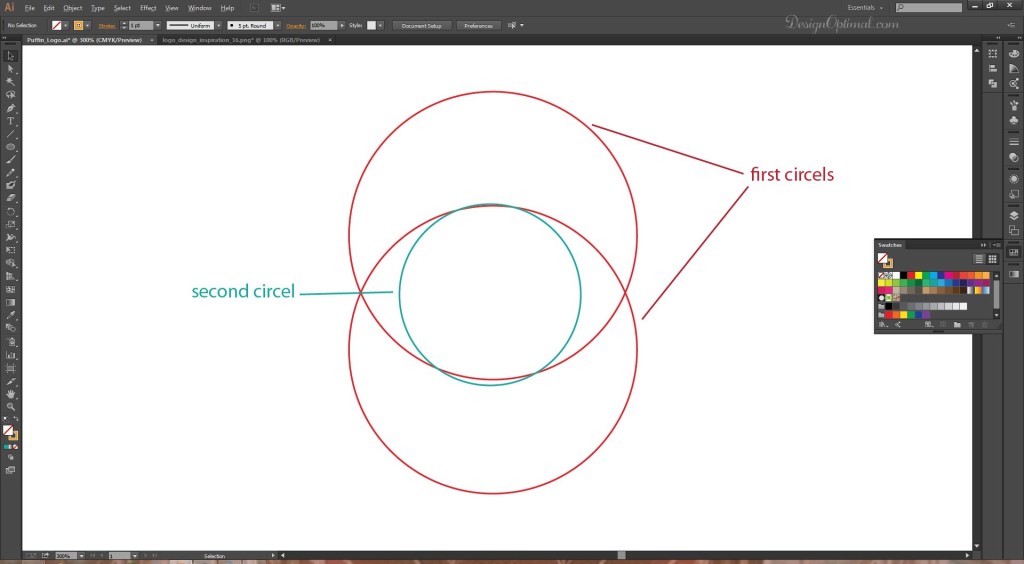
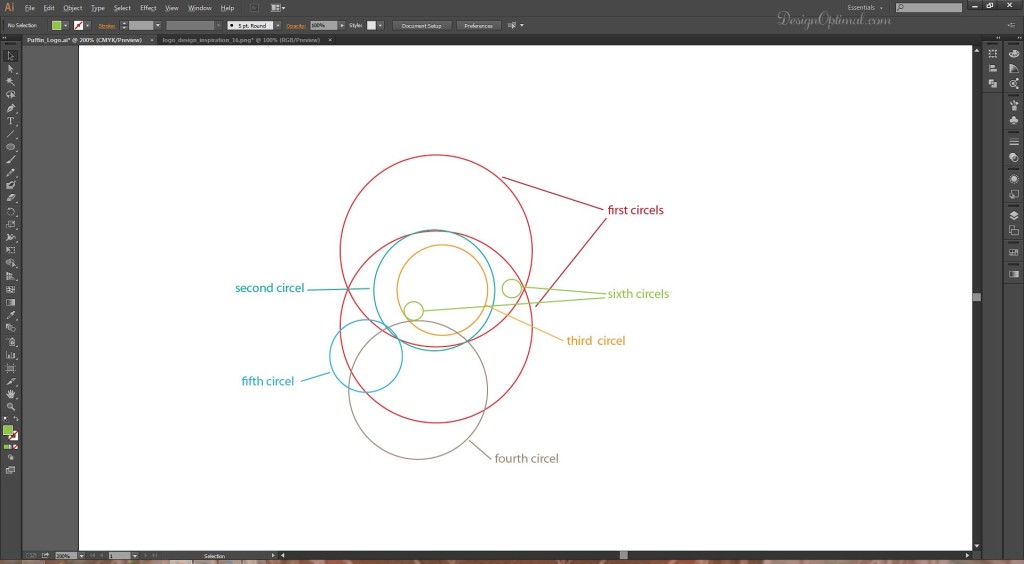
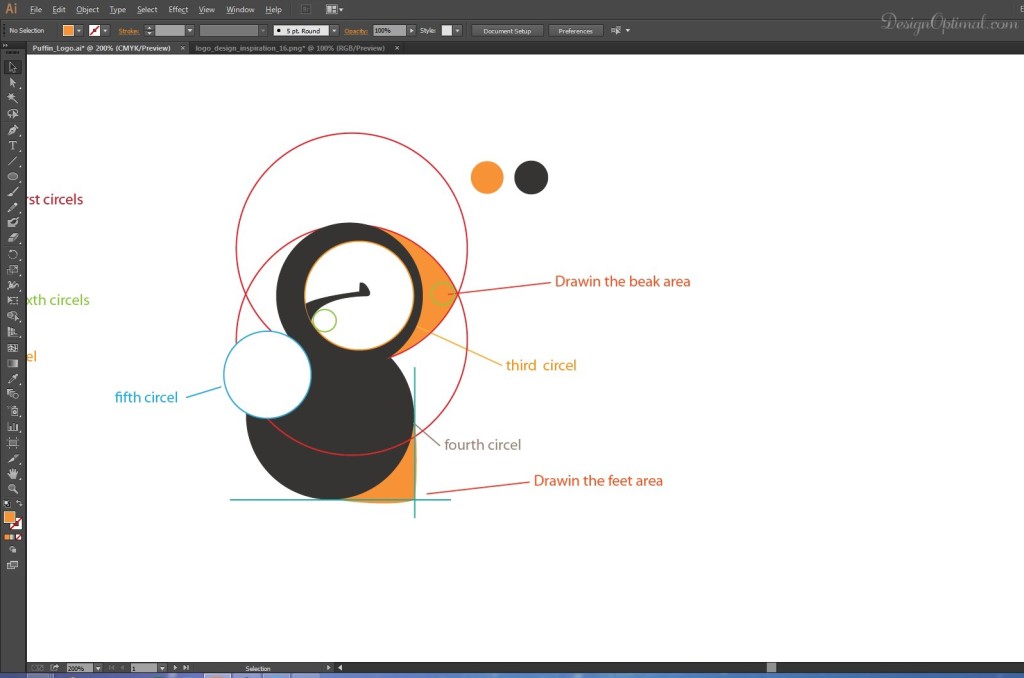
- Now as the first step in making the logo, we will start with creating a circle using the circle shape in Illustrator make the size of it 180px and after that duplicate the same circle again.
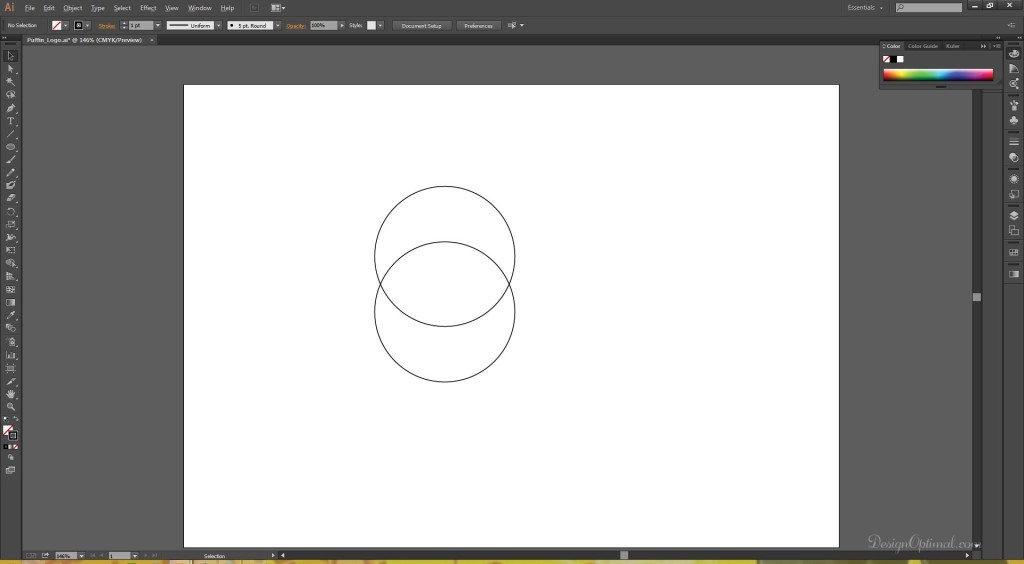
- Now again make another circle this time make the size of its 113px and keep it in the middle of the area of the overlapping main big circles, the process is shown below.
Step 03
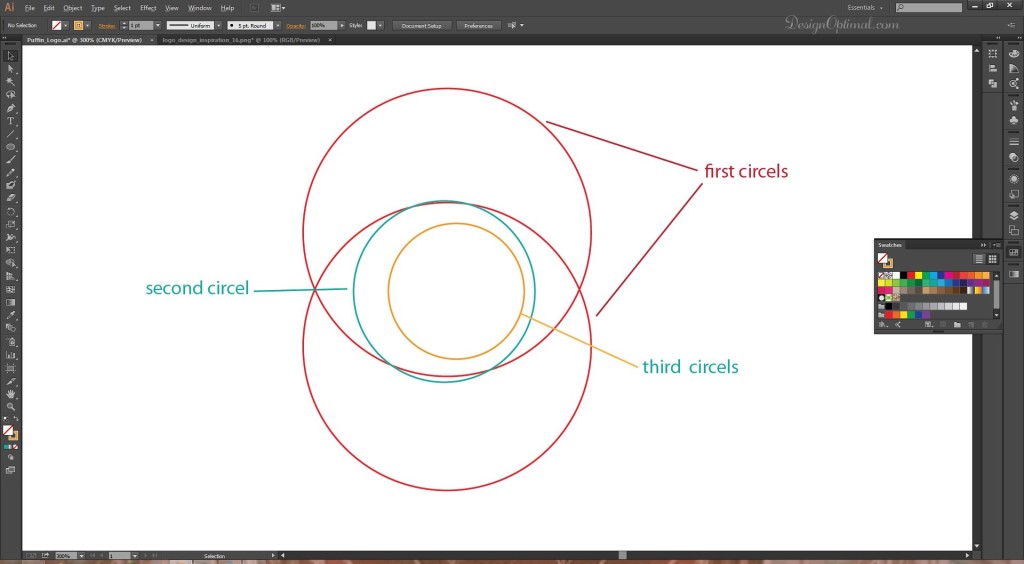
- Now create another circle inside of the newly created circle, make size of it 84px and place it as the image shown below.
Step 04
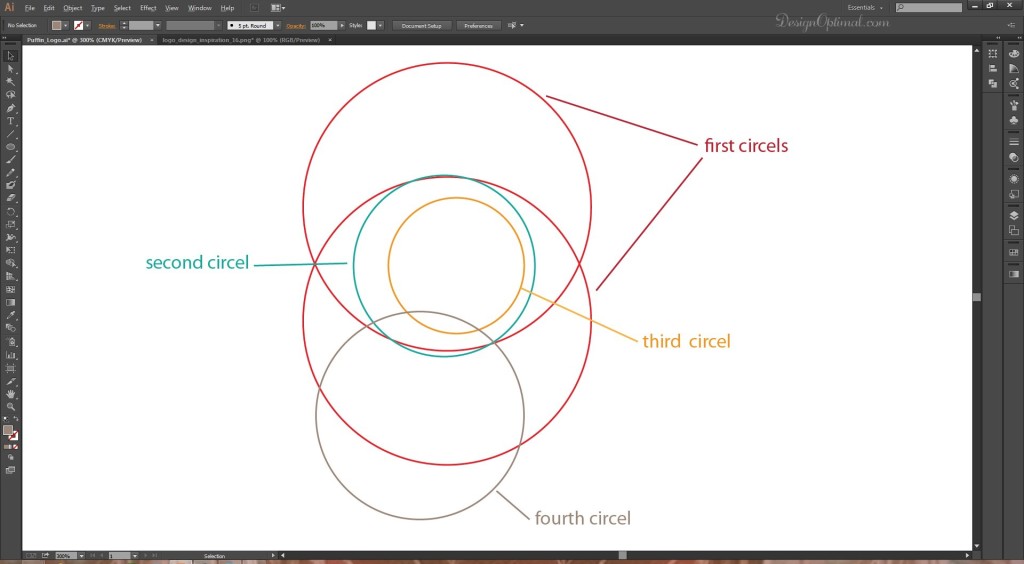
- Again make another circle as shown in the next image and place it according as shown, the size is 130px.
Step 05
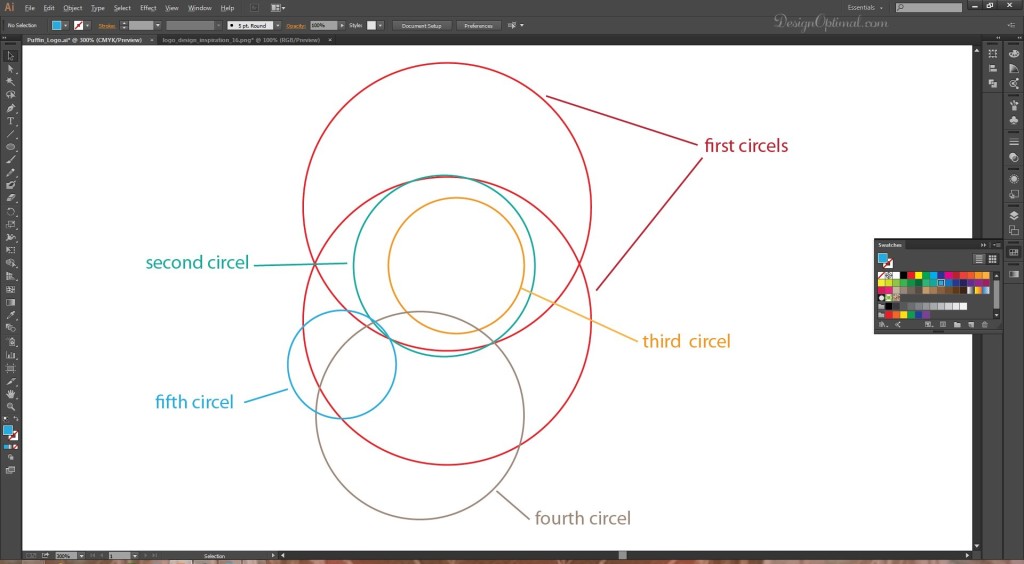
- Create another circle but this time make the circle size as 68px and place it like this.
Step 06
- Now again make two more circle’s but this time make it small size is 18px and place it like this.
Step 07
- Now select all the circle’s that we create just now and duplicate it and move it as shown in the next images.
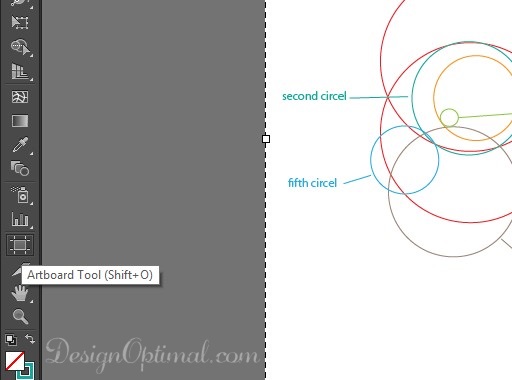
- We are going to add some more details for the logo, as to show all the process of the logo we will have to increase the art board size a bit. So take the art board icon and give the size as 600px.

Step 08
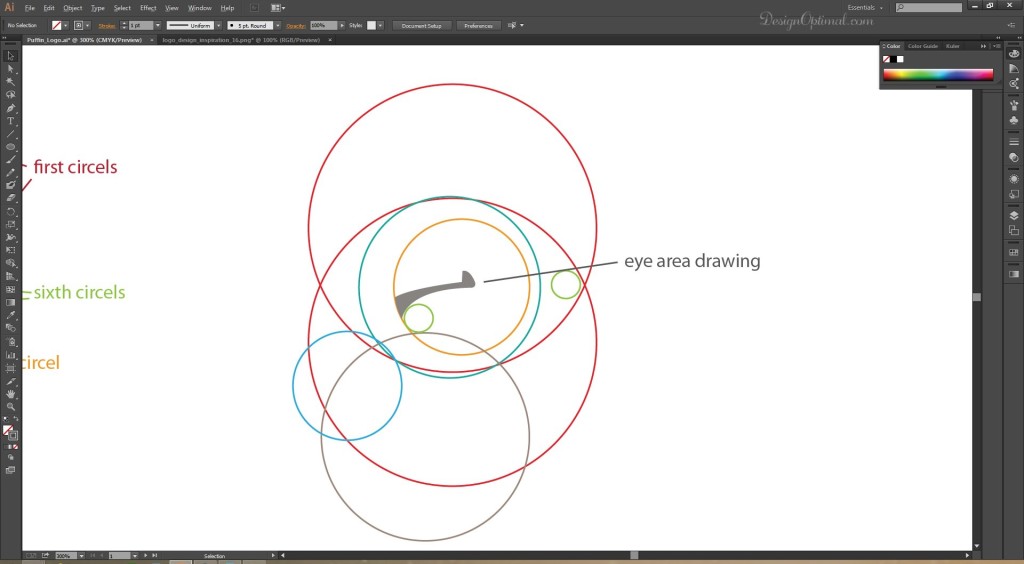
- So in that duplicated circle’s, we will have to add an eye area to the logo.
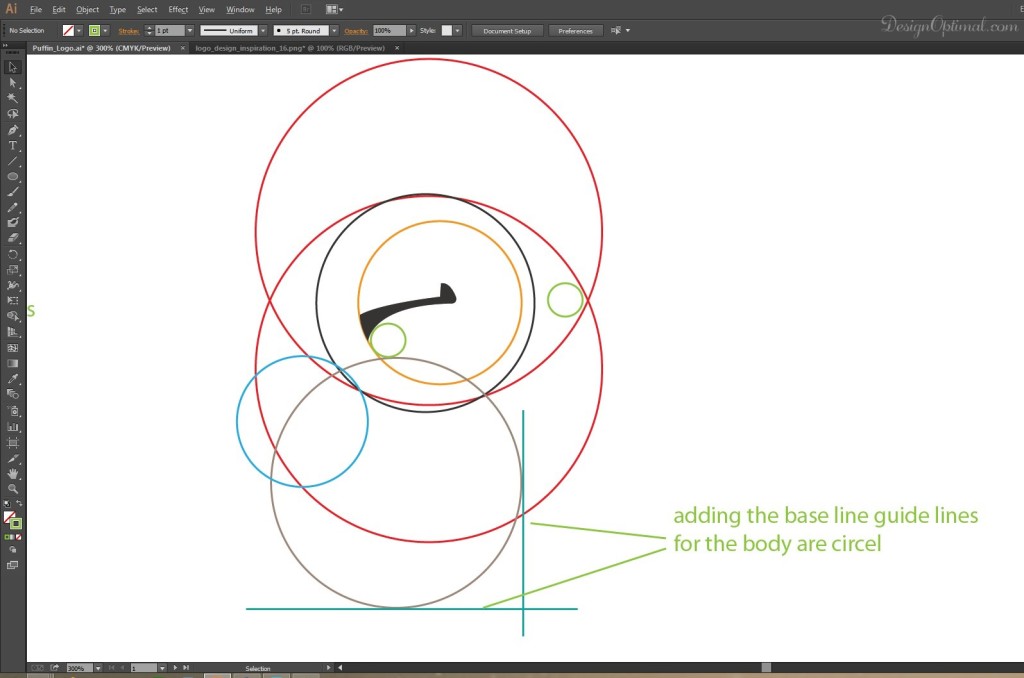
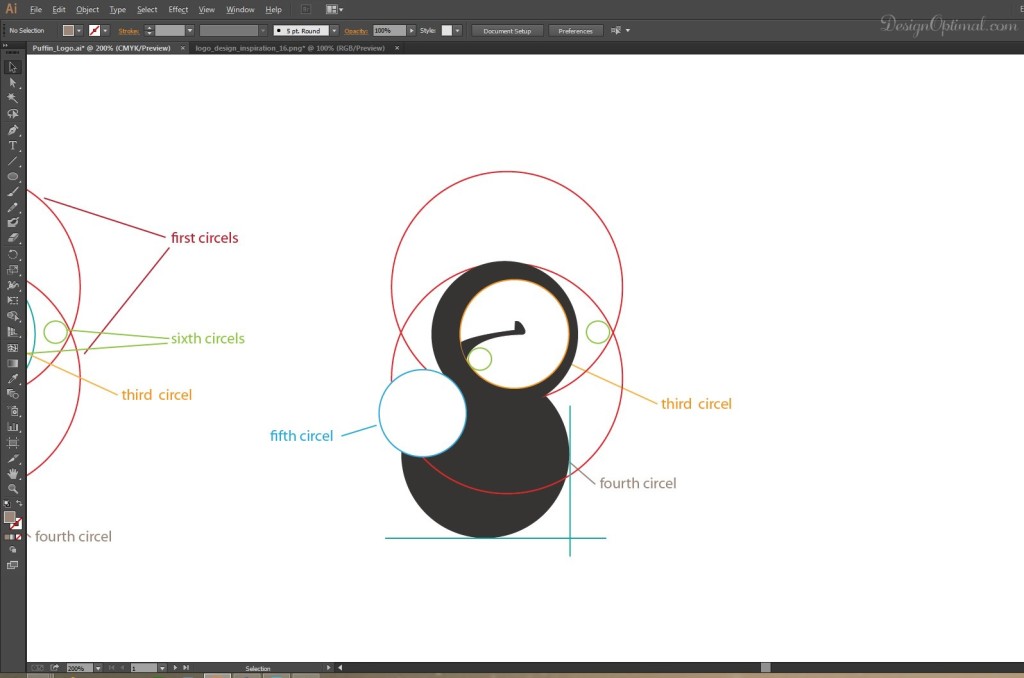
- Now its time to fill the areas to make the logo. For that, we will have to draw a base line for the body area circle. The process is shown below.
Step 09
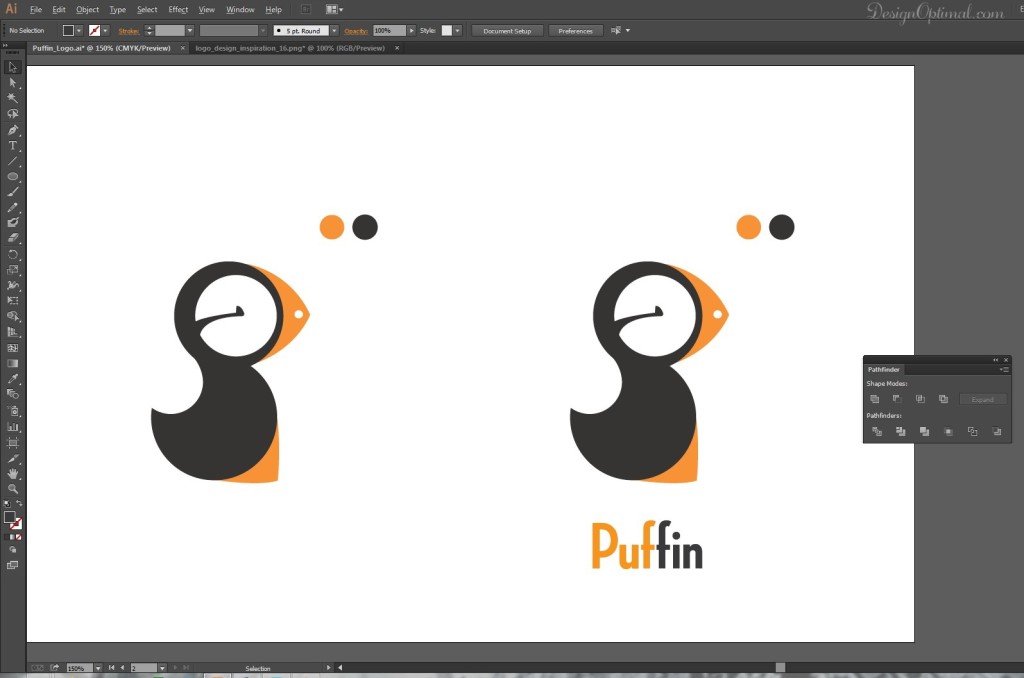
- Now start filling the body area of the logo. The process is shown below. The selected color id is # 353433.
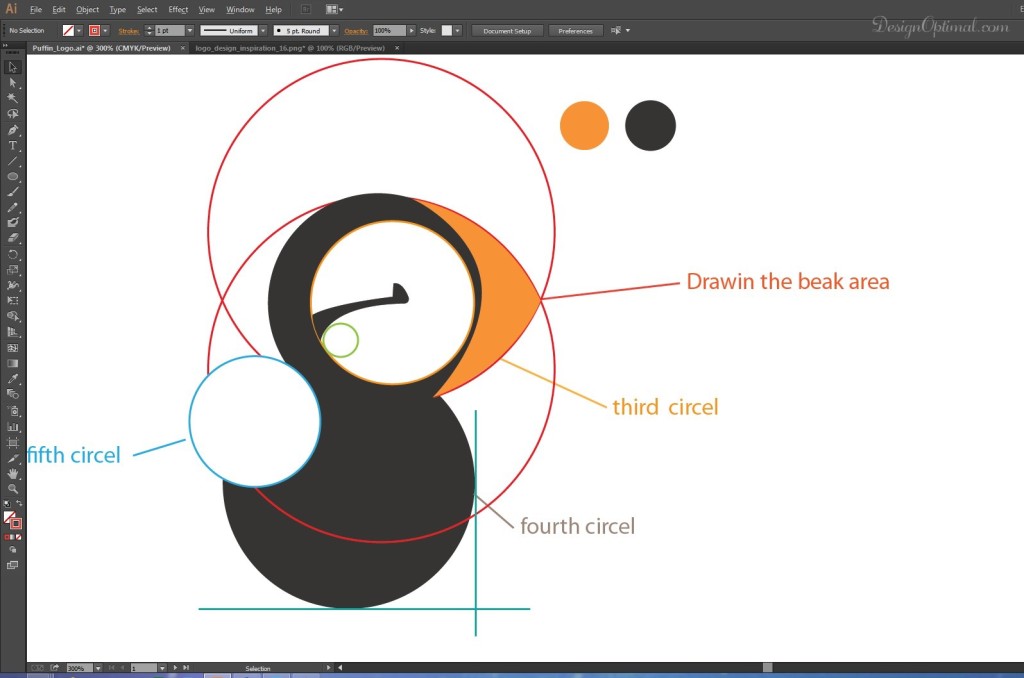
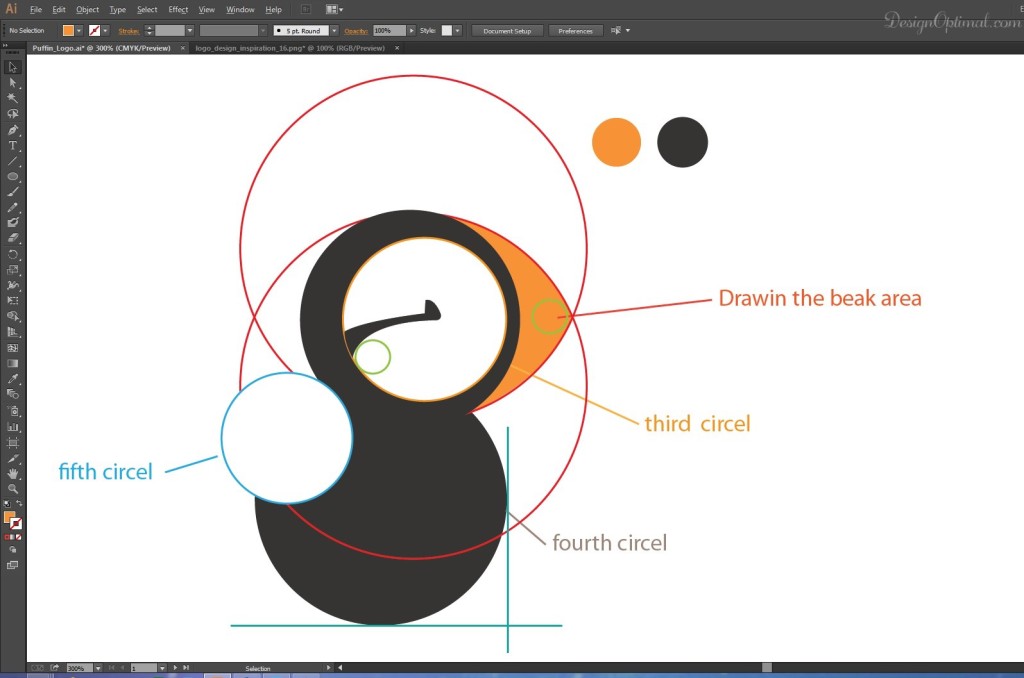
- Now take the pen tool and start drawing the beak area of the bird. The selected color id is # F79135.
Step 10
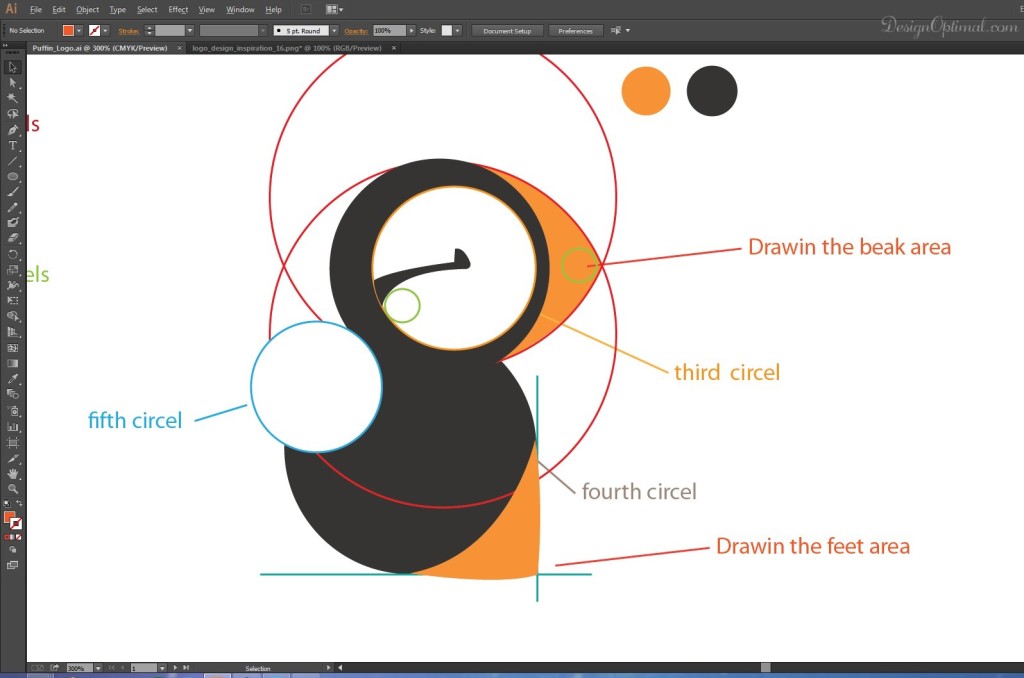
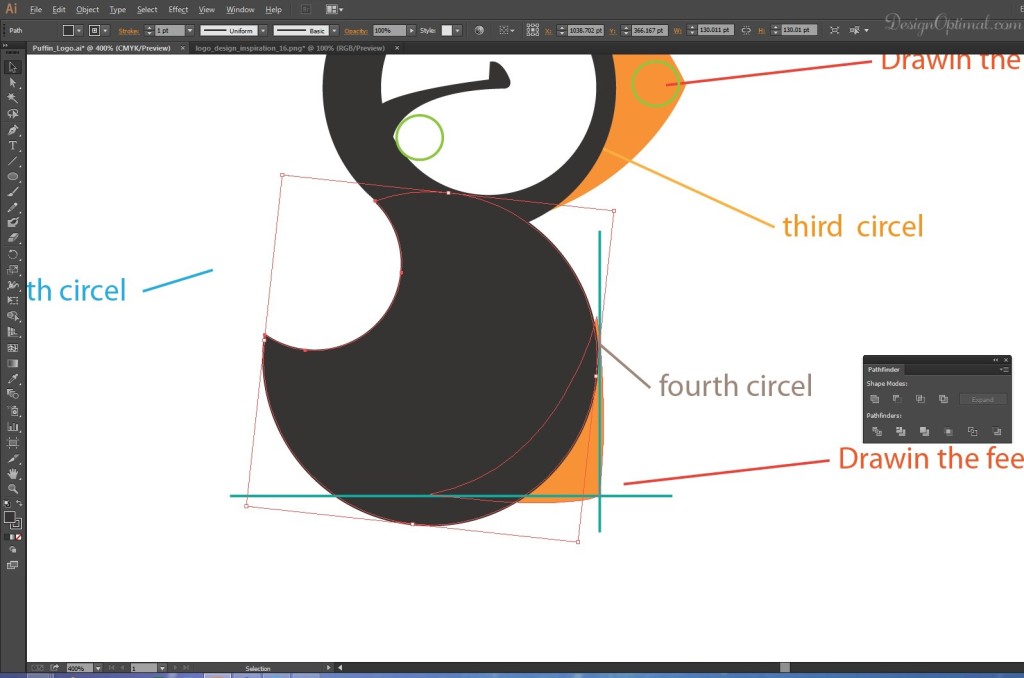
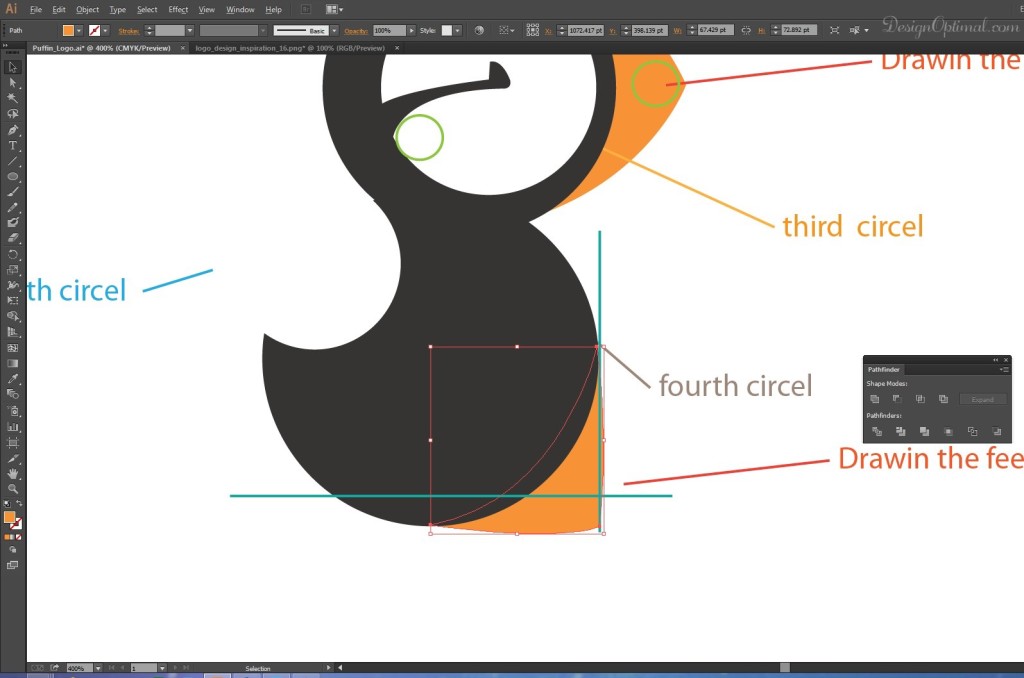
- Now we will draw all the feet area now as for the next step. Now in this step the baseline lines we created some steps ago comes in handy. The process is shown below.
Step 11
- Again duplicate whole art work we have just completed and place it as shown below.
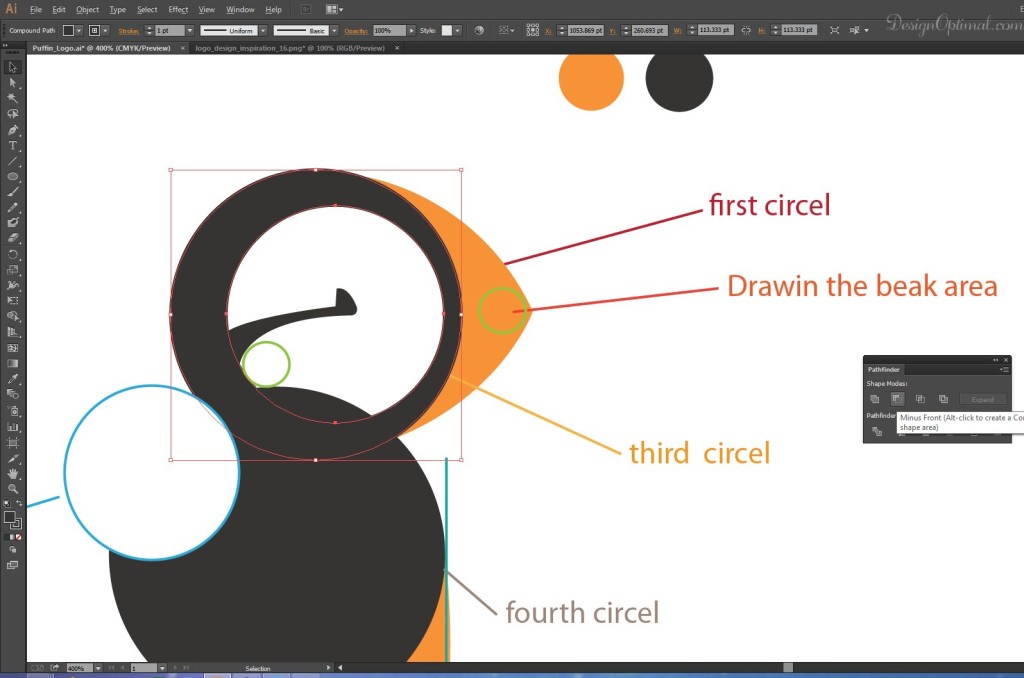
- Now take the path finder tools and select the first circle and the third circle, then get the pathfinder tool and click the shape mode called minus front.
- Now again select the fourth and fifth circles and use the pathfinder tools and repeat the same command called minus front.
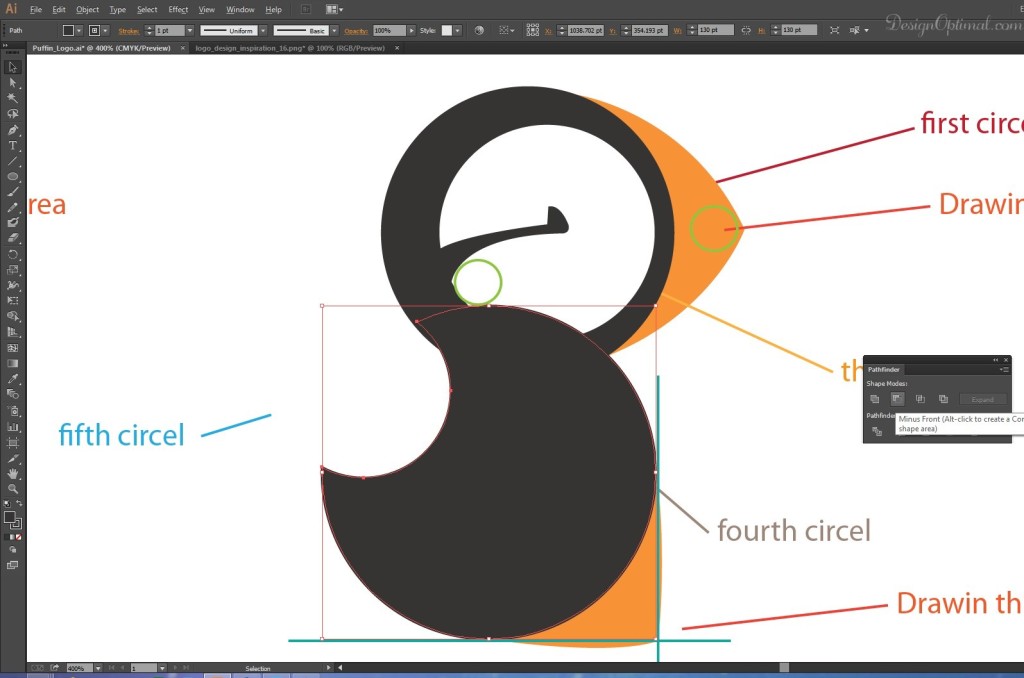
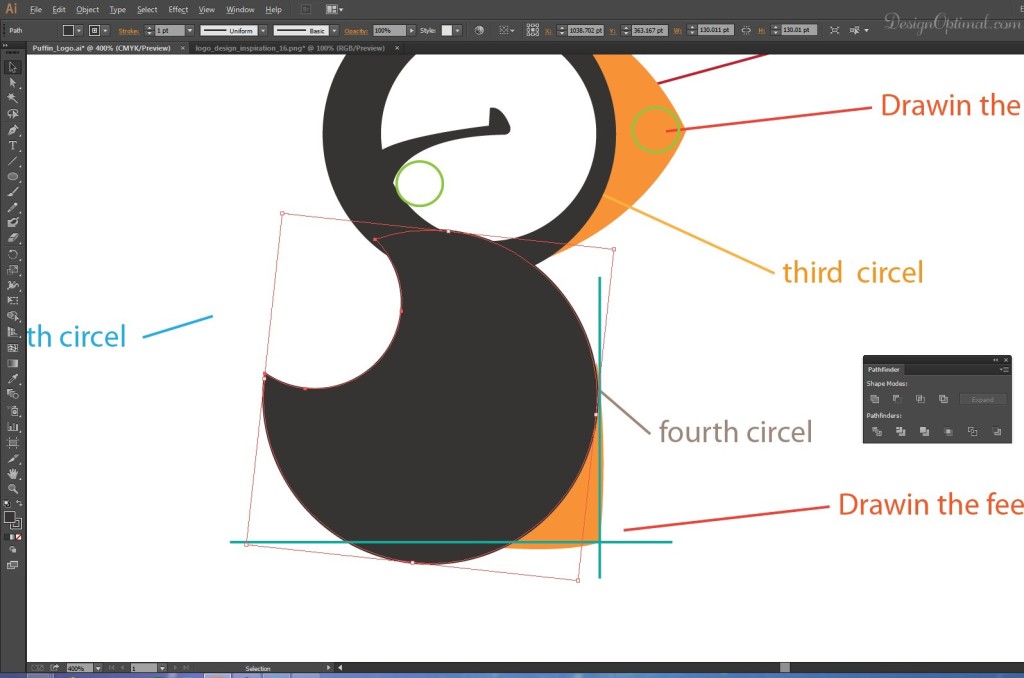
- Now re-position the bottom circle to make it more appropriate to the logo.
Step 12
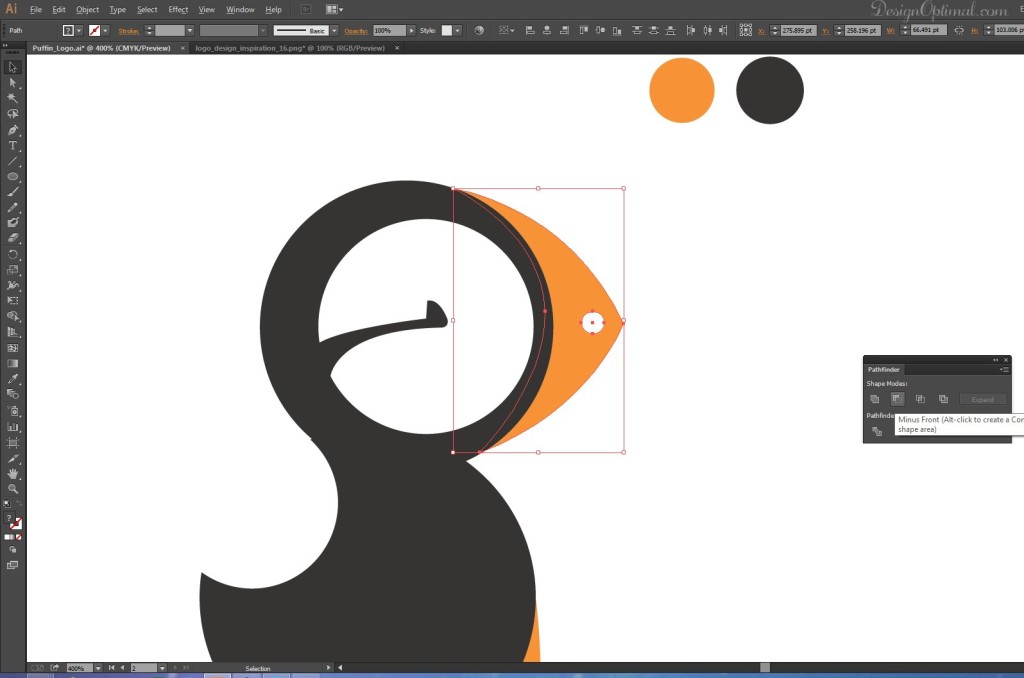
- Now fill the circle in the beak area with white and give the same pathfinder command called minus front.
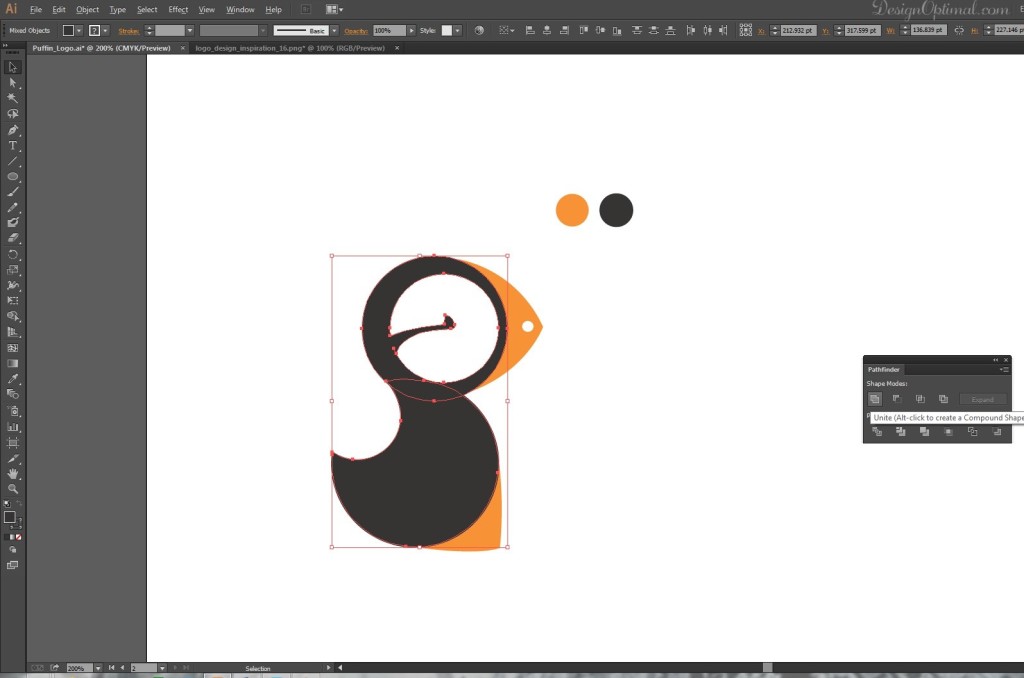
- Now again select all the shapes in dark grey color and use the pathfinder command called Unite.
Step 13
- As for the final step we will add a text to the logo that we just created.
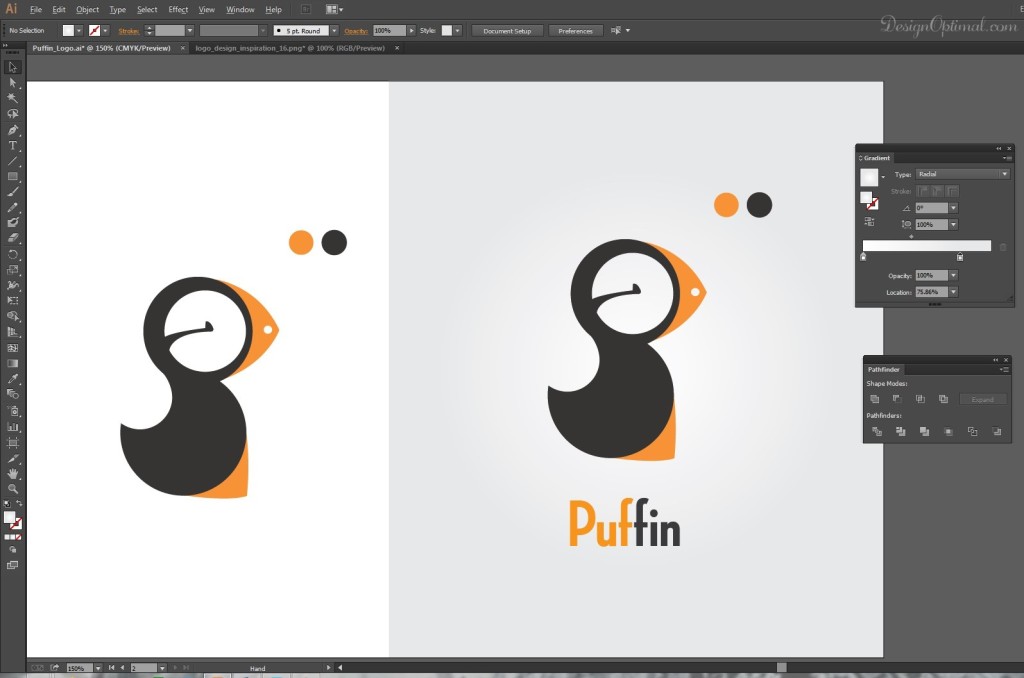
- But first we will have to select all the shapes of the logo and group it. Now duplicate it and add the text. The word will be “Puffin”.
- We used the font called the Neutraface Condensed bold and used the same two colors that we used for the logo.
- The process is shown below.
