Hello, guys today we are going to show you “How to Add Image into Text in Adobe Photoshop”. In this tutorial, you will learn how to add the image into any text very easily. Don’t worry if you are new here this is a step by step tutorial also have a screenshot of each step so you can practice it by yourself by downloading the project PSD file.
Resources
Images used:
- Blue Sky by unsplash.com
Fonts used:
- Gill Sans Ultra Bold
Step 01
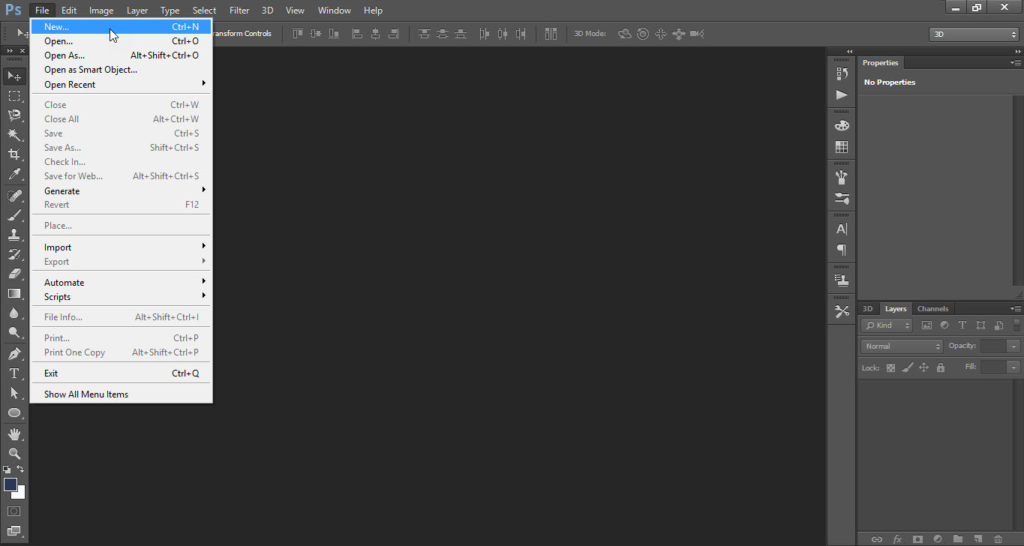
- Open the Adobe Photoshop software.
- Go to the “File” menu and click on the “New” option.
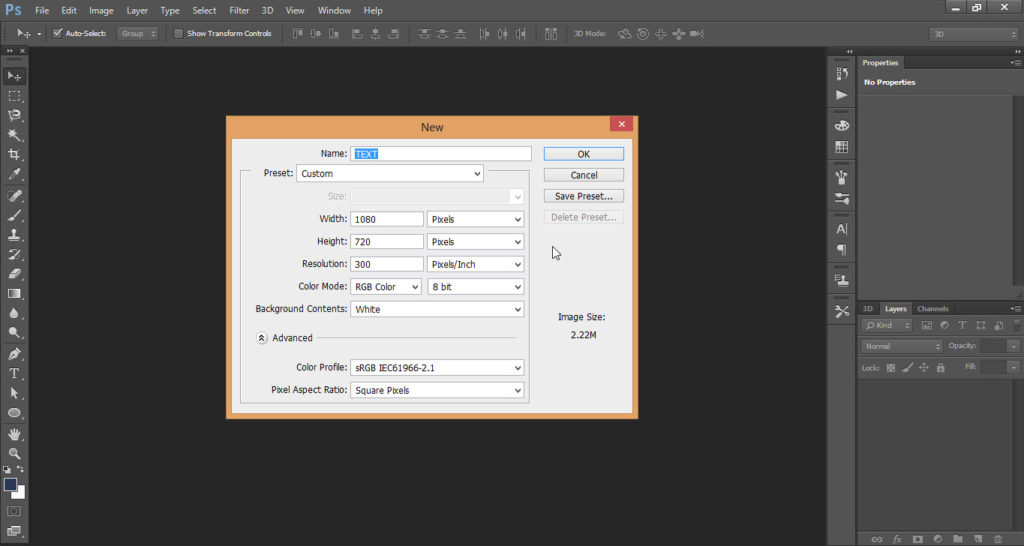
- Select the size of the document according to your requirements.
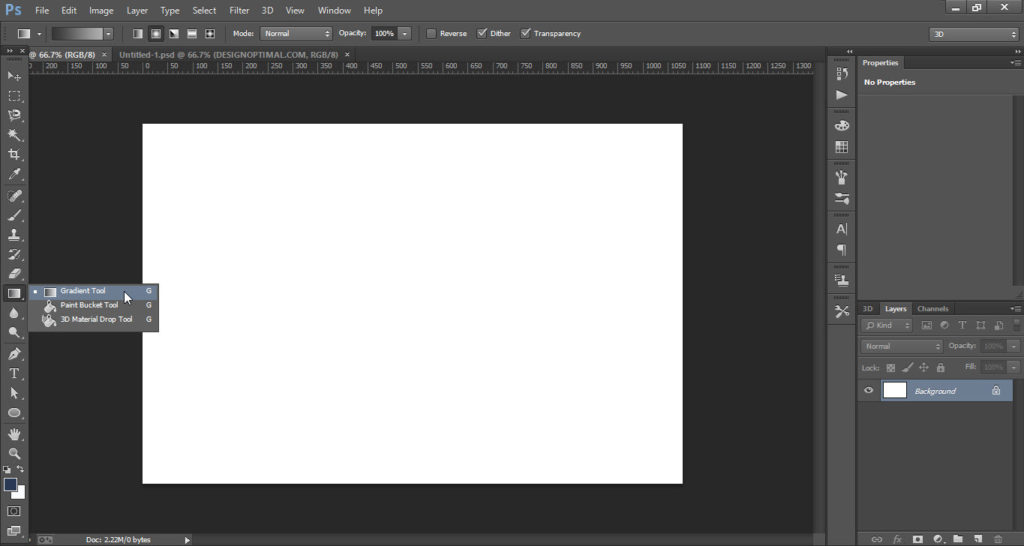
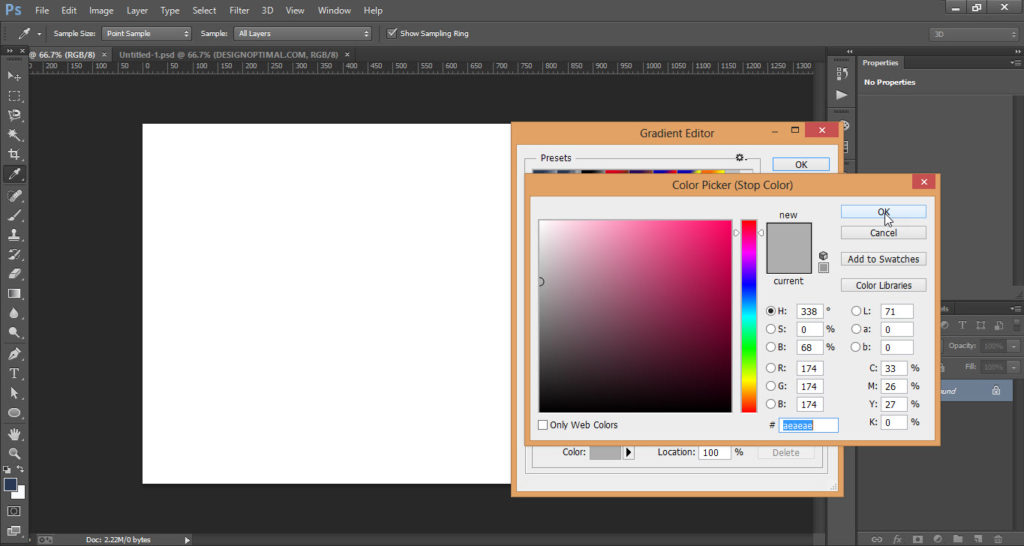
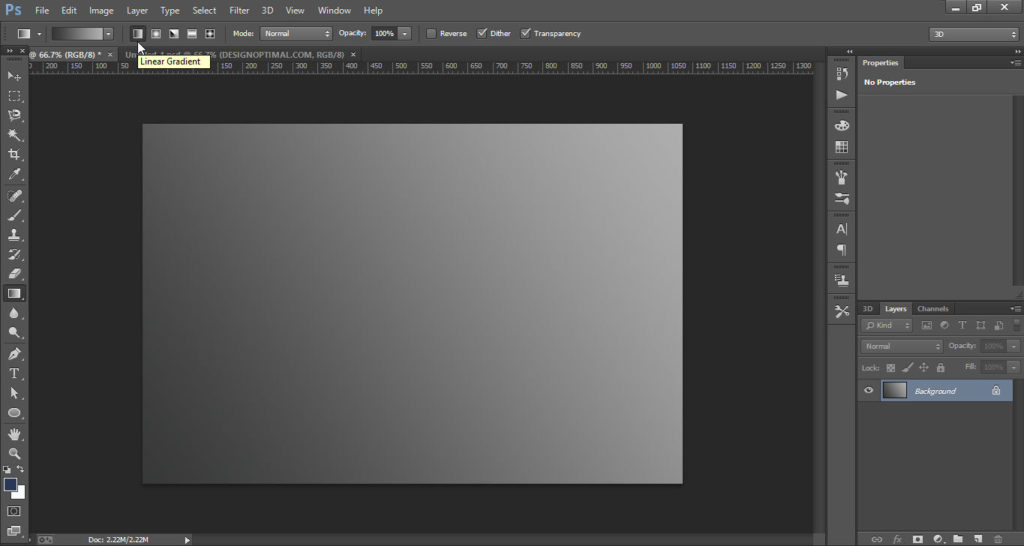
- Go to the “Tools Bar” and take the “Gradient Tool”.
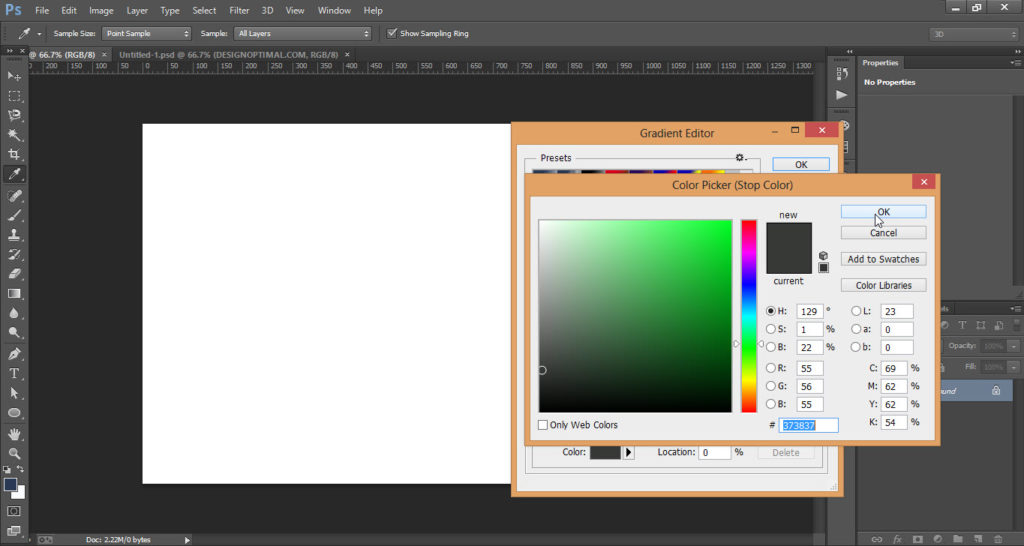
- Select the gradient which you want to apply to the background from “Gradient Editor”.
- Make sure that your gradient type is “Linear Gradient”.
Step 02
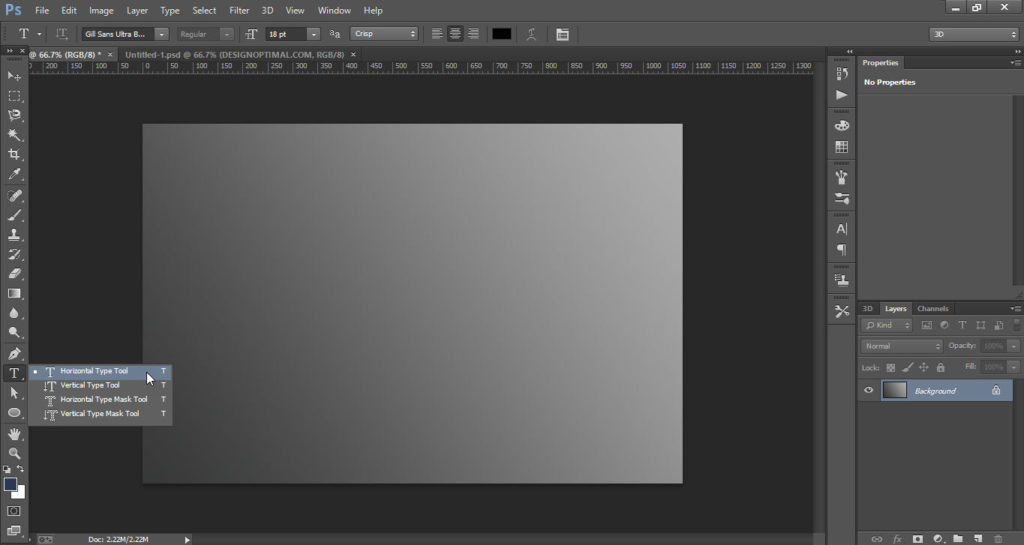
- Select the “Horizontal Type Tool” form the “Tools bar”.
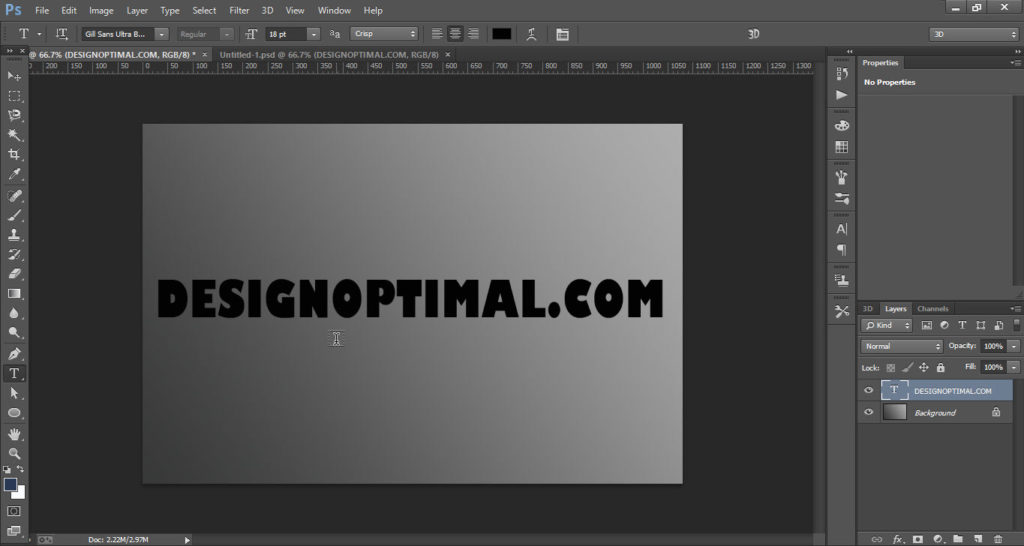
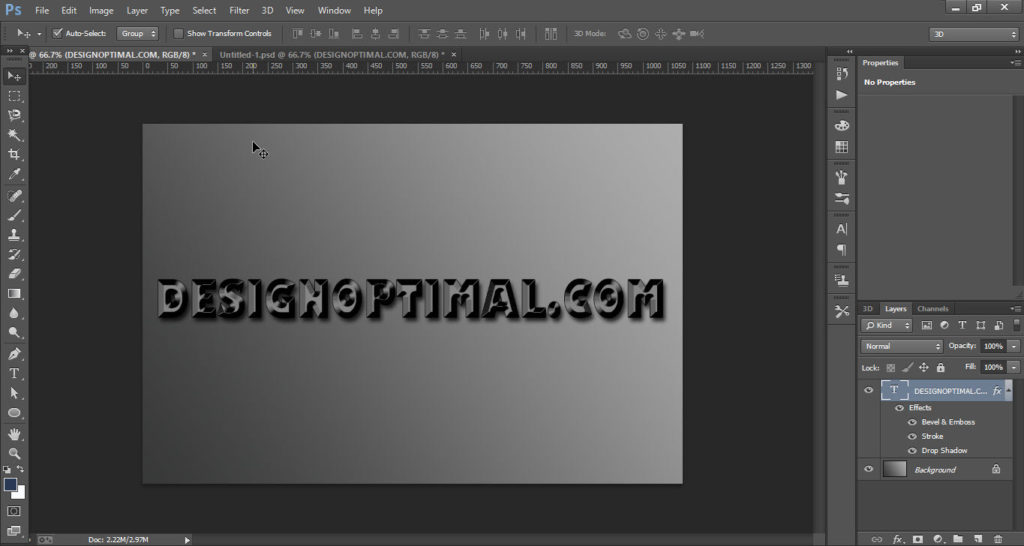
- Write any text you want as I write “DesignOptimal.com”.
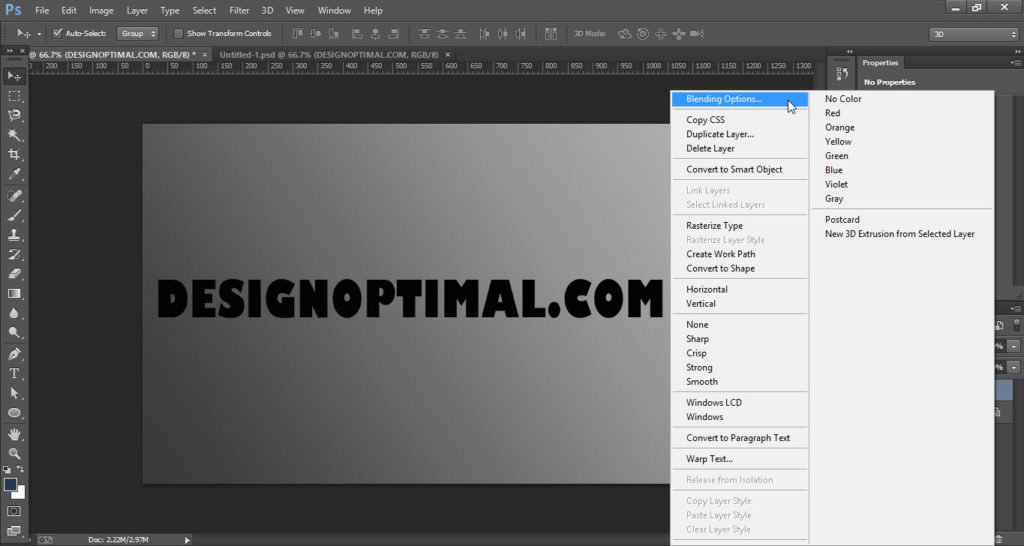
- Now right click on the “Text Layer” and click on “Blending Option”.
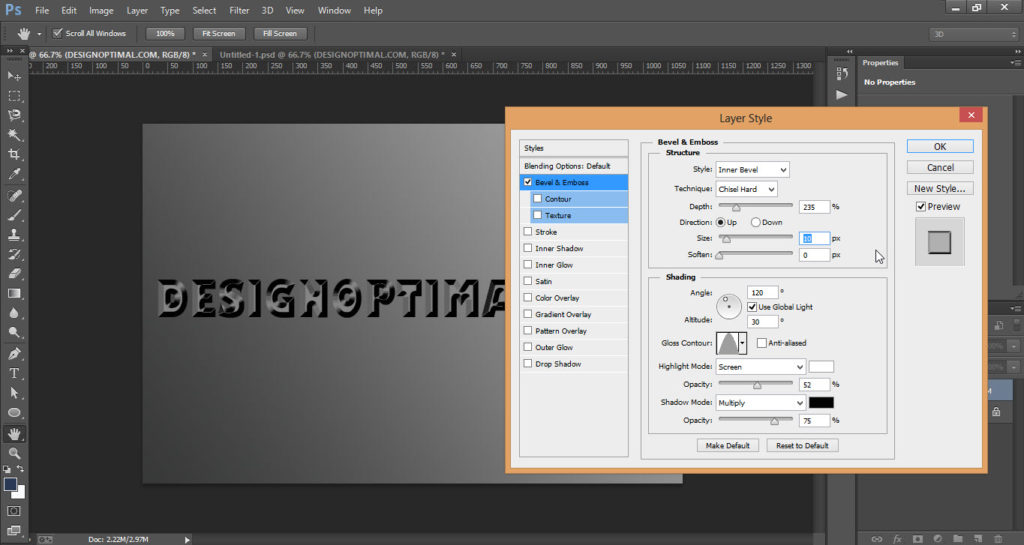
- A “layer Style” window will be opened, Apply the “Bevel & Emboss” effect.
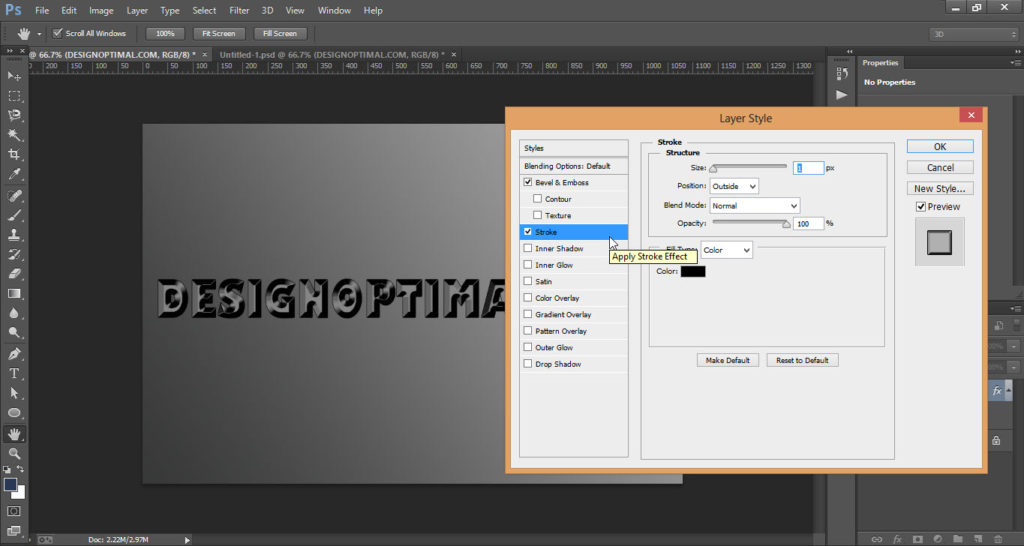
- In the “Layer Style” window also tick the “Stroke” option and apply some stroke also to look like 3D.
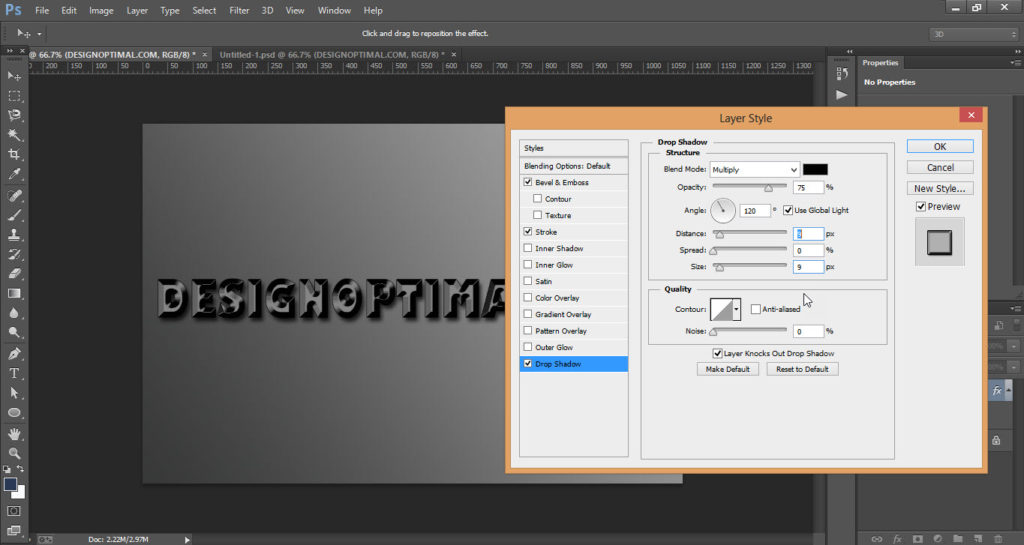
- Again in the “Layer Style” window tick the “Drop Shadow” effect and adjust the shadow size and distance.
- Your text is ready, Now add the image to the text which you want.
Step 03
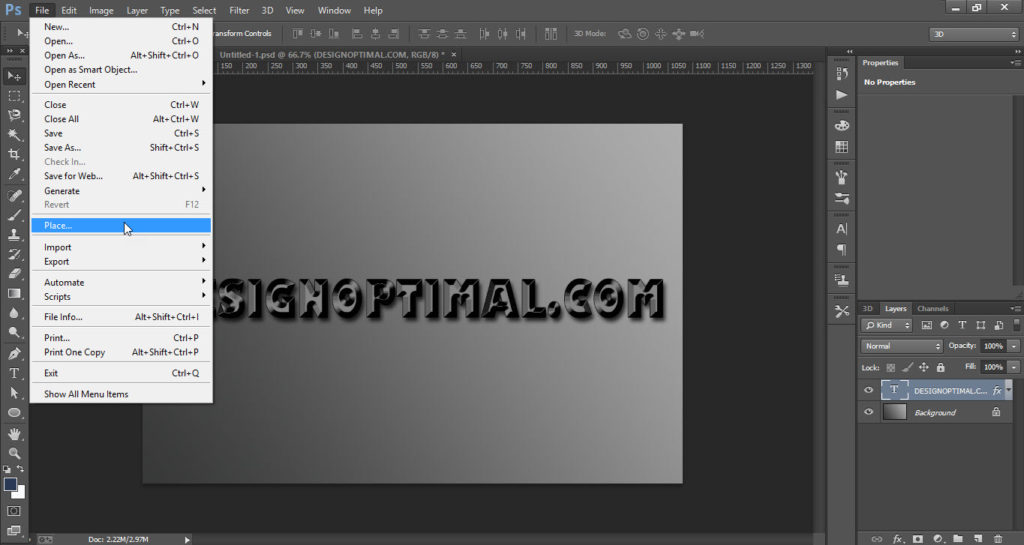
- Go to the “File” menu and click on the “Place” option.
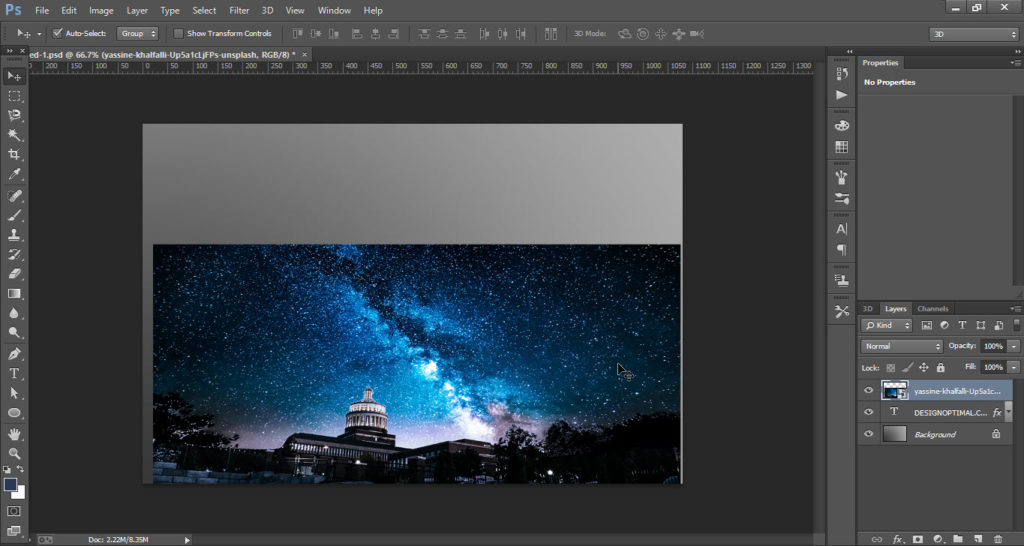
- A window will be opened so select the image which you want to add and then click on ok.
- Place the image upon the text and fix the size of the image.
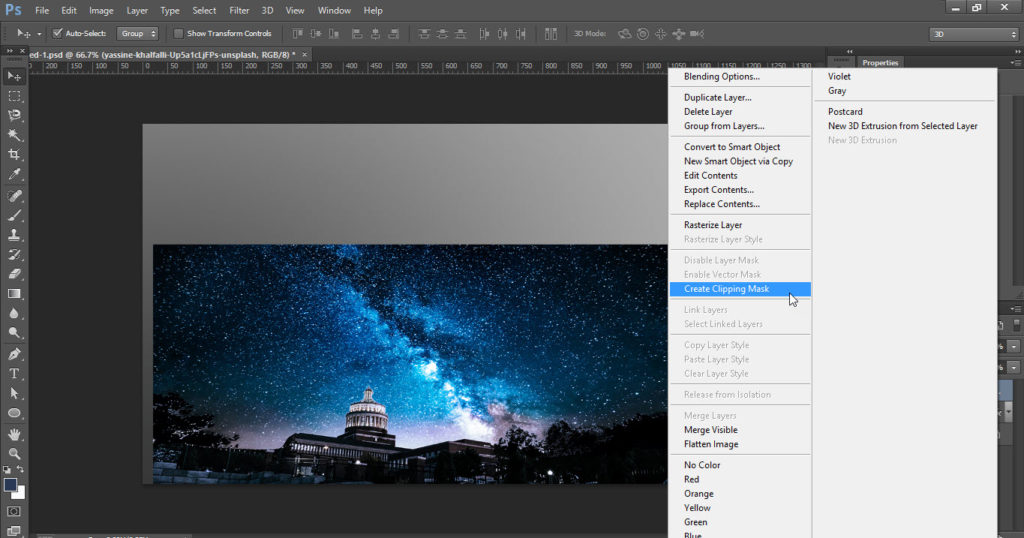
- Now “Right Click” on the “Image” layer, click on the “Create Clipping Mask” option.
- Finally, your image is added to the text.
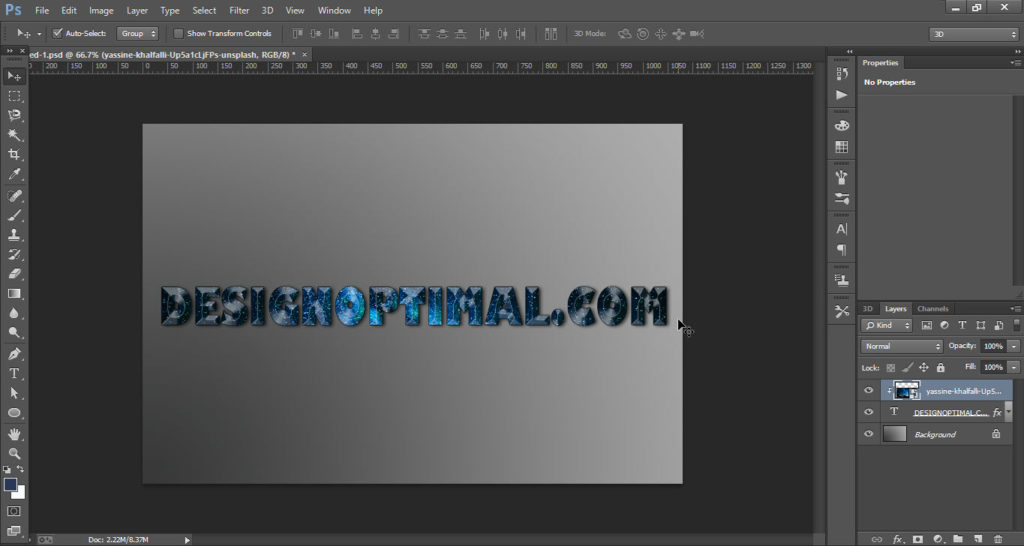
This is how the final result looks like


