Hello everyone!! Today we are going to show you “How to Design an Animated Logo in Adobe Photoshop”. In this tutorial, we will show you a very simple step to design an animated logo. its step by step tutorial all the screenshots are available and you can also download the source file of the project.
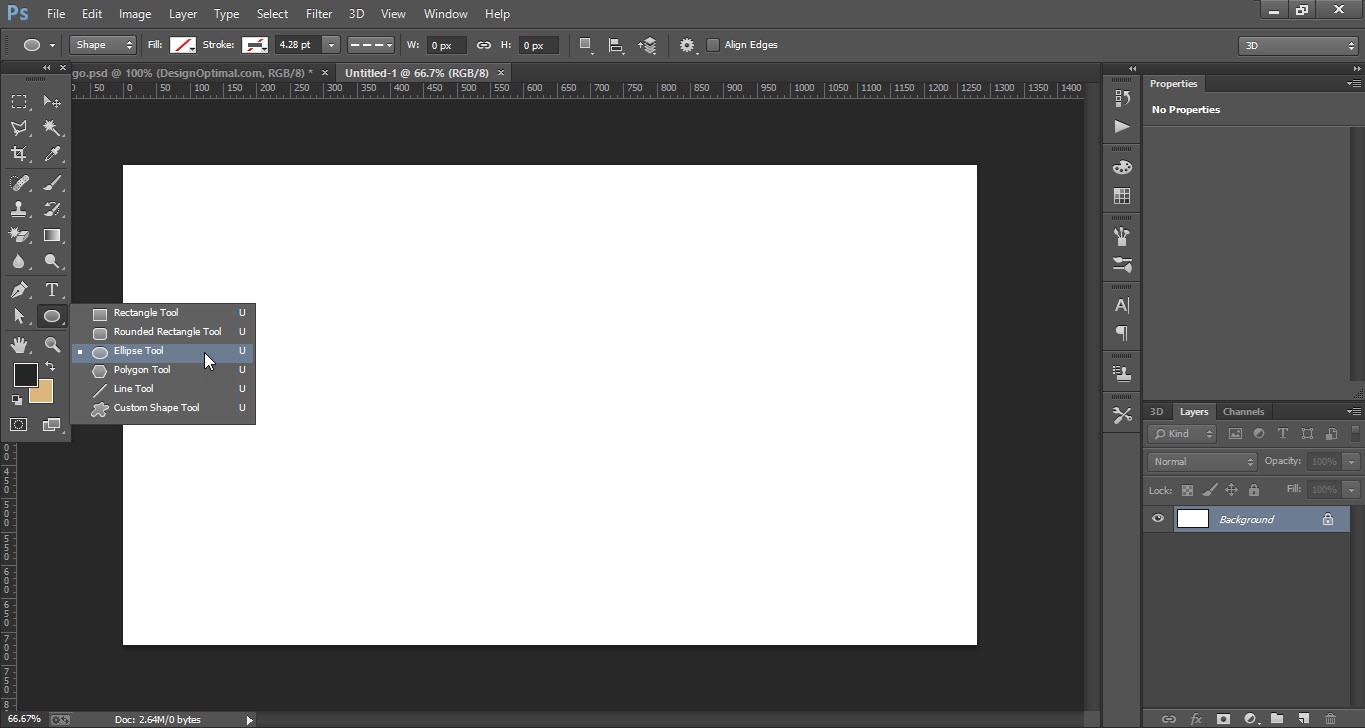
Step 01
- Open the Photoshop software.
- Select the “Ellipse Tool” from “Tools Bar”.
- Draw a circle by pressing the “Shift Key” and drag the curser.
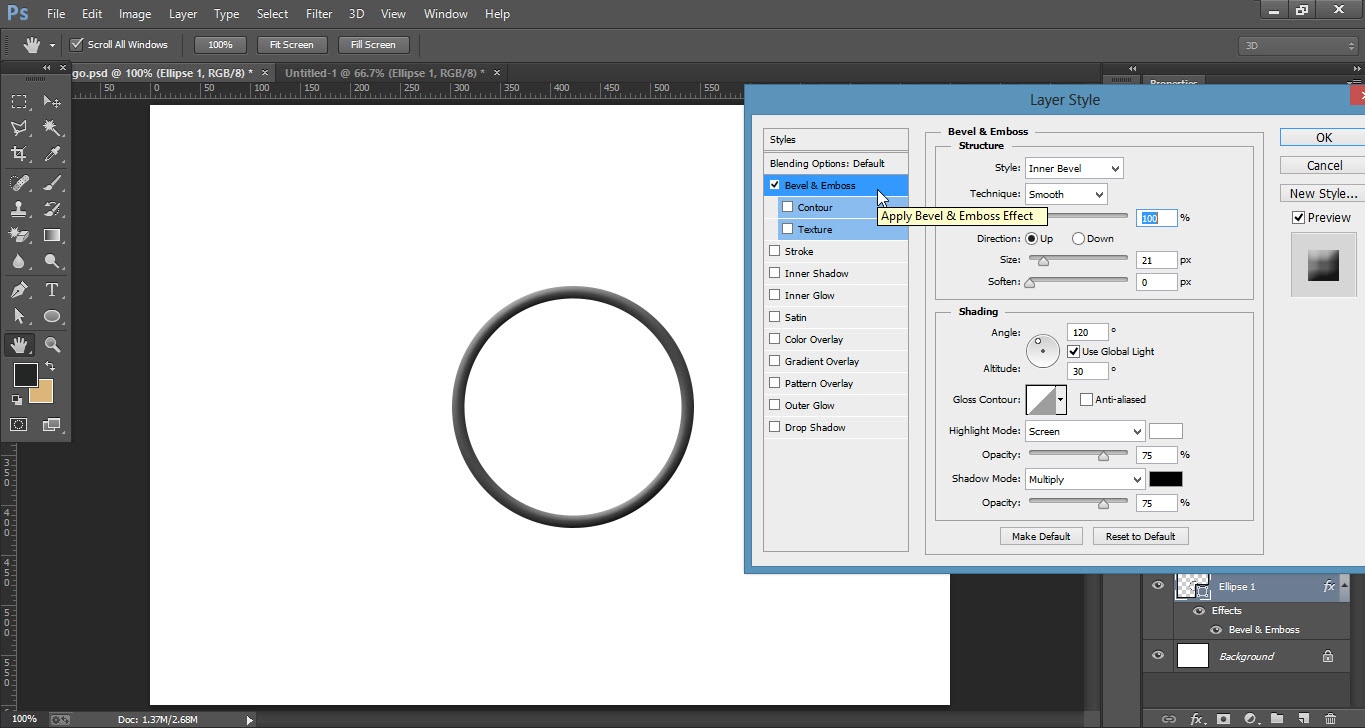
- Now double click on the “Ellipse Layer”, the “Layer Style” window will be opened.
- Tick the “Bevel & Emboss” option and arrange the setting as shown in the screenshot.

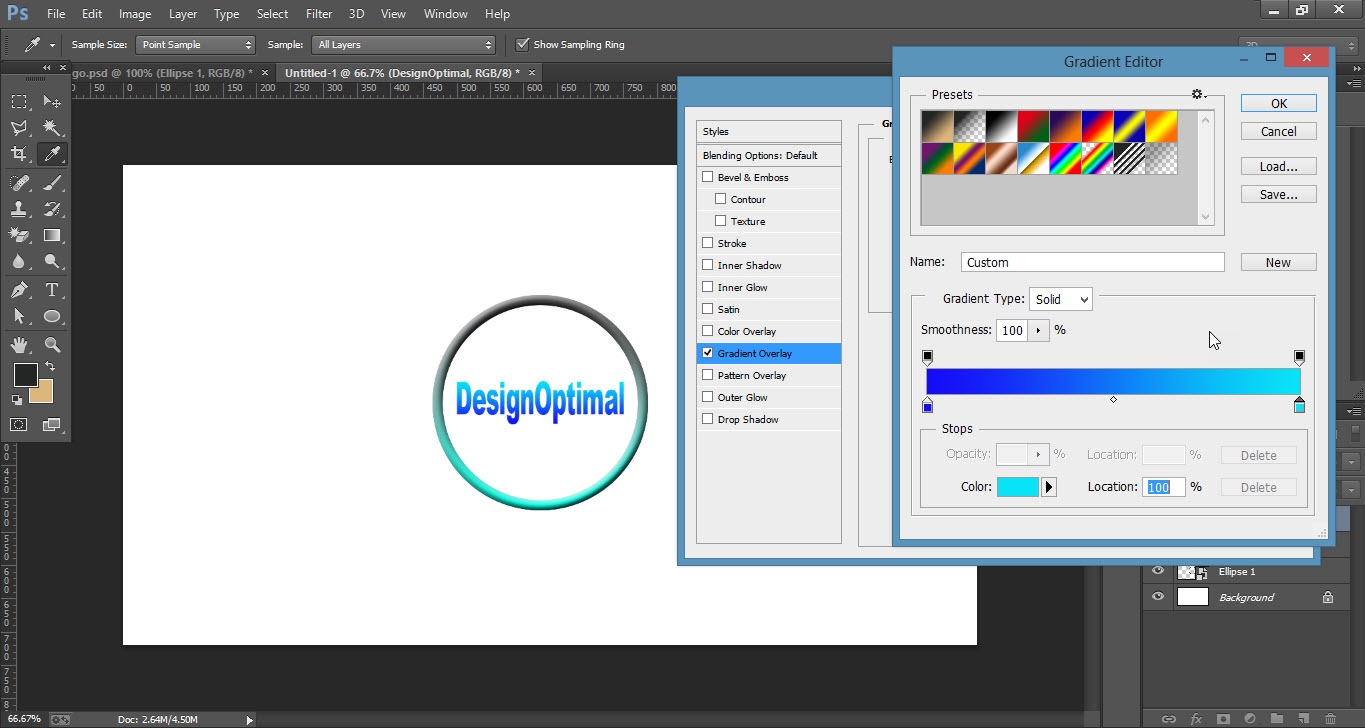
Step 02
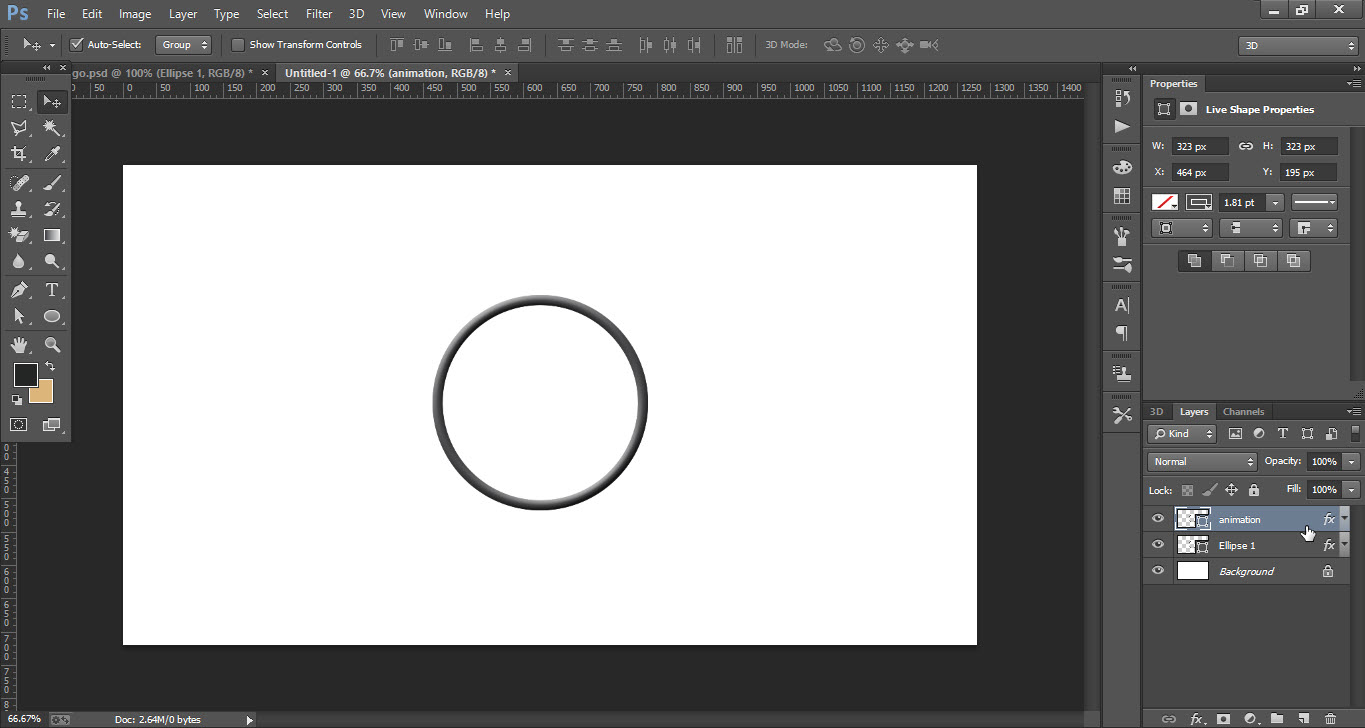
- Press “Ctrl+J” to duplicate the “Ellipse Layer” and rename it as “Animation”.
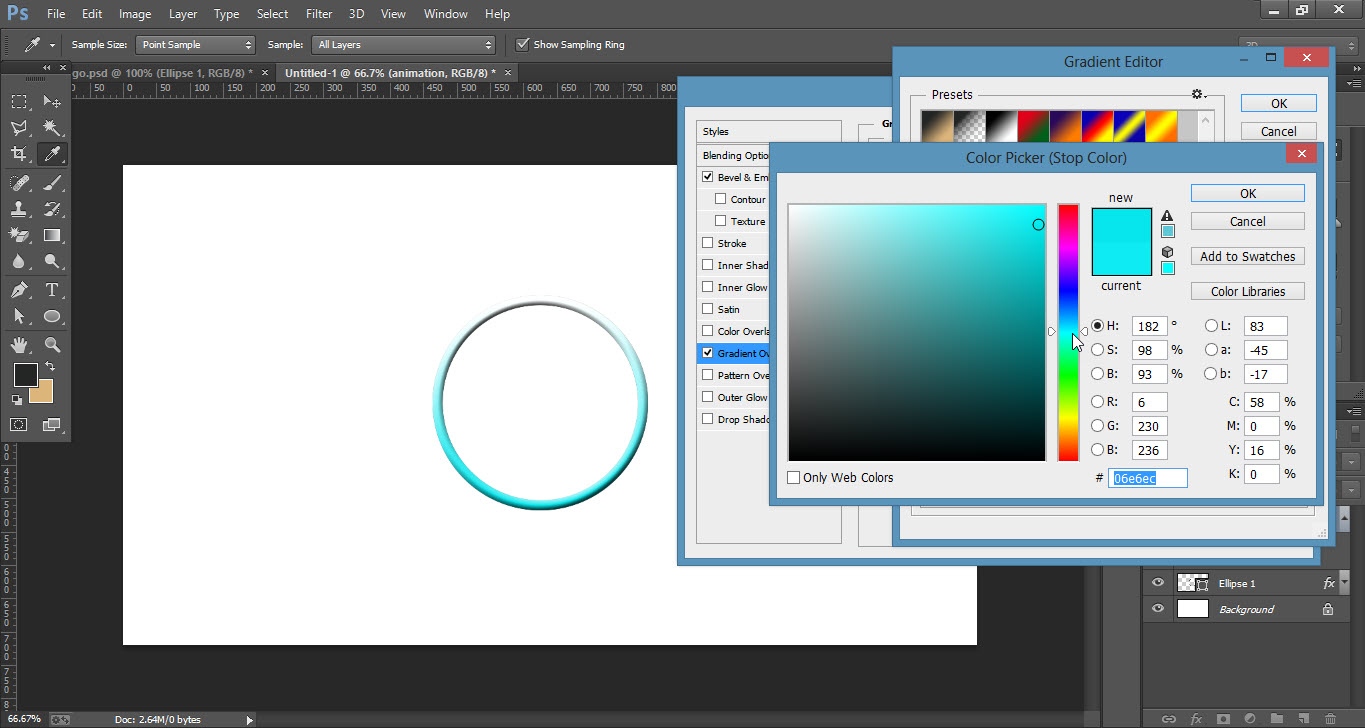
- Double click on the “Animation Layer” to open the “Layer Style window”.
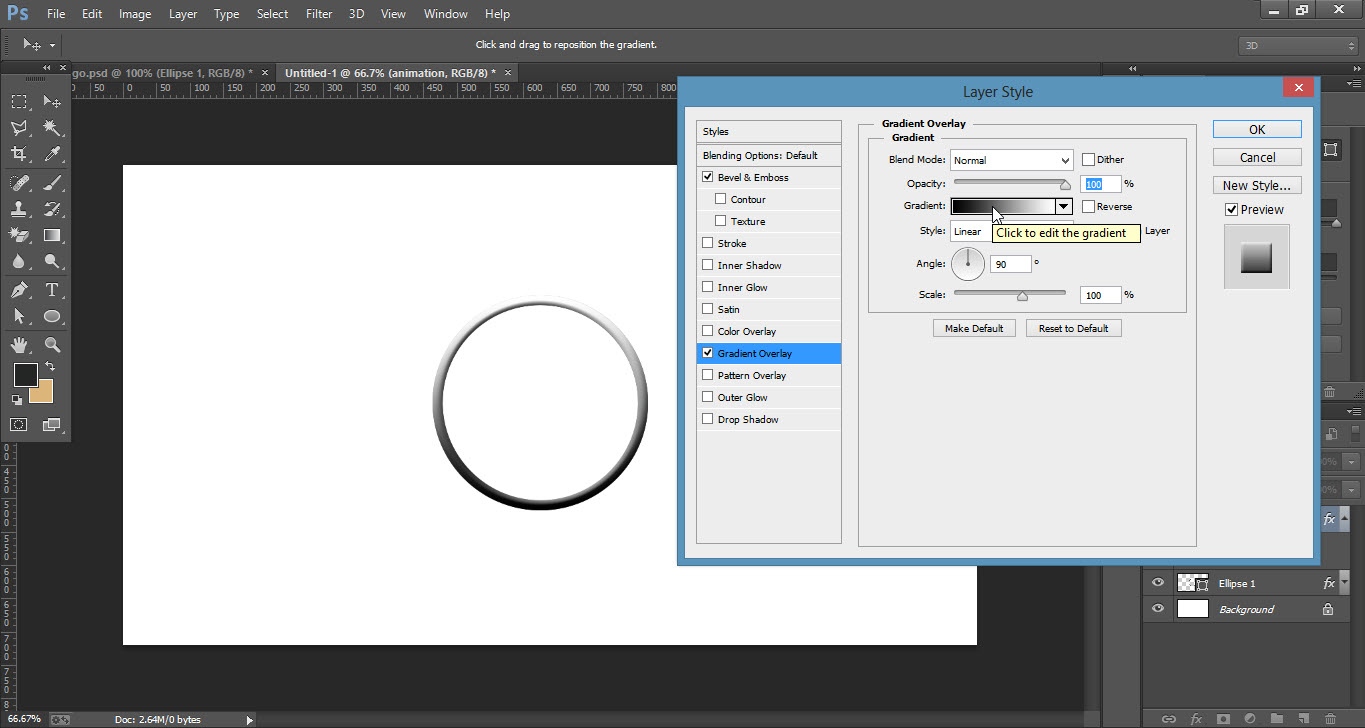
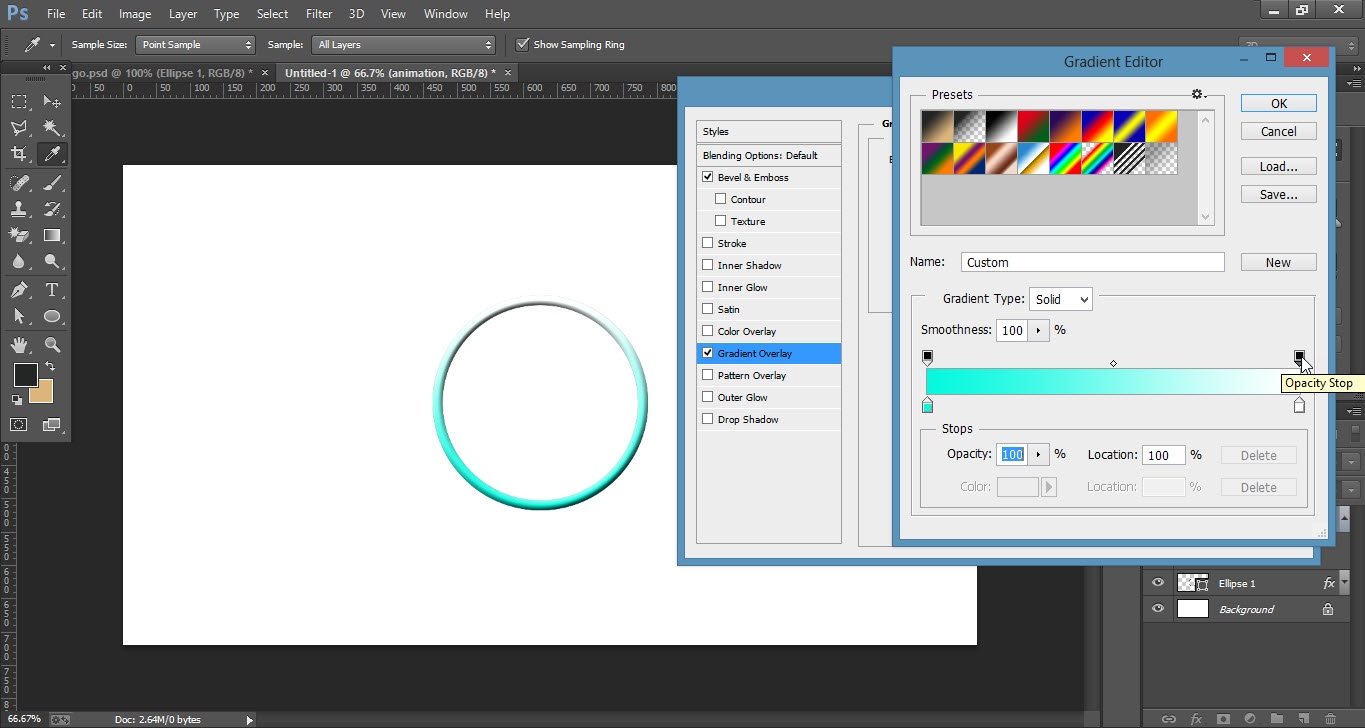
- Tick the “Gradient Overlay” option than double click on the “Gradient” option.
- “Gradient Editor” window will be opened then double click on the “Color Stop” option to select the color.
- The “Color Picker” window will be opened so select the color and click on ok.
- Now on the “Right Side” of the double click on the “Opacity Stop” and bring the opacity to zero 0%.


Step 03
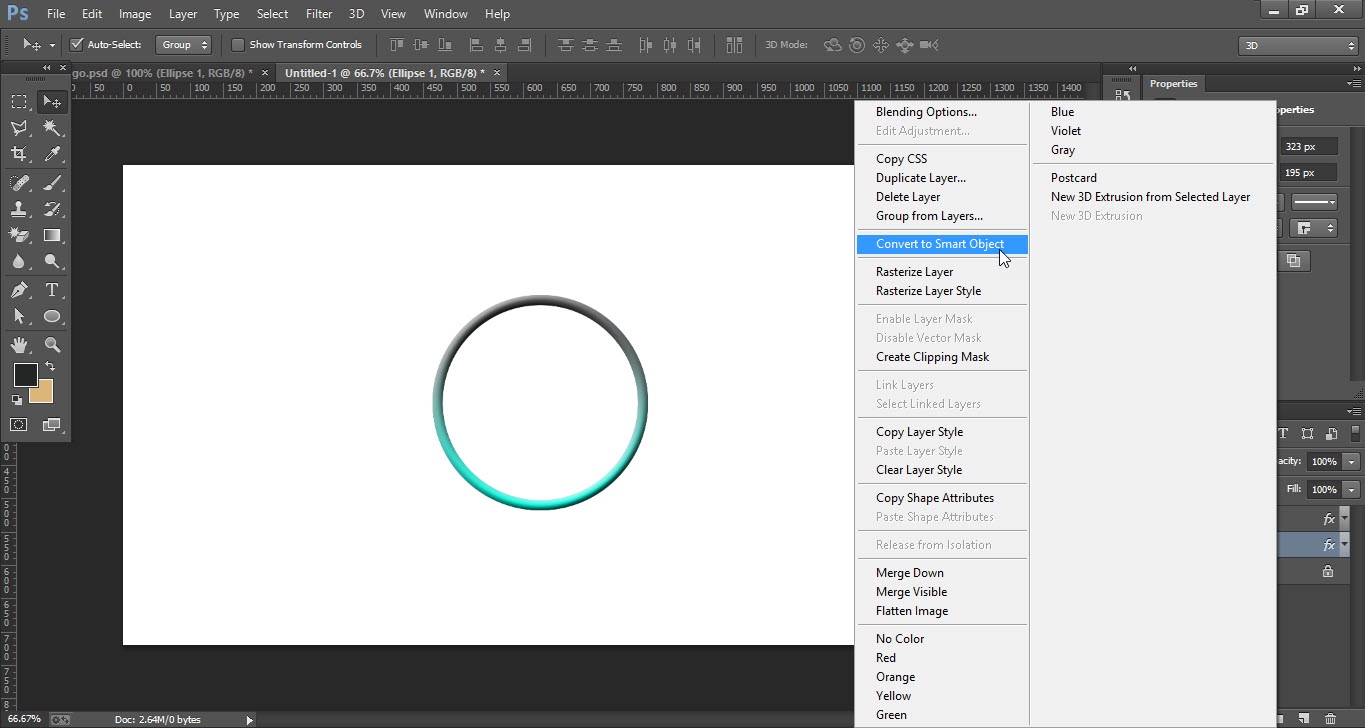
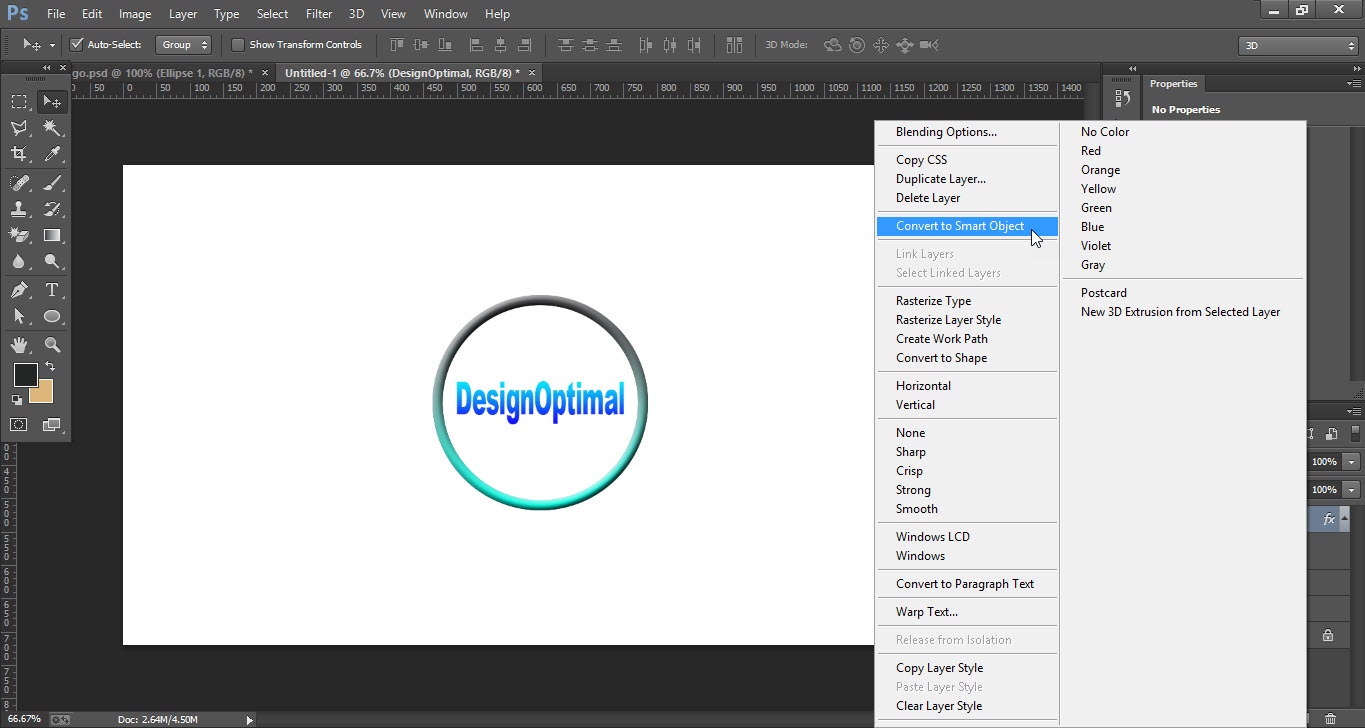
- Now convert each layer to “Smart Object” to do so “Right Click” on the layer and click on the “Convert to Smart Object” option.
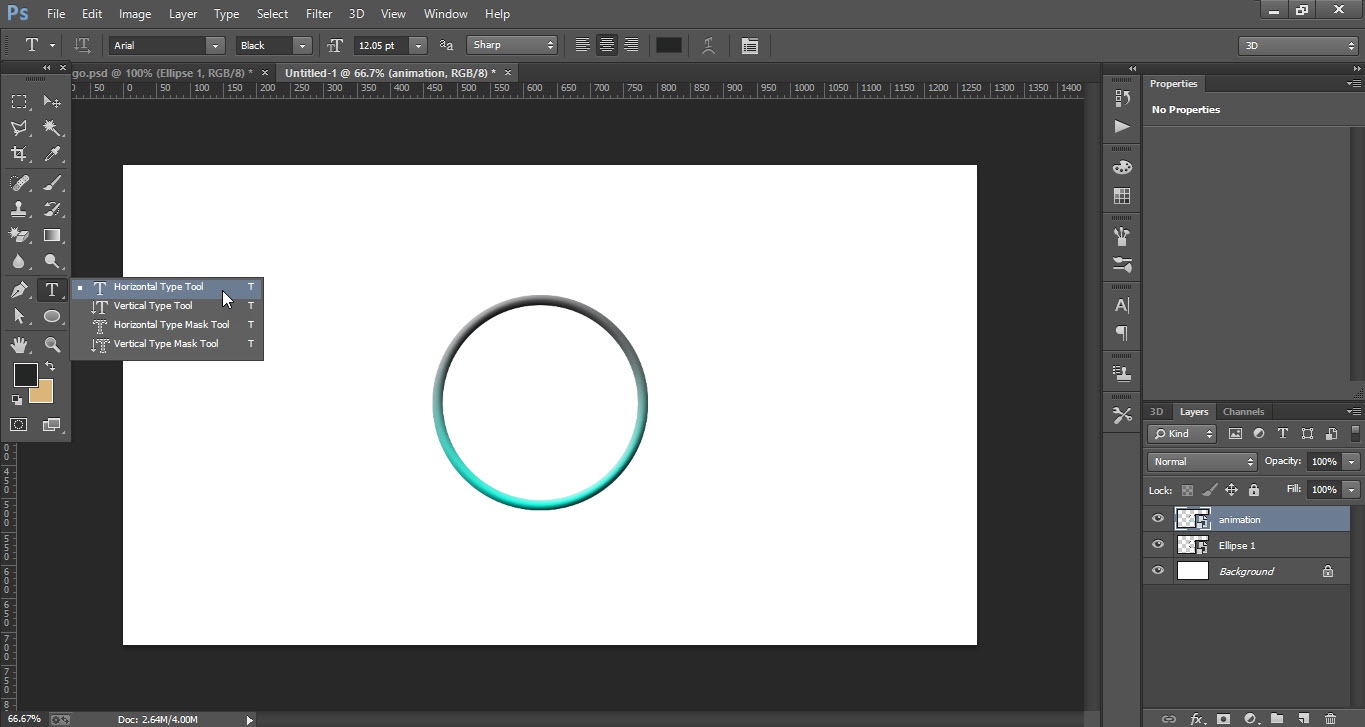
- Select the “Text Tool” from the “Tools Bar” and write whatever you want.
- Place the text in the center of the circle.
- Apply the gradient to the text as we did before(same process as we did for the circle).
- Convert “Text Layer” to “Smart Object”.

Step 04
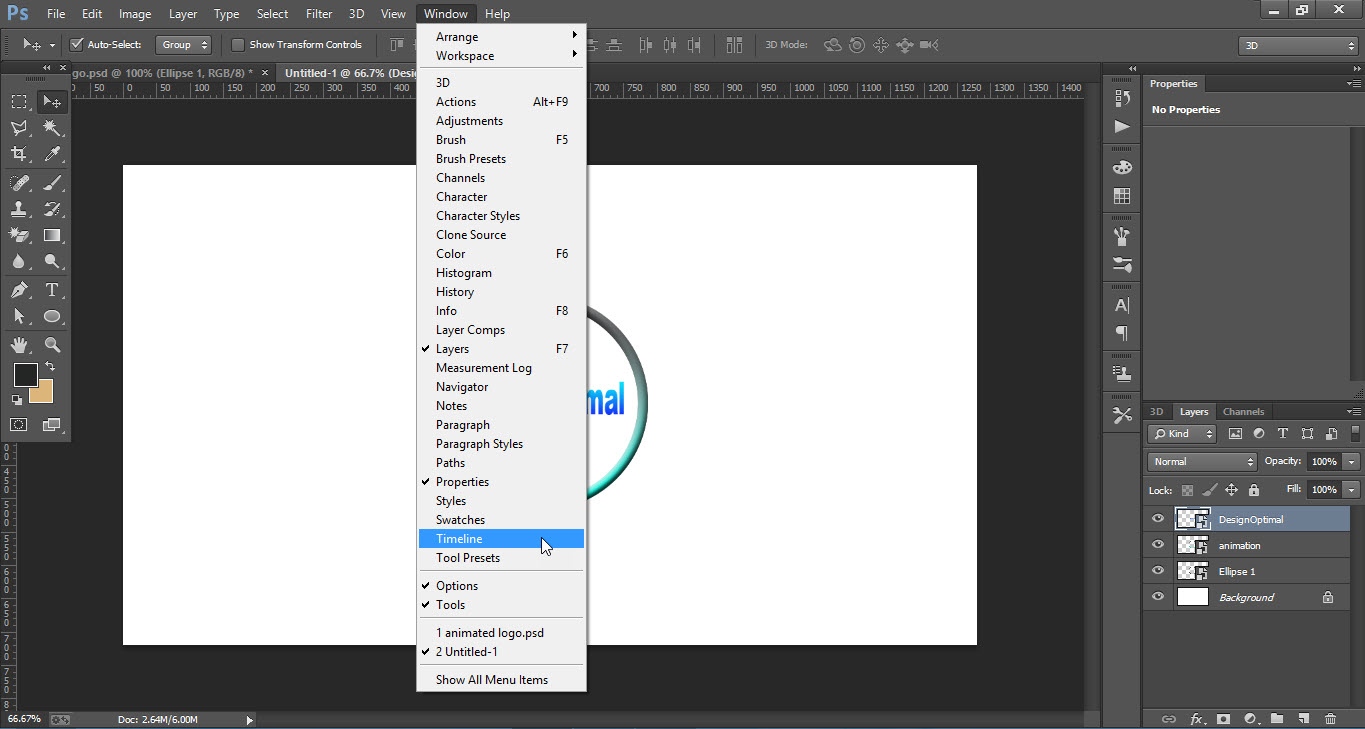
- Now its time to animate the circle and text.
- Go to the “Window” menu and click on the “Timeline” option.
- A window will appear it the bottom, click on the “Create Video Timeline” option.
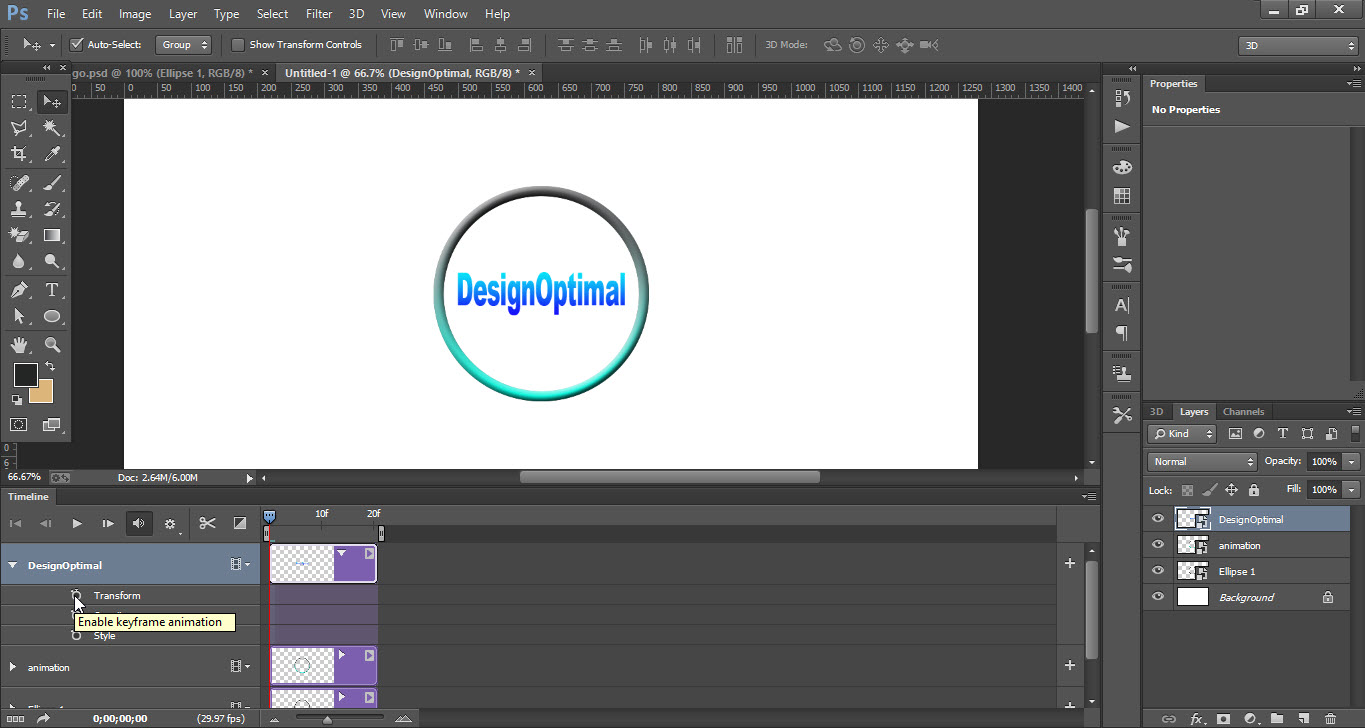
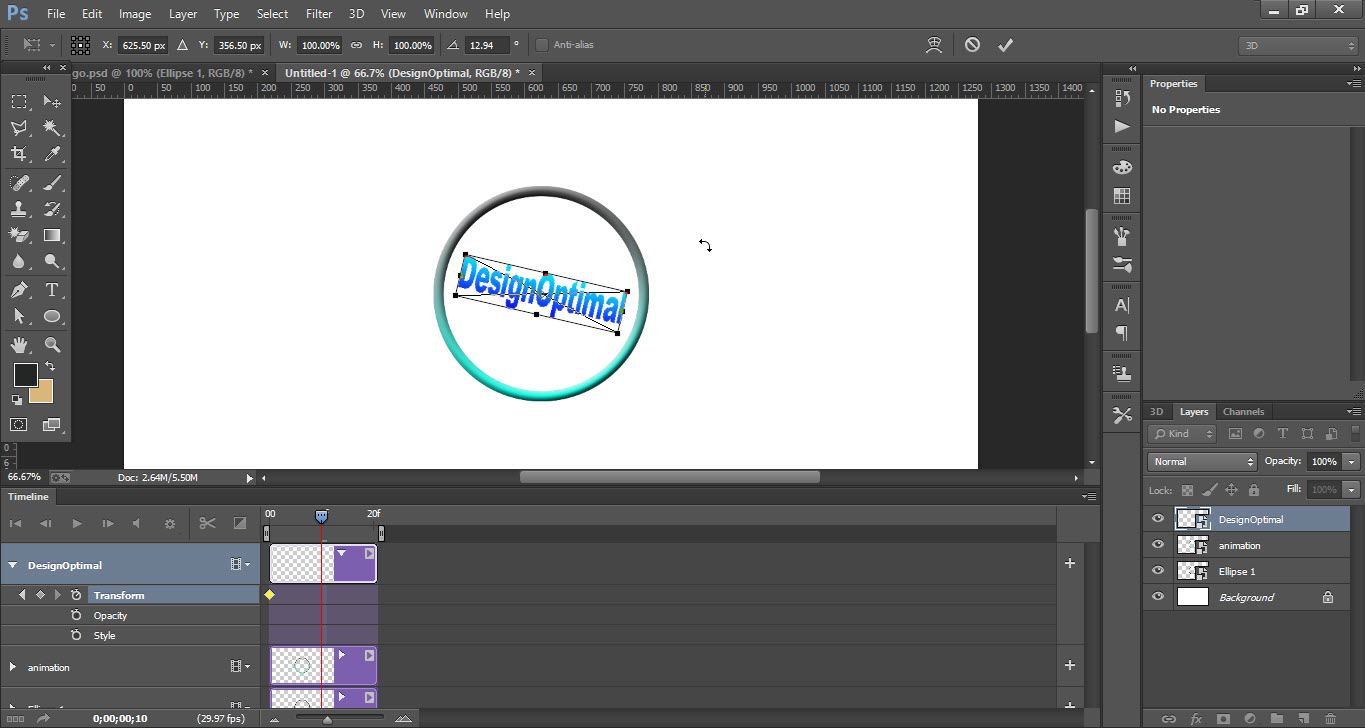
- First, animate the text so select the text layer and click on the “Small arrow” on the “Left Side”.
- Now click on the “Timer” which is near to the “Transform” option.
- Drag the “Slider” to the right side up to the “10f” frame.
- Press “Ctrl+T” and rotate the text according to your point of view and press “Enter”.
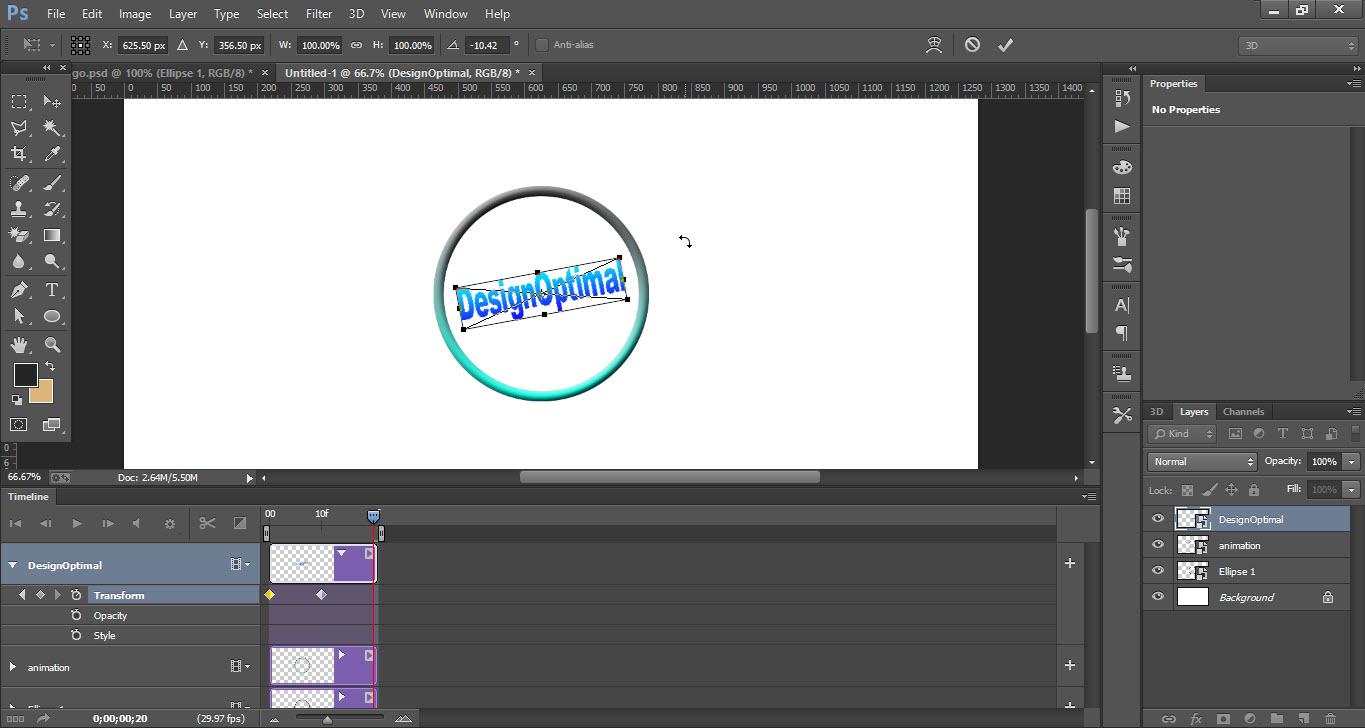
- Again drag the slider to the left up to the “20f” frame.
- Again press “Ctrl+T” and rotate on the opposite side and press enter.
- So text animation is done now lets animate the circle.
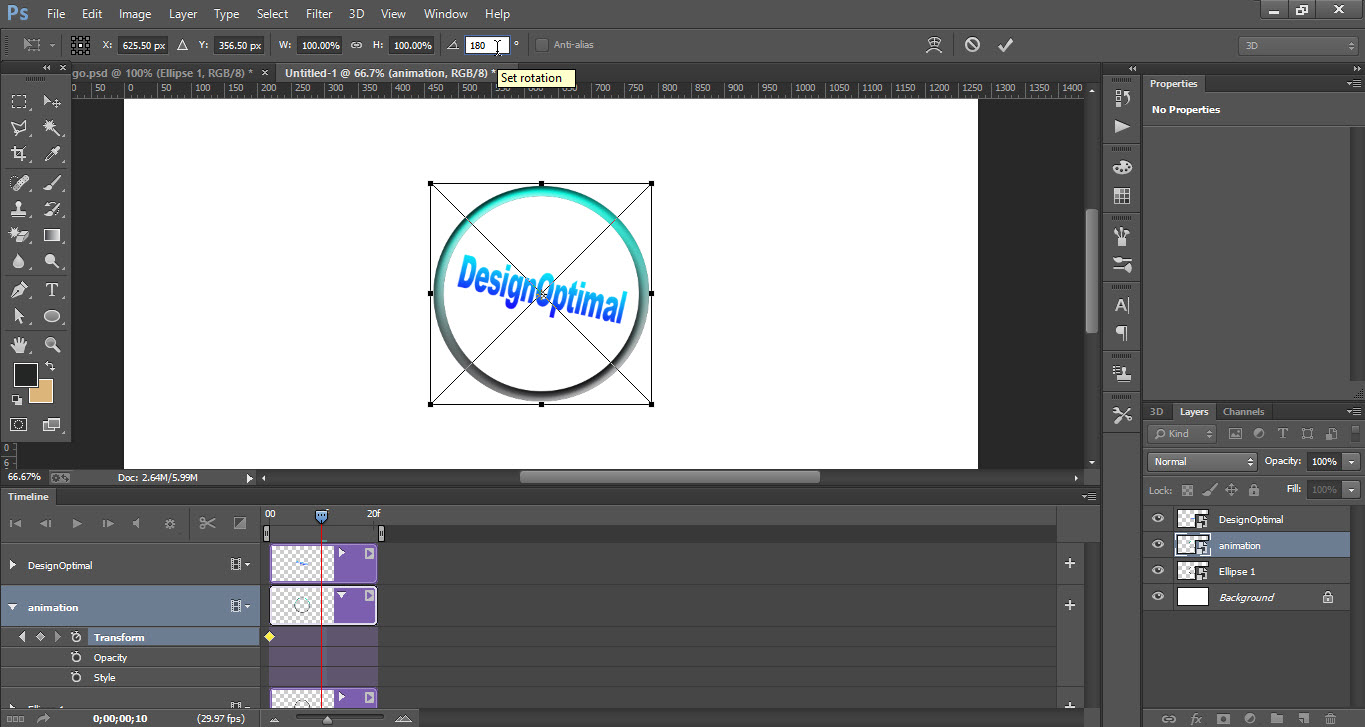
- Select the “Animation Layer” open the “Transform” options(as we did for the text).
- Bring the slider back to the “Left Side”.
- Now click on the “Timer” to animate the circle.
- Drag the “Slider” to the “Right Side” up to the “10f” frame.
- Press “Ctrl+T” and rotate the circle on the “180” degree then press “Enter”.
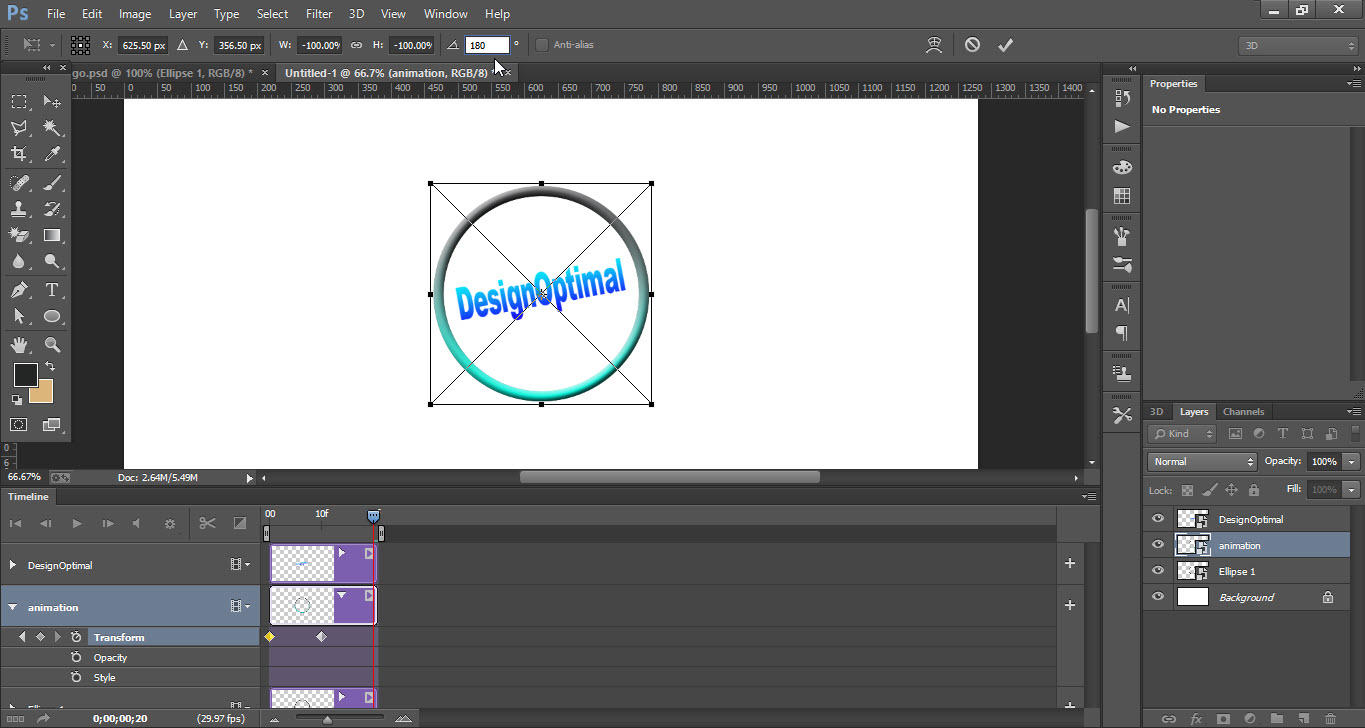
- Again drag the “Slider” to the right side up to the “20f” frame.
- Press “Ctrl+T” and rotate the circle on the “180” degree then press “Enter”.
- The animation is done if you want to check the animation press “Space Bar” it will be played.
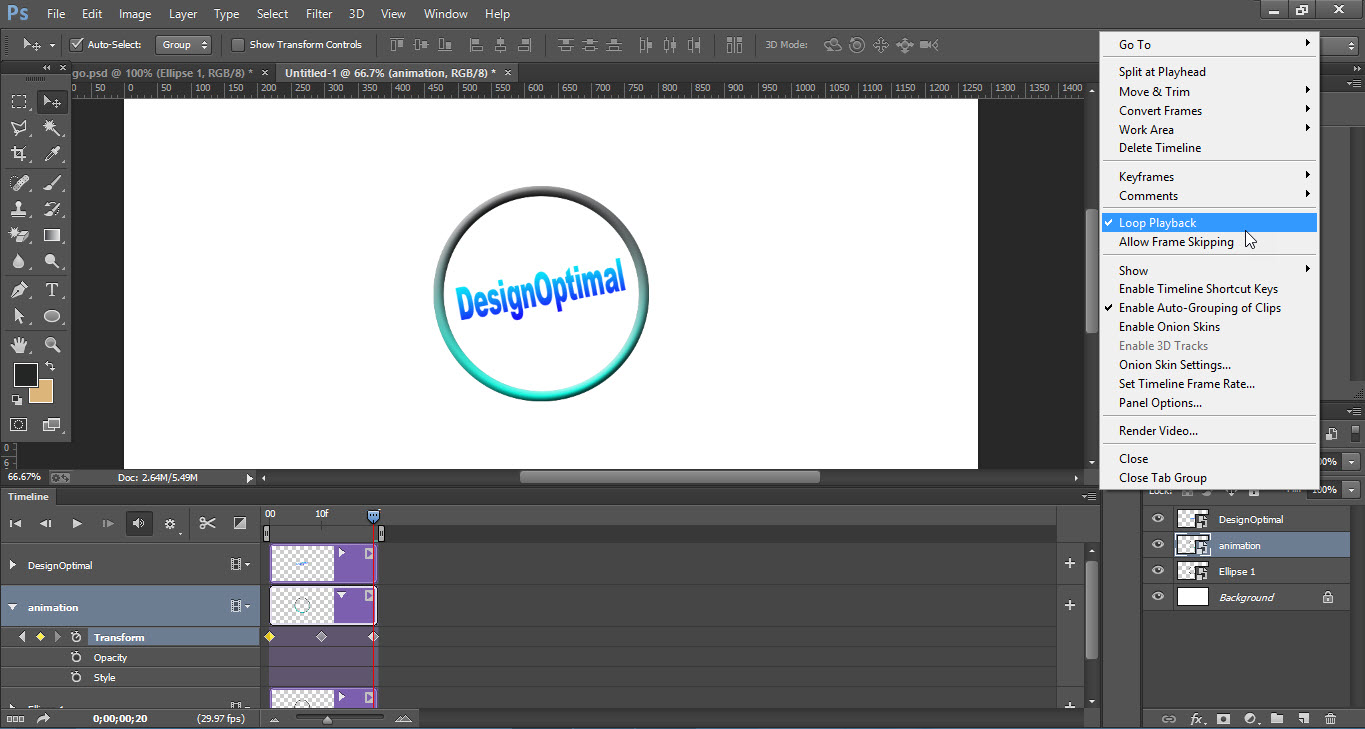
- If you want to animate it forever so click on the small “Down Ward Arrow” which is located at the right side of the timeline window.
- Tick the “Loop Playback” option the animation will be forever.


Step 05
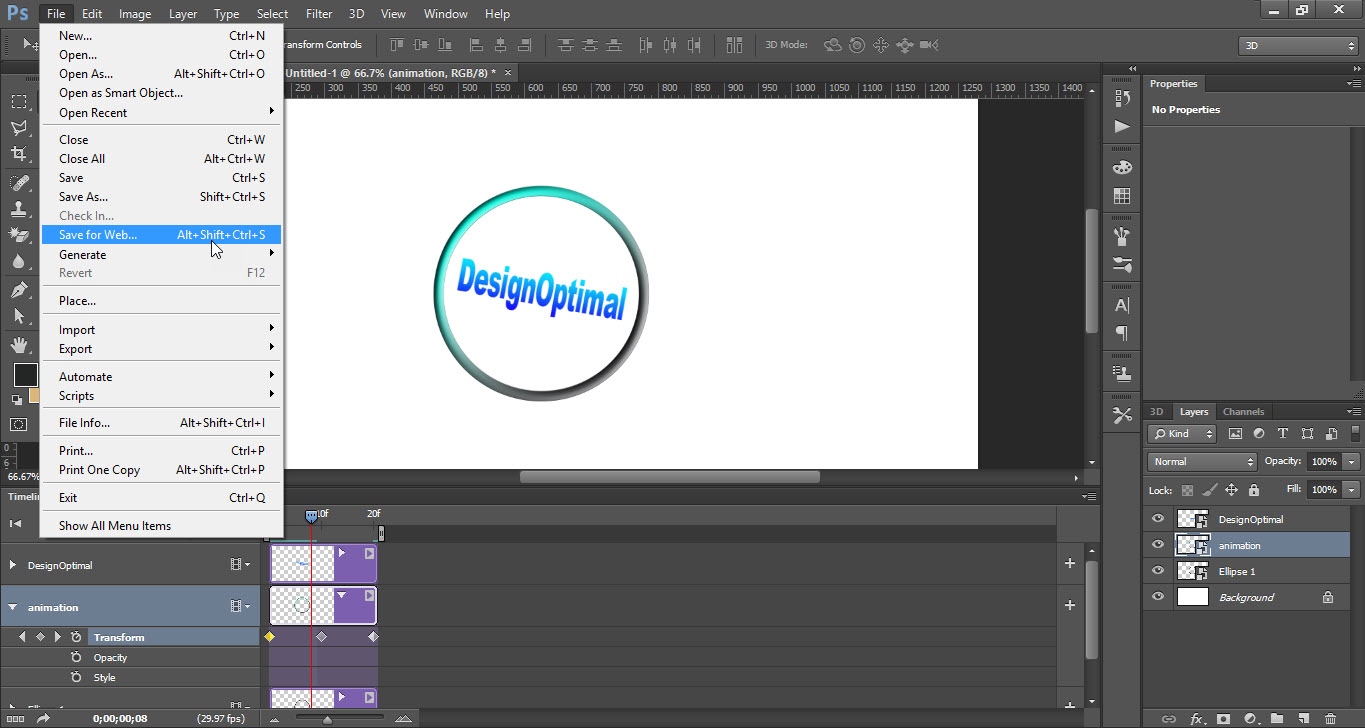
- Now to save this go to the “File” menu and click on the “Save for Web” option.
- ”Save for Web” window will be opened, do the setting as shown in the screenshot and click on the “Save” option.
- So if you want to check it after saving open with “Internet Explorer”.
- Finally, your animated logo is ready.

This is how the final result looks like