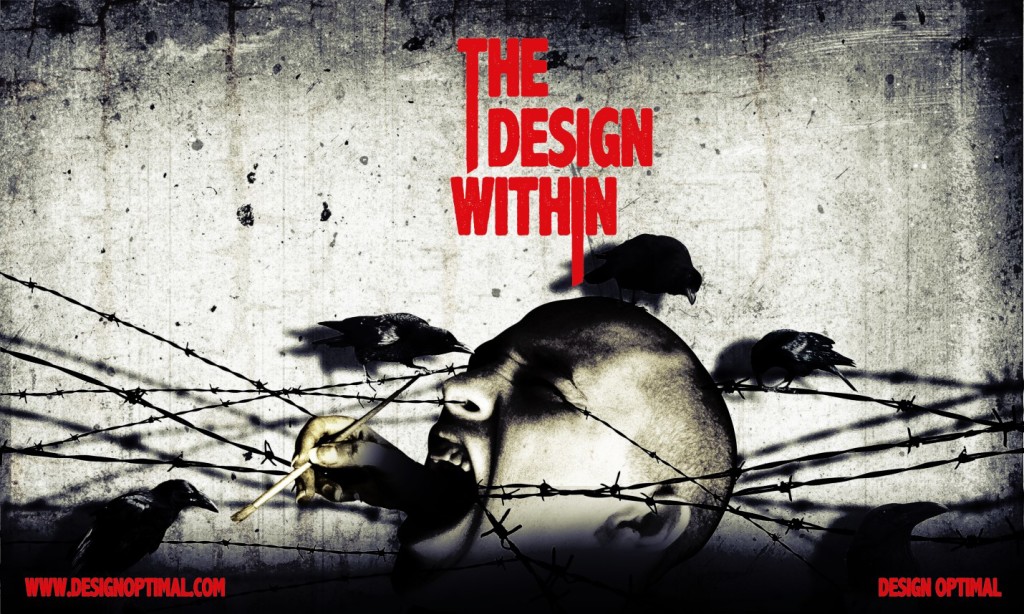
Hello People out there thanks for joining with us for another tutorial. Today we will discuss how to create a Horror poster in Photoshop. This tutorial has been inspired form a Pc Game. Above image will get you an idea about the final outcome of what we are going to design today.
Resources
- Fonts Used :
- Images used :
- Grunge-texture_01
- In your face – 1 by mjranum-stock
- barbed wire brush
- African Pied Crow Stock 2 by HOTNStock
- crow_23_by_peroni68-d4os15q by picshare.ru
- Curious_Crow_by_solarka_stock
- Cut-out stock PNG 60 – eating crow by Momotte2stocks
- iStock_000013999487Small-Crow
- Hand Pose Stock – Holding Paintbrush by Melyssah6-Stock
- Grunge Texture Backgrounds for PowerPoint Template
Step 01
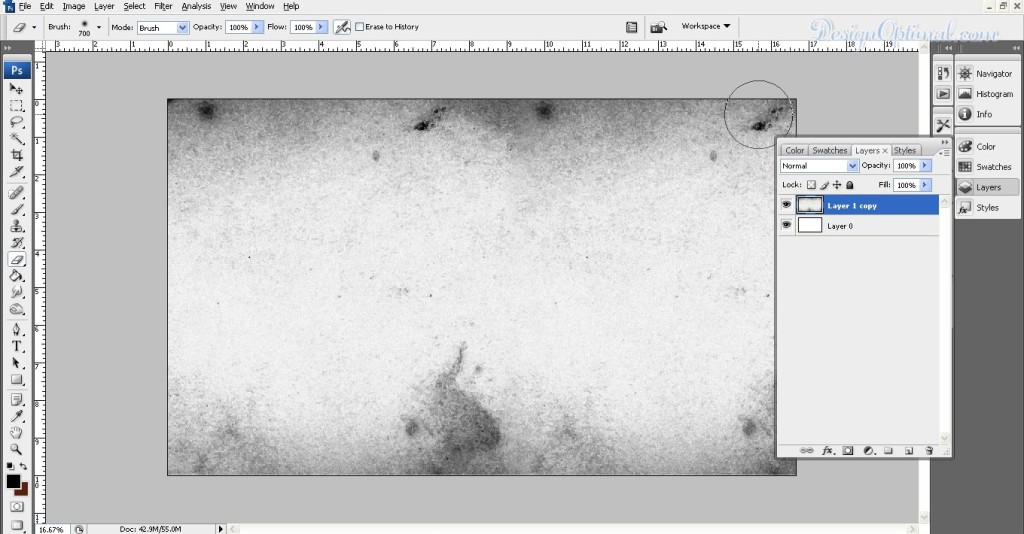
- Open Photoshop. Create a new document around 5000px x 3000px and save it as design_within.psd.
- Now go open the Grunge-texture_01 (check the “Resources” section at the beginning of the tutorial) and fill the document with it.
Step 02
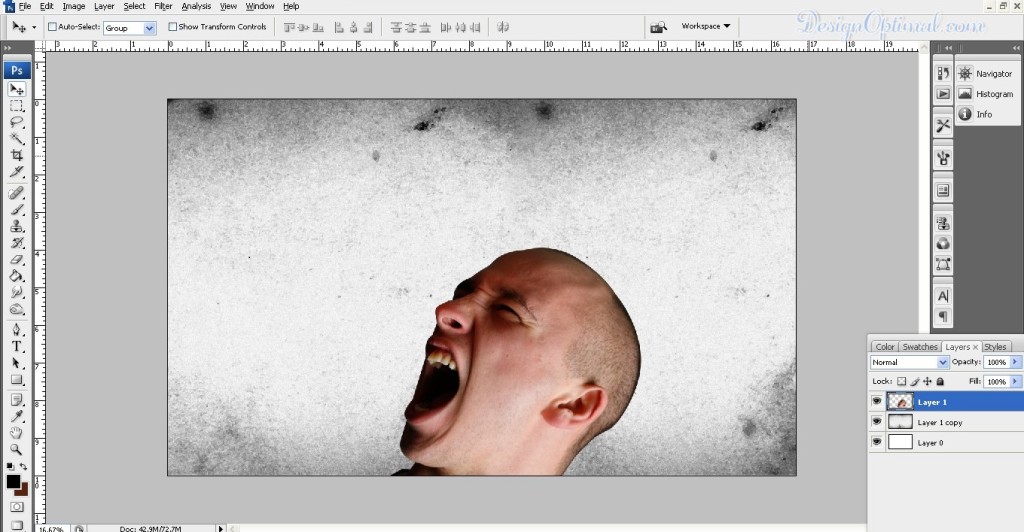
- Now use the image named In_your_face___1_by_mjranum_stock (check the “Resources” section at the beginning of the tutorial).
- Now remove the background around it and place it in the document that we created as the way shown below.
Step 03
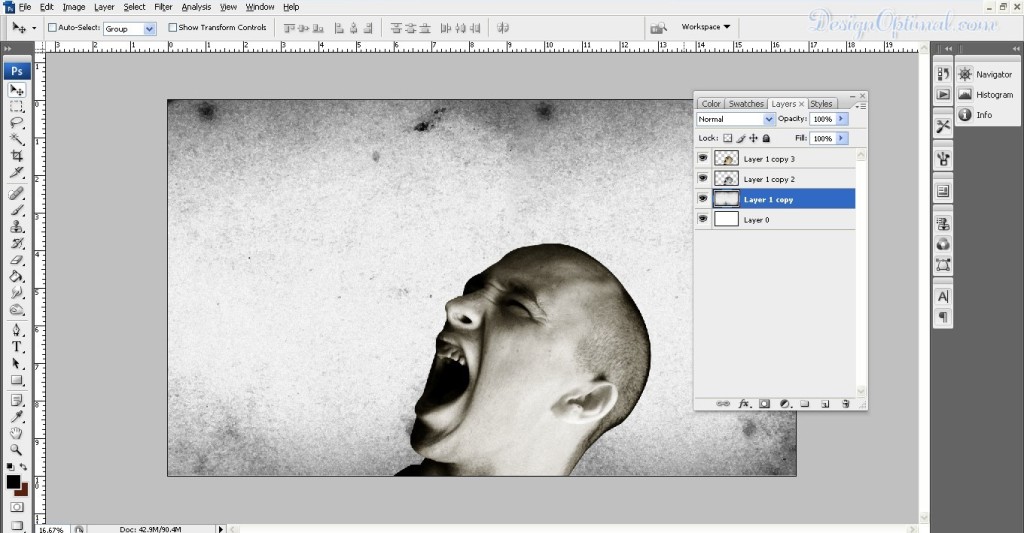
- Now we will have to make that image blend with the background that we have created.
- Duplicate the layer and go to image >Adjustments >Black and White and give tint as the color and save it.
- And again duplicate it and make it black and white.
- Now keep the tint layer on top of the black and white layer and blend it to soft light.
- Now resize the head a bit to fit in to the canvas.
Step 04
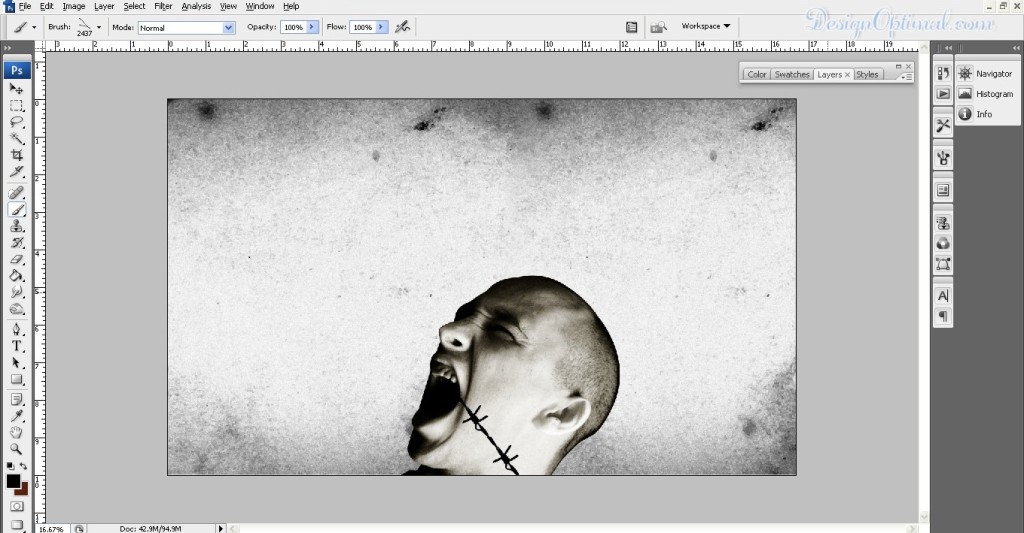
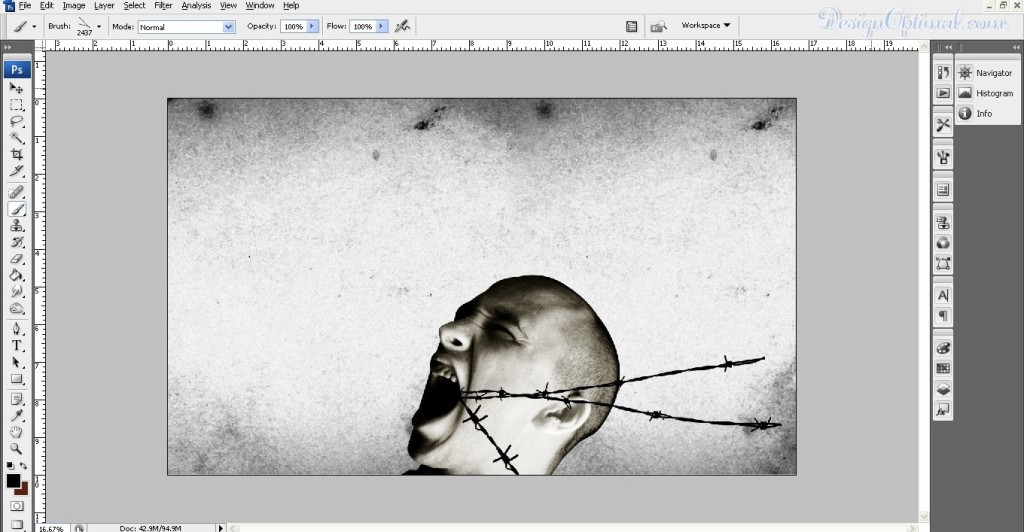
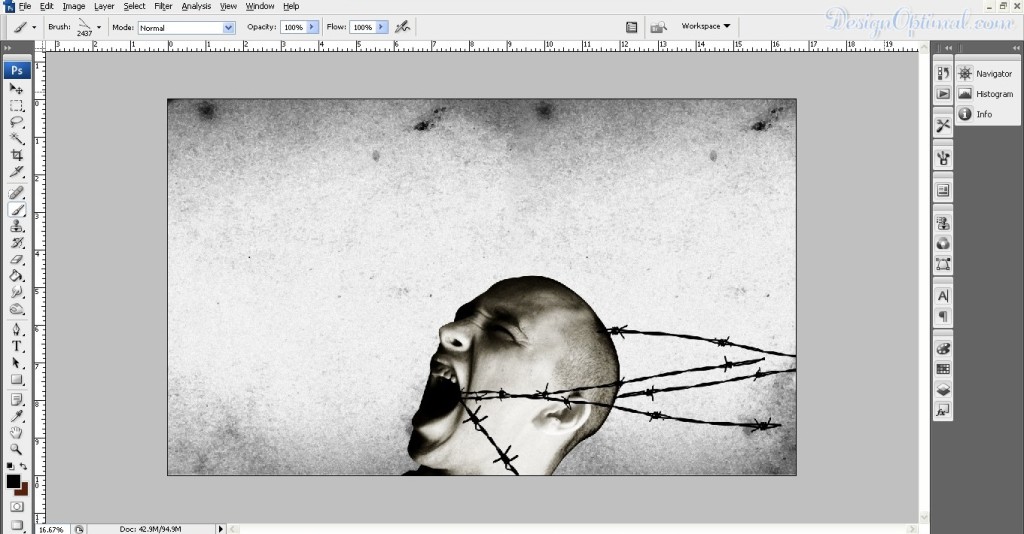
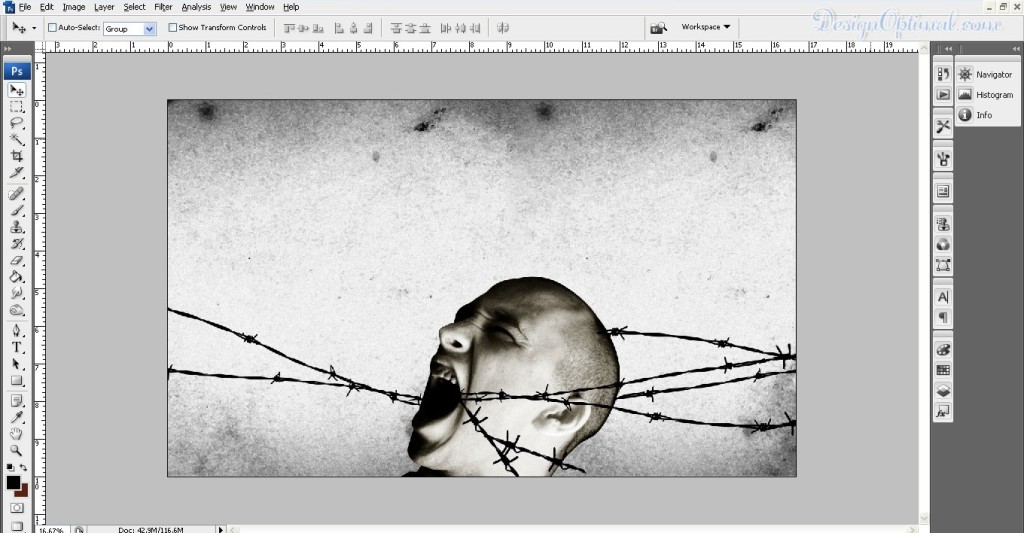
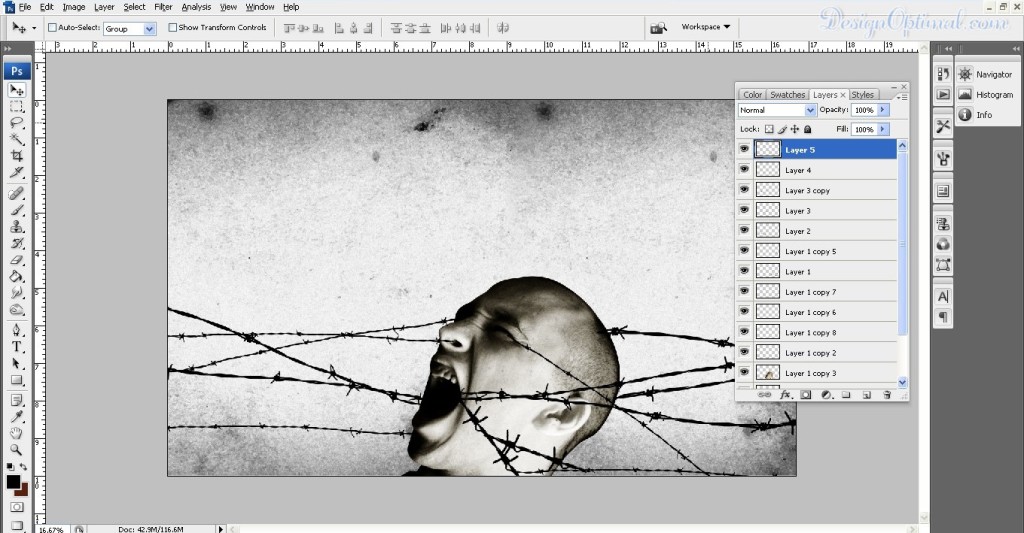
- As the next step we will use the barbed wire brush (check the “Resources” section) around the man face like if he’s screaming in agony of barbed wires.
- So use these brushes as shown below. You will have to be bit patient in this step because otherwise you won’t get the outcome that you need.
- There are set of options in this brush set and it’s up to you to decide which brush will be more suitable creating the tangled effect.

Step 05
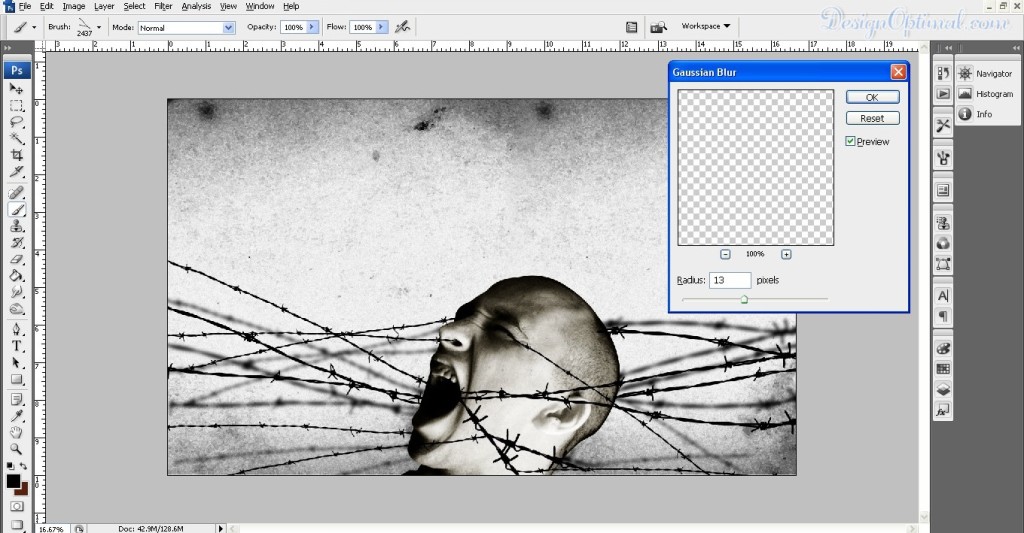
- Now select all the barbed wire brush layers and duplicate them and merge them and keep that layer below the screaming man’s head layer.
- Then apply a Gaussian bluer around 13px. The result is like below.
Step 06
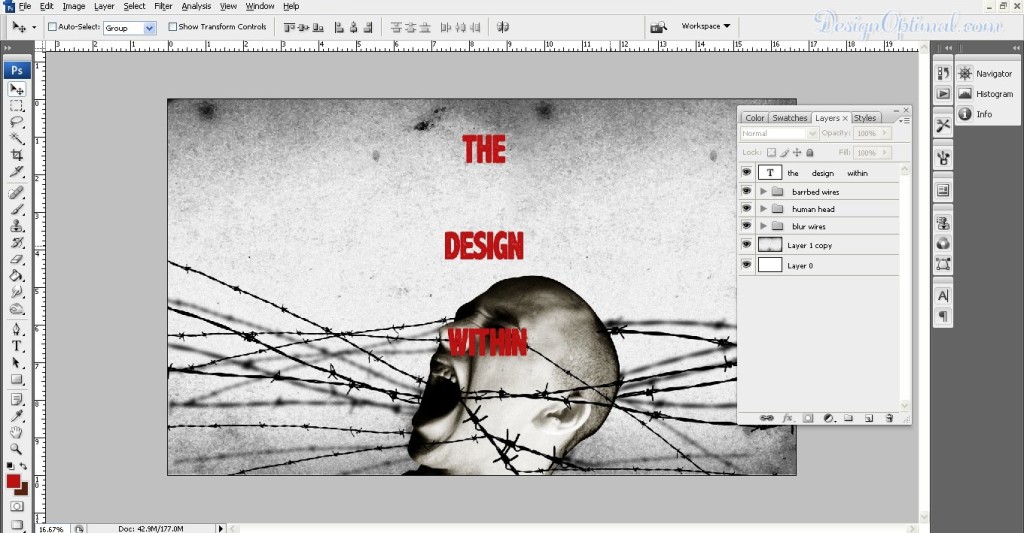
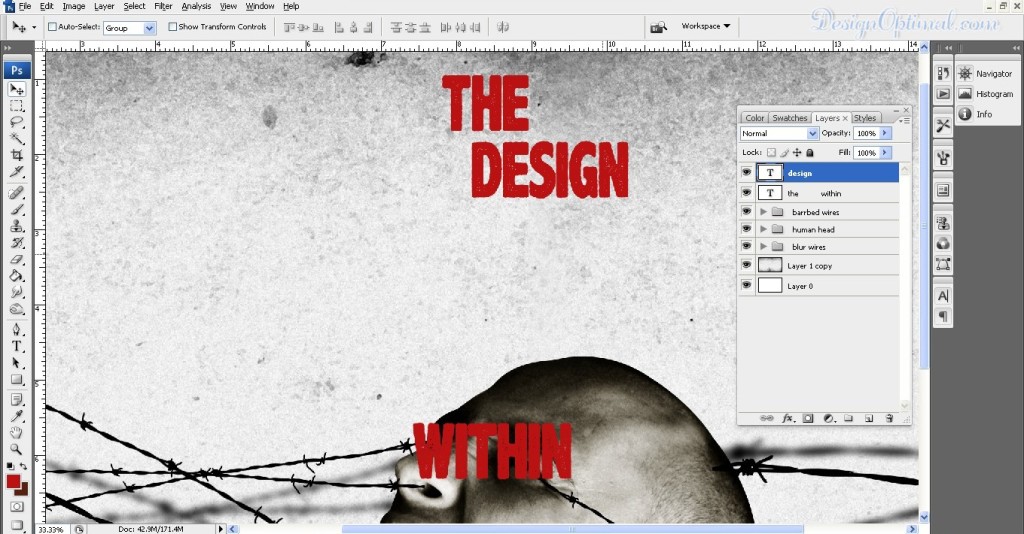
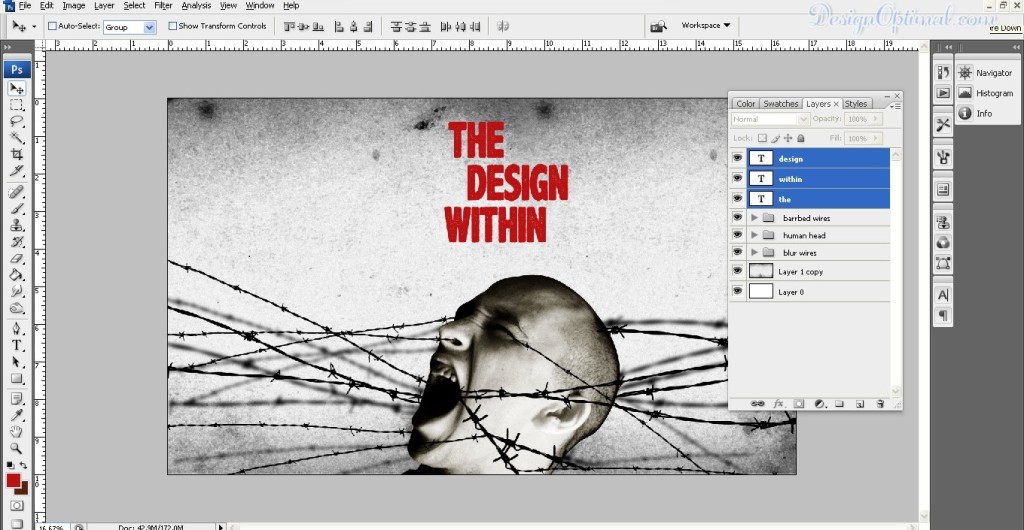
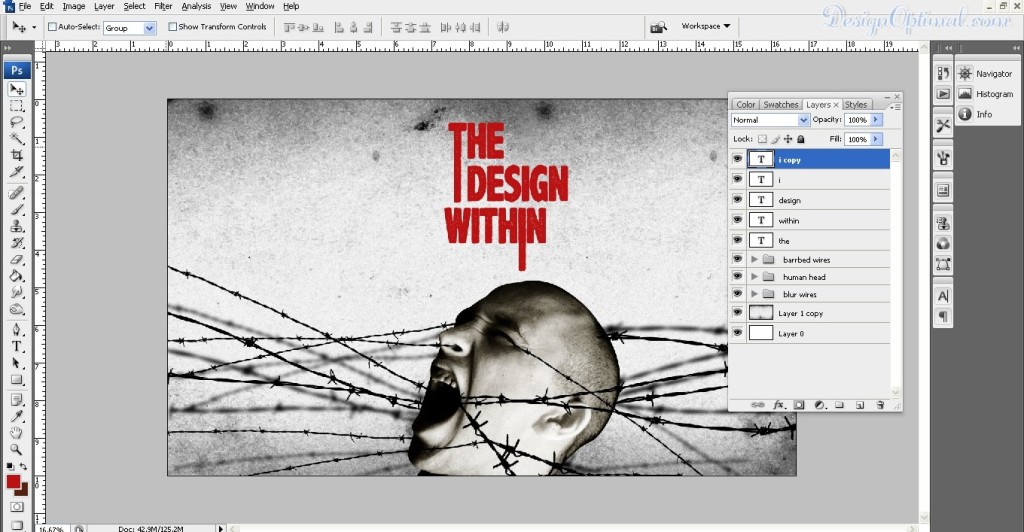
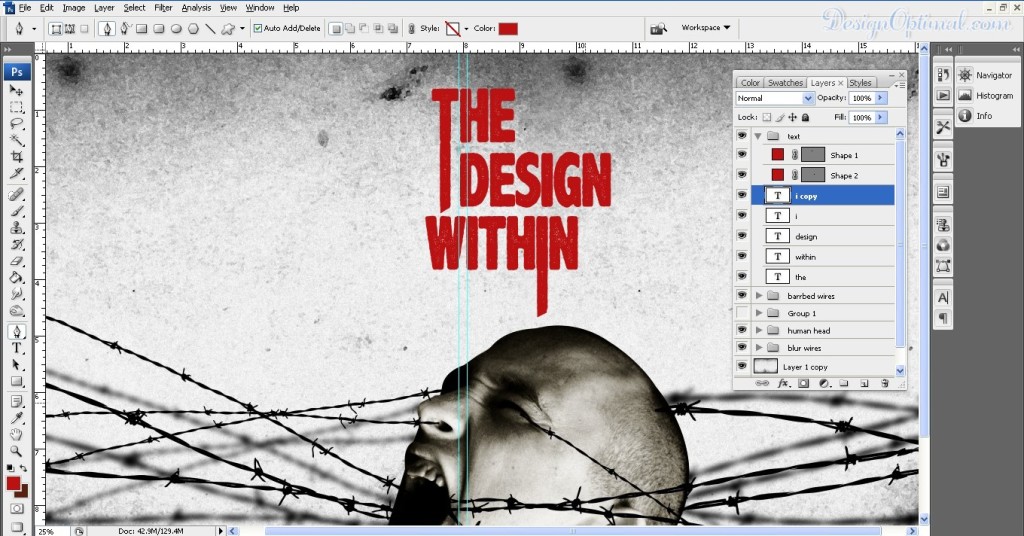
- As the next step we will type the text as the design within. We will use the font called the Axe handle for this the process is shown below.
Step 07
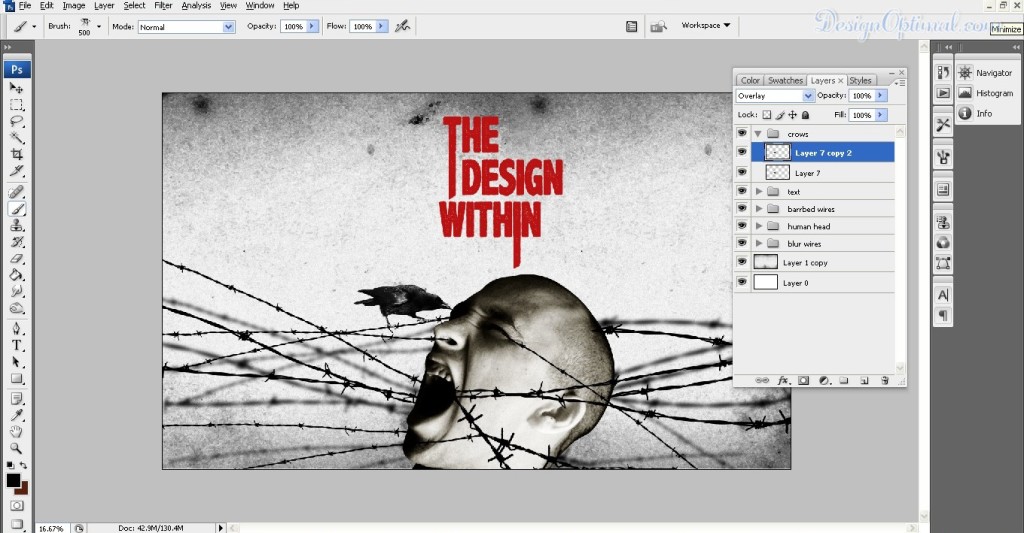
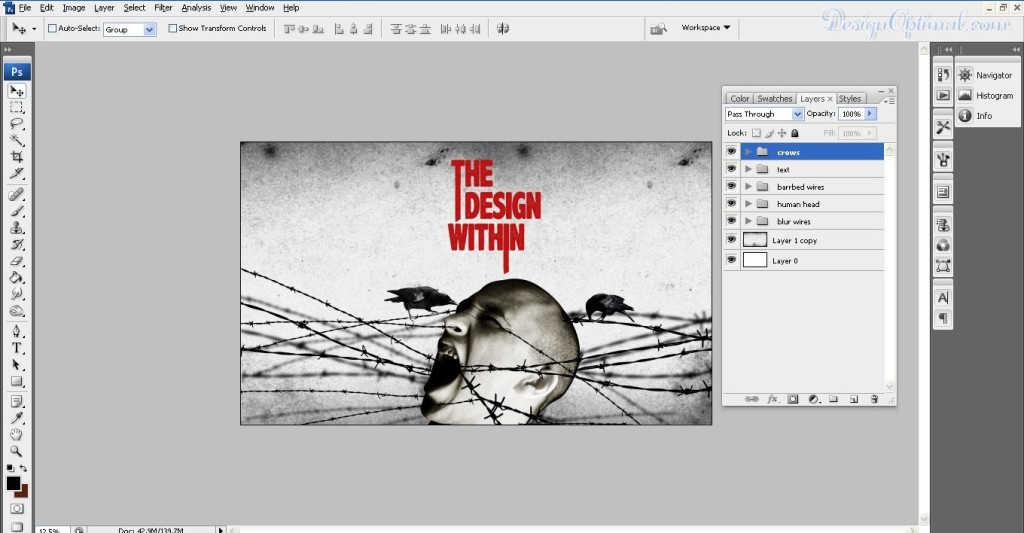
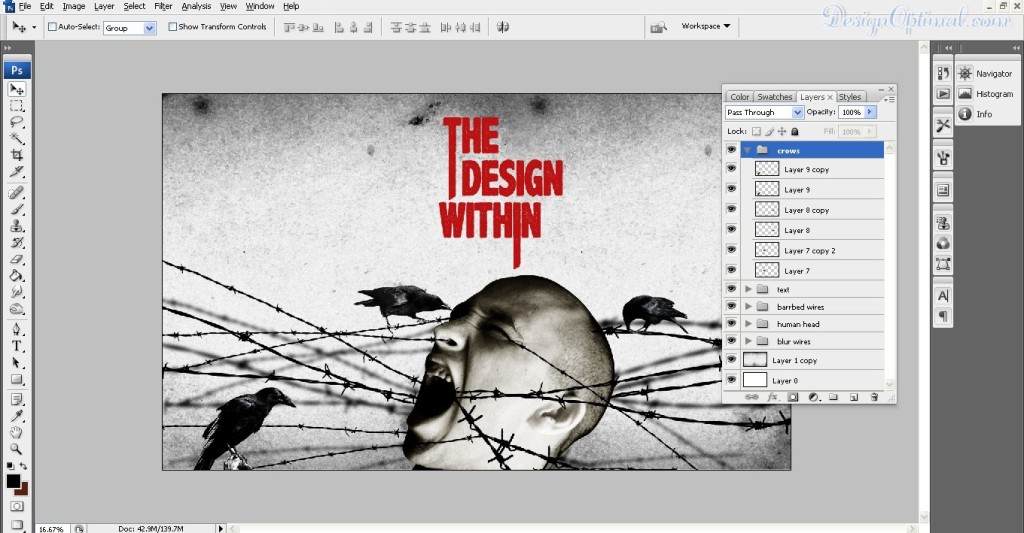
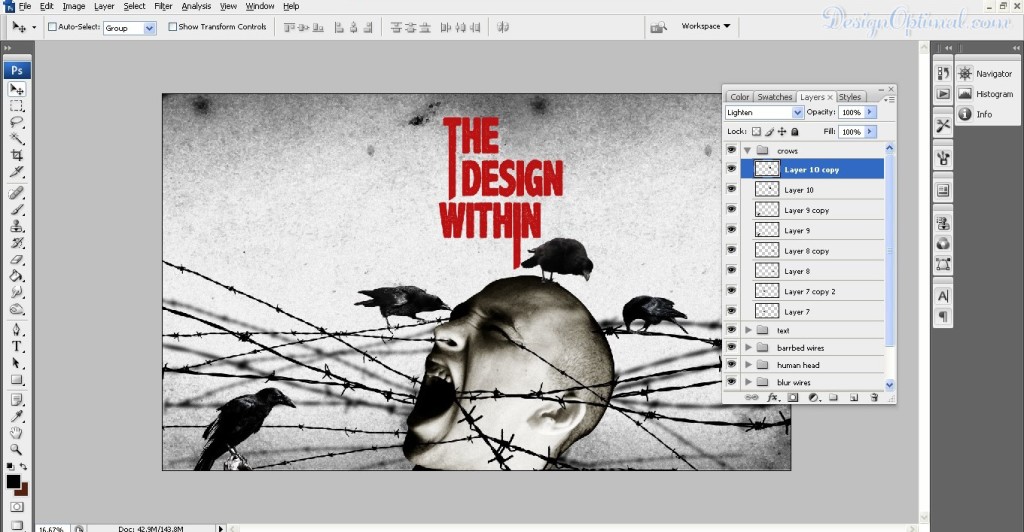
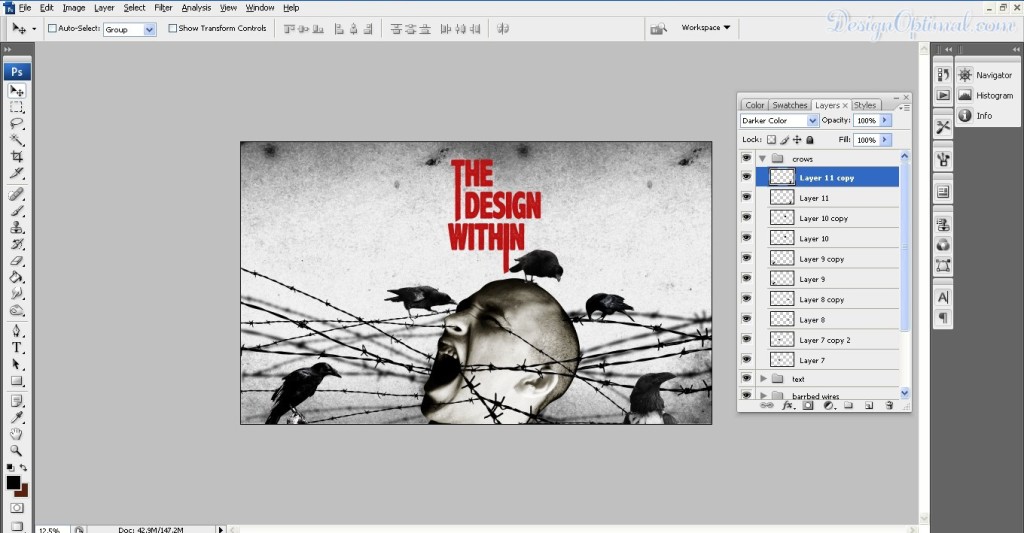
- Now to make this picture gloomier. We will have to add some crows like if they have perched on the barbed wires and on the man’s head.
- We will use these stock photos for that (check the “Resources” section at the beginning of the tutorial).
- african_pied_crow_stock_2_by_hotnstock-d4fzwdh
- crow_23_by_peroni68-d4os15q
- Curious_Crow_by_solarka_stock
- cut_out_stock_png_60___eating_crow_by_momotte2stocks-d6ii2ds
- iStock_000013999487Small-Crow
- Remove all the backgrounds around them and place the crows as shown in the next couple of images.
- To increase the crows image quality we will duplicate them and turn it in to black and white and blend the layer in to overlay.
- After adding all the birds in the proper positions duplicate it and keep that layer below the human face layer and give the same Gaussian blur as we gave to the barbed wires earlier.
- Now give a color overlay to it give 100% black for the fill color and reduce the opacity to around 70%.
Step 08
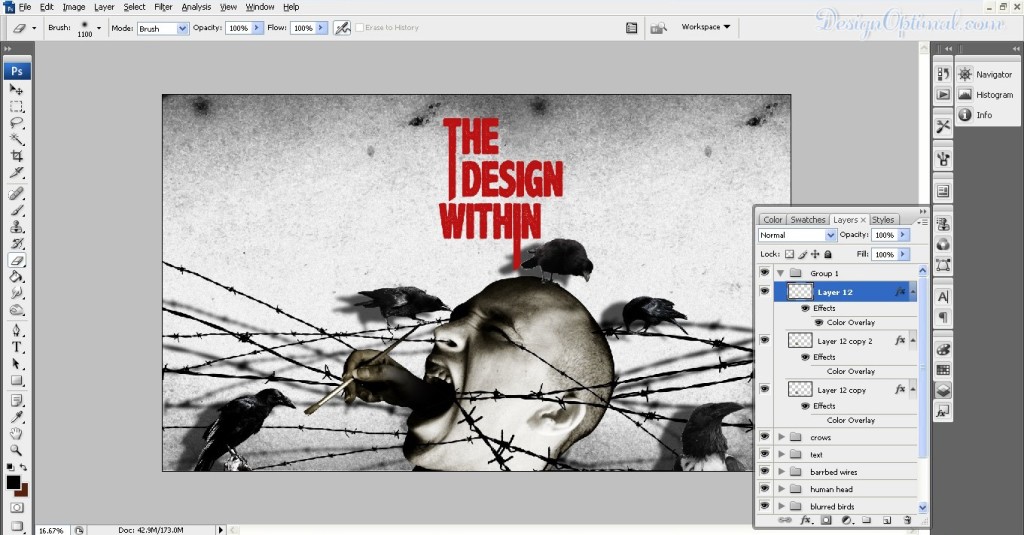
- After those steps as for the final touches, we will add an artist hand like if it’s coming out from the screaming human’s mouth the process is like this.
- For this we will use hand_pose_stock___holding_paintbrush_by_melyssah6_stock-d4w6132 image (check the “Resources” section at the beginning) and we will use one of the below hands that’s inside the main stock image.
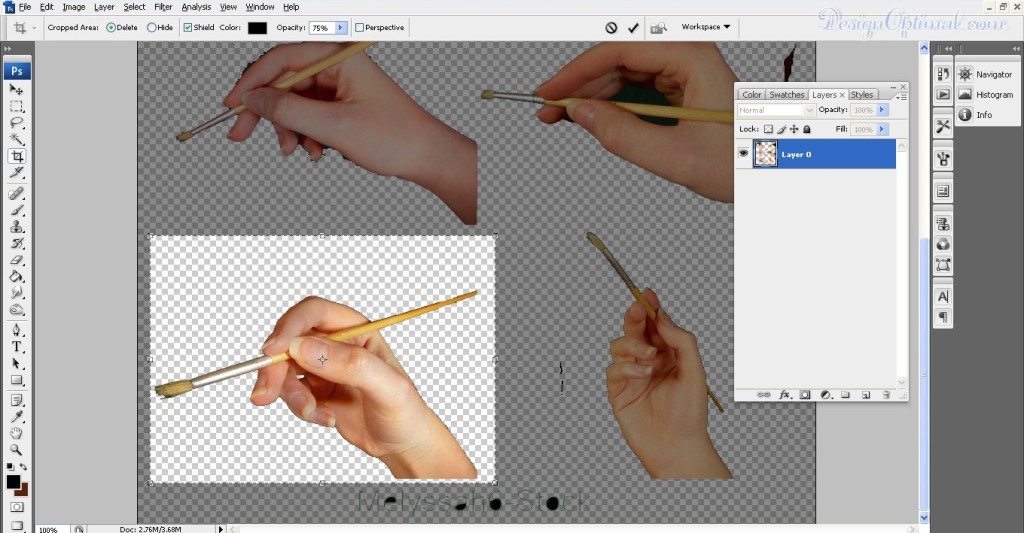
- Now position it as the first image shown below.
- Now after posting the image turn it into black and white.
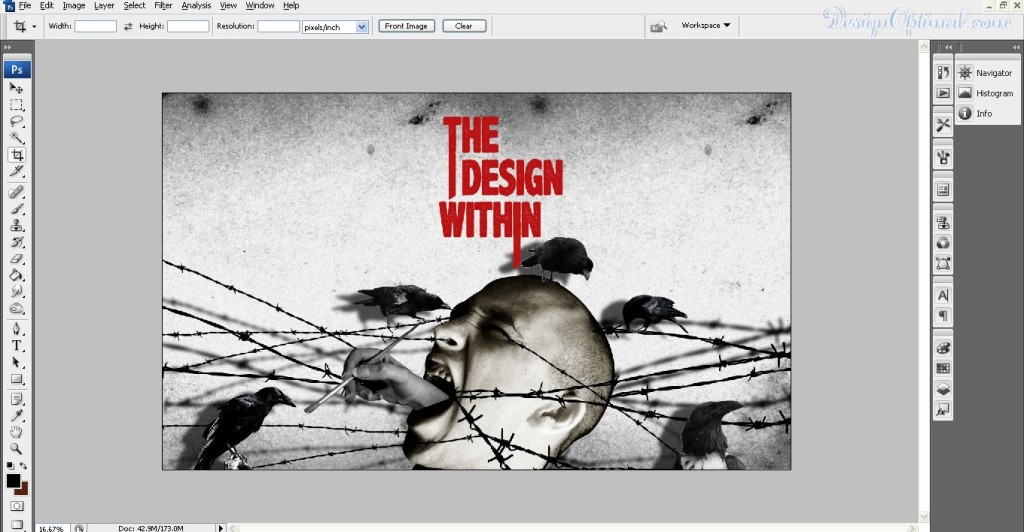
- Now again duplicate the image and turn it in to tint color using the black and white option and blend the layer in to overlay.
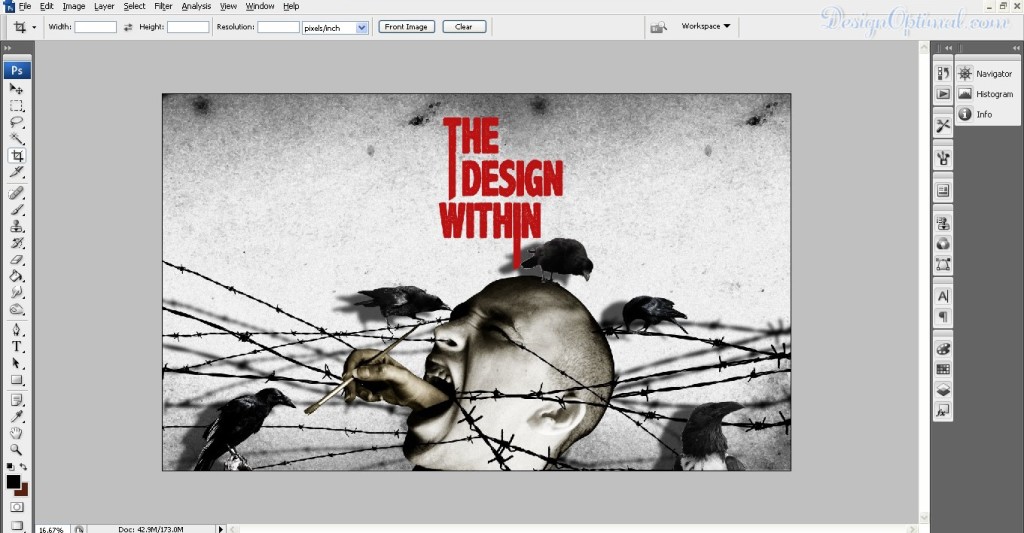
- Now again we will duplicate the same image and give the whole image a color overlay of black and keep it on the top of the layers.
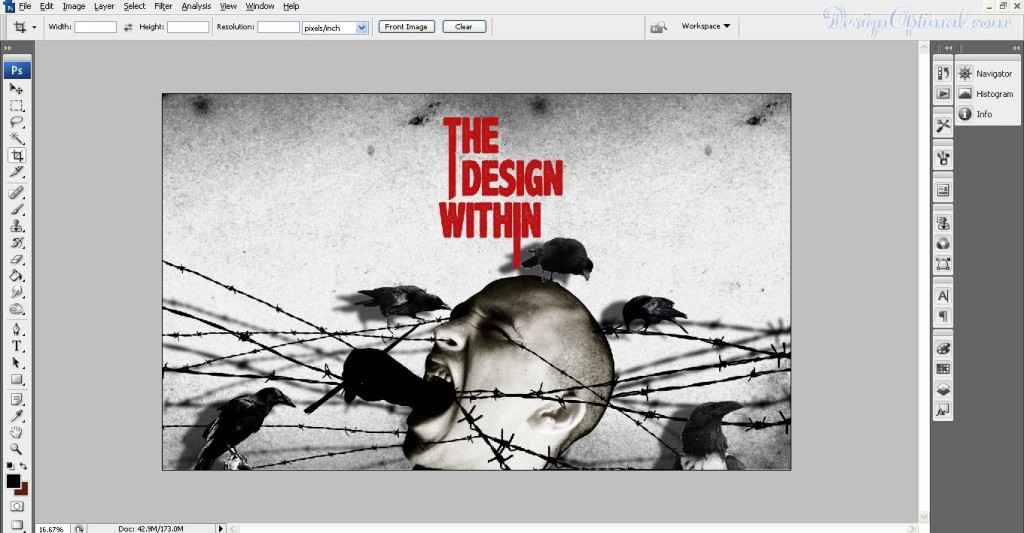
- After that we will erase the front areas of the top image that we gave color overlay of black.
Step 09
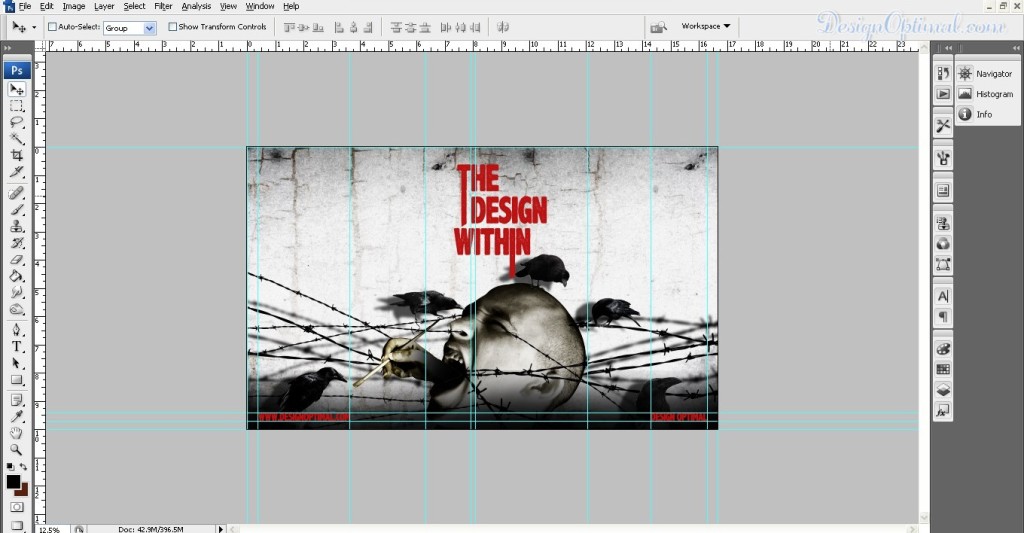
- Now for the final touches we will type as Design optimal and www.designoptimal.com in the bottom corners of the art work.
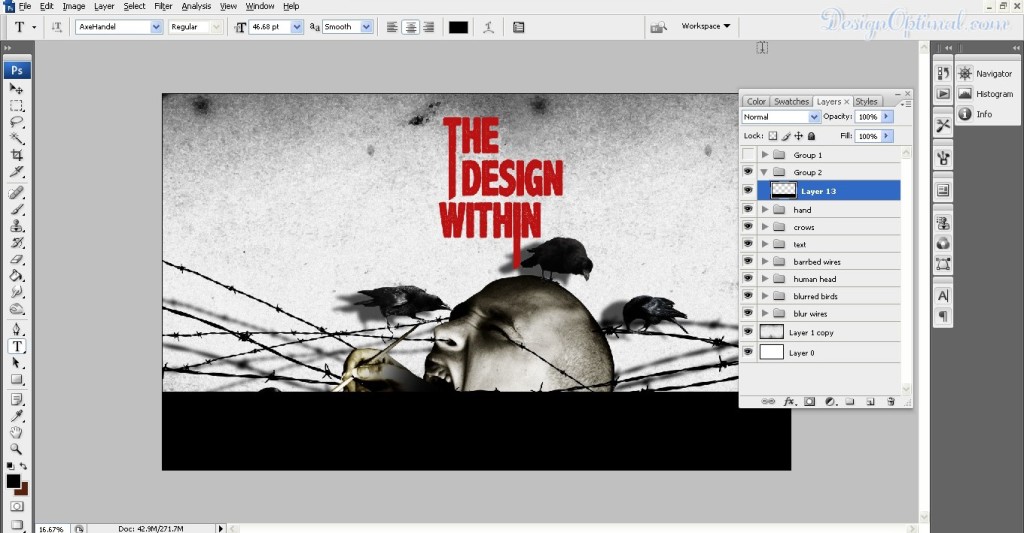
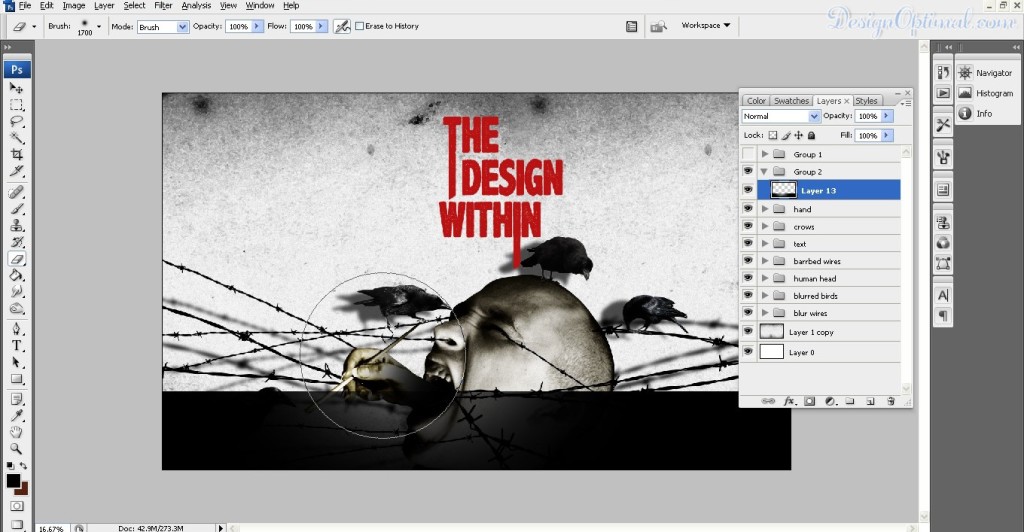
- Before typing this, we will have to add a small dark shed to the bottom of the art work as the process is shown below.
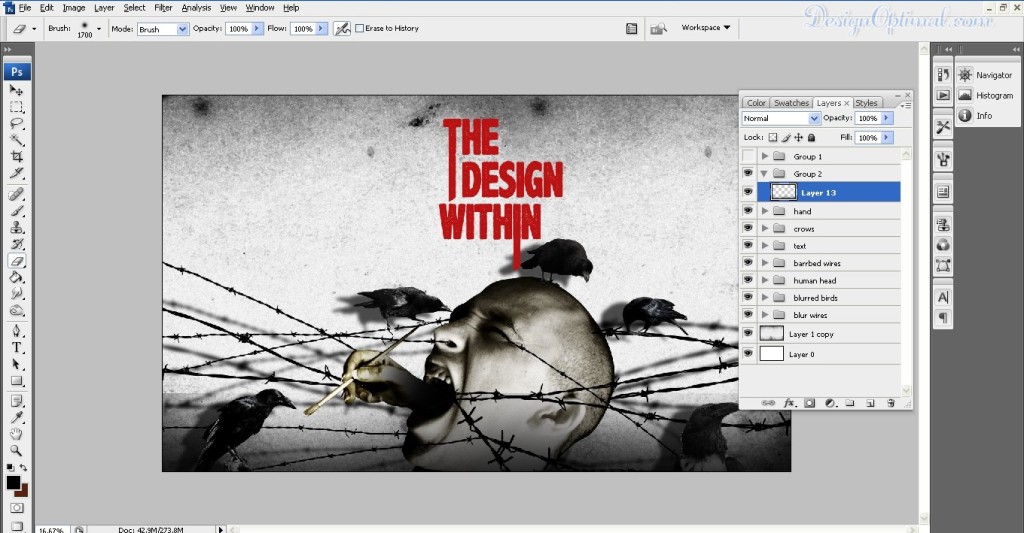
- First draw a rectangle shape with black fill in the whole width area of the art work.
- Then take a blur eraser and erase top part of the black fill. Just keep a small shade in the bottom of the art work where the text comes.
- Now type both words with the same text that we used for the main caption
Step 10
- Now for the final touches, we will add some more detail to the background.
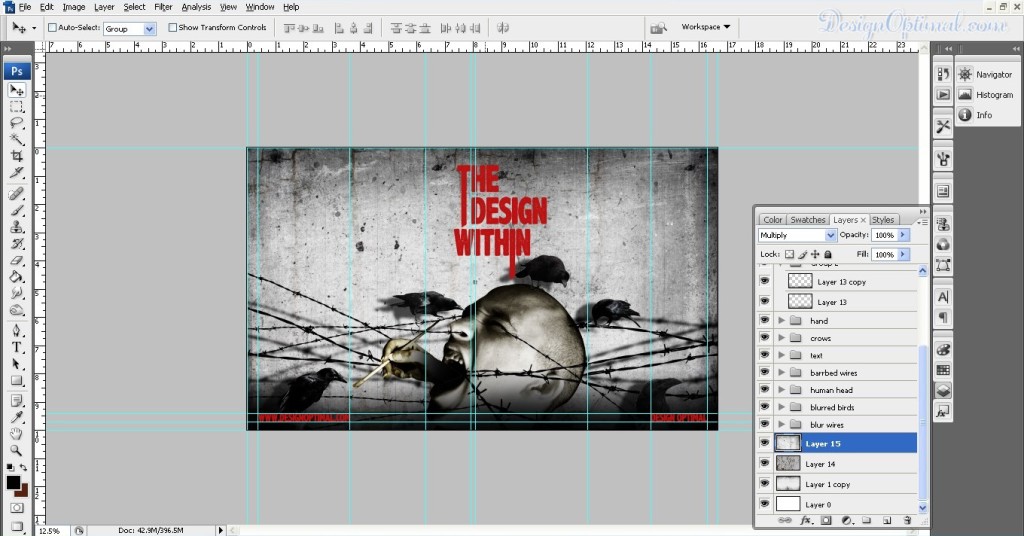
- So we will use two more textures to add more grungy look to the Background. We will use the texture back grounds called (check the “Resources” section at the beginning)
- grunge-texture-powerpoint-backgrounds and paint-4background
- first add the paint 4 background on top of the main grungy ash color background that we used in the first step of the tutorial
- Then blend it to Overlay and reduce the opacity to 75% and then use the second texture on top of it and blend it in to multiply.
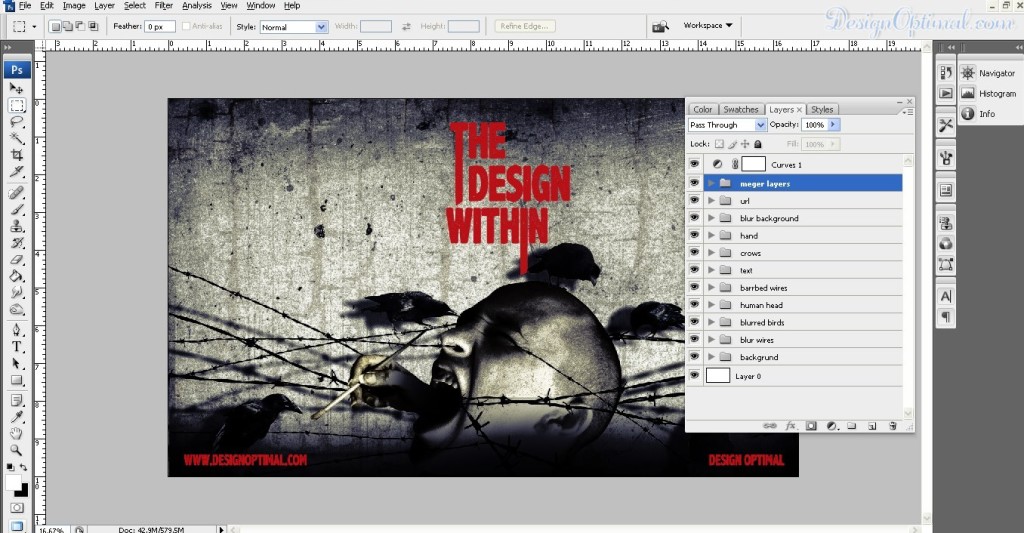
- And after that we will add some layer curves adjustment layer.
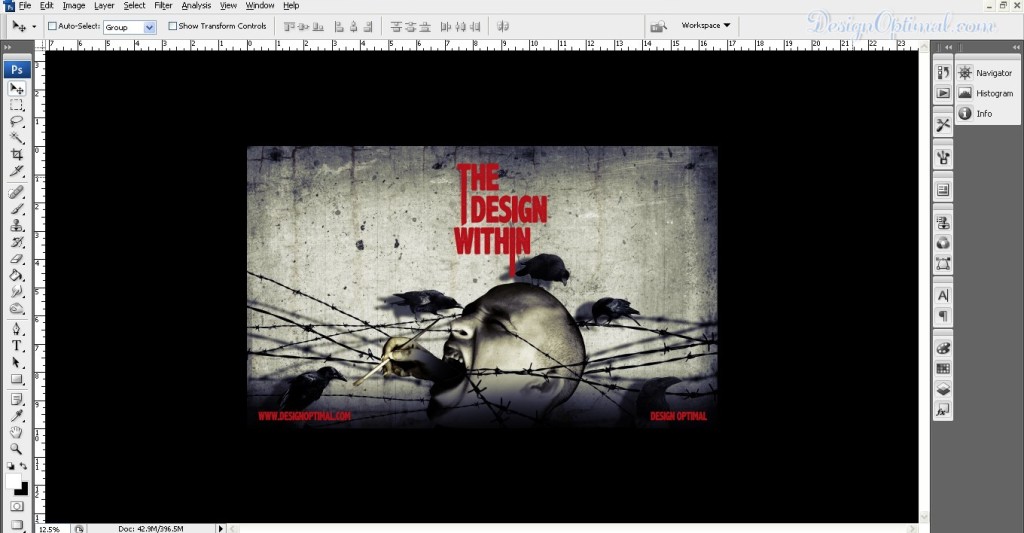
- After that, thought of making it bit cartoonish look so I have used some Ps Filters.
- So for that duplicate all the layers that you have currently got and merge them and run the Ps filter called ink outline.
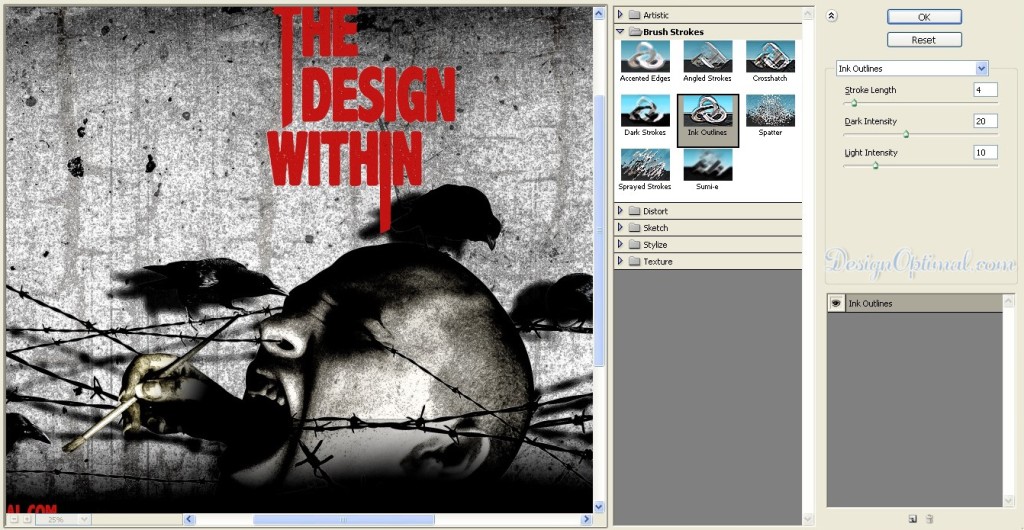
- Reduce the opacity of that layer into around 70%.
- Next duplicate the original layer and run the PS filter called the accent edges.
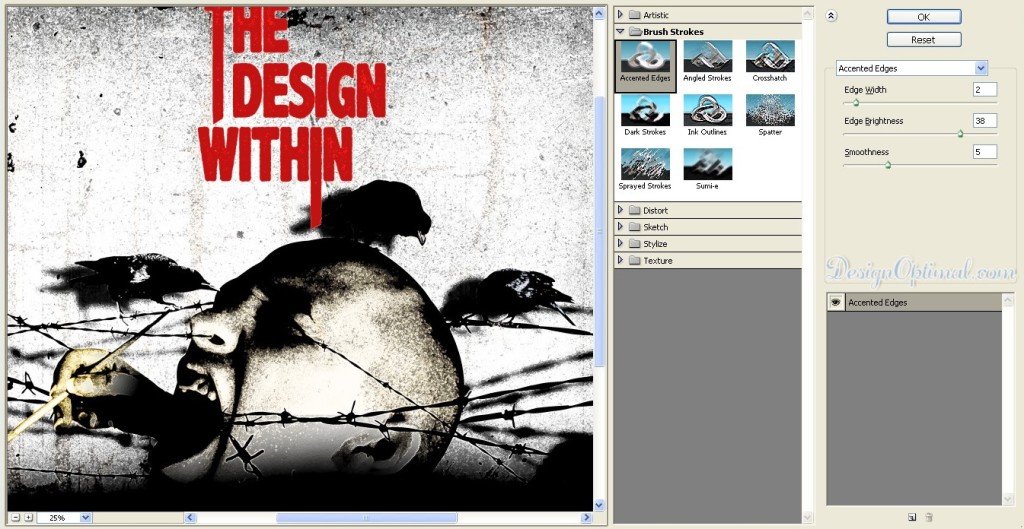
- Now blend the firstly created Ps filter layer in to Overlay and second screen in to screen, reduced the second screen layer opacity in to 40%.
- At the end, the below image would be the final outcome.
