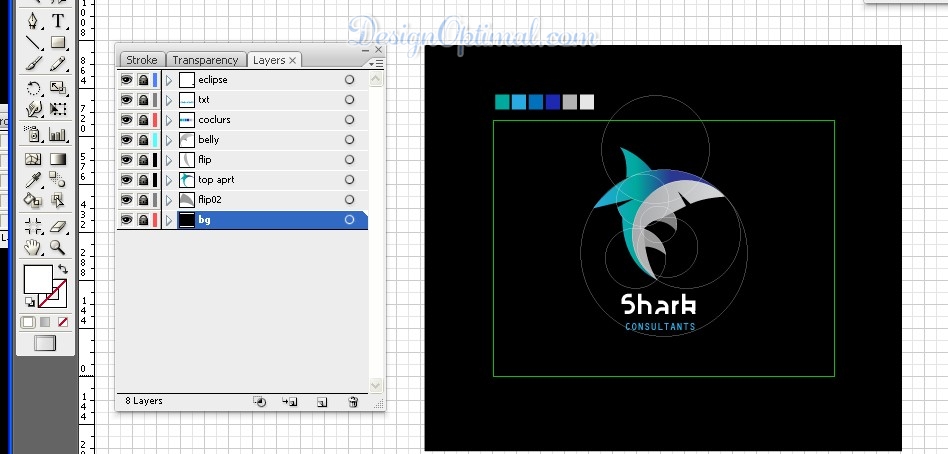
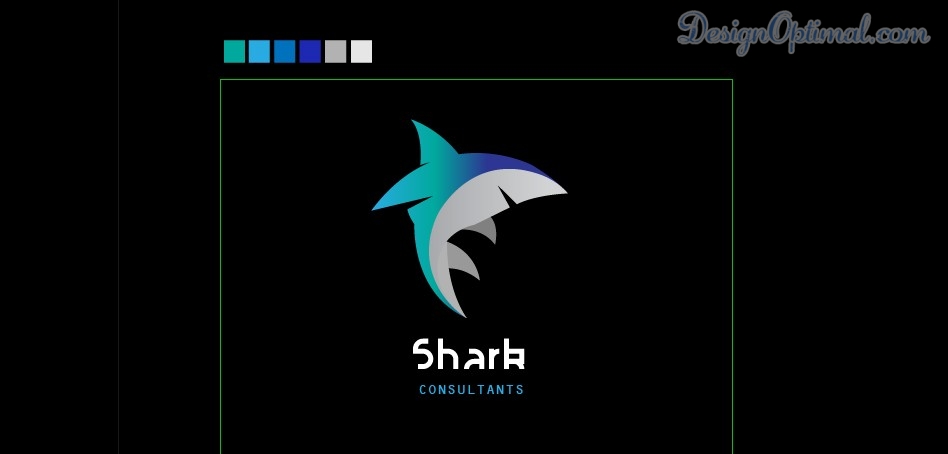
Hello!! Guys we are happy to see you again, today we are going to show you how to create a simple but yet elegant shark logo using Adobe Illustrator.
If you log in to the web, you can find lot of simple but yet powerful and clean logos that have used animals as the symbols, below we will show you how to create such logo step by step.
Step 01
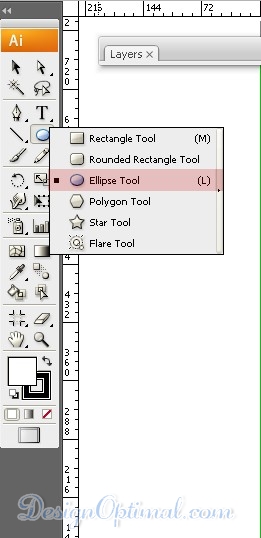
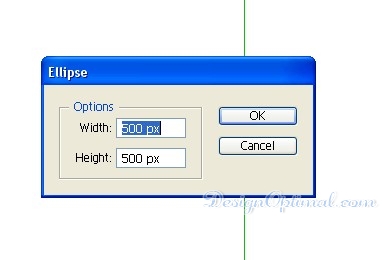
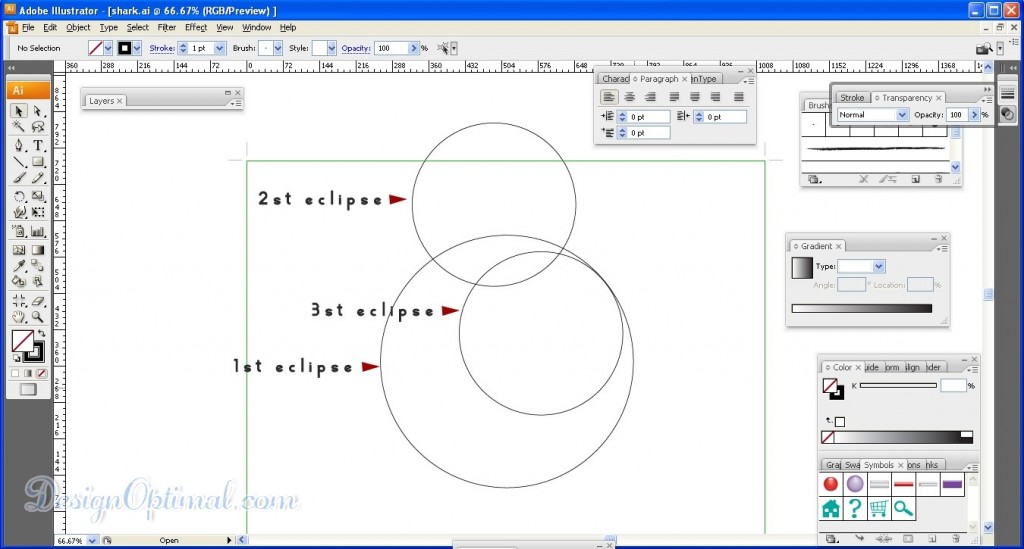
- Open Adobe Illustrator and create a new document of 1024px x768px, and make it a Landscape mode save it as Shark logo.ai. Select the Eclipse tool (01-elclipse tool) and double click the canvas. Then you will get a pop up screen there add the value as 500px x 500px, but only keep the stroke fill only for each of the eclipse that we create. Do not give a fill color, because it will make difficult to position the eclipses if you give a fill color.
Step 02
- Now make another eclipse shape using the same tool, but this time give it around 250px x 250px as the value then place it as the image shown below. Now duplicate the 250px x 250px eclipse and place it as shown in the image. Note how the 2nd and 3rd eclipses are positioned.
Step 03
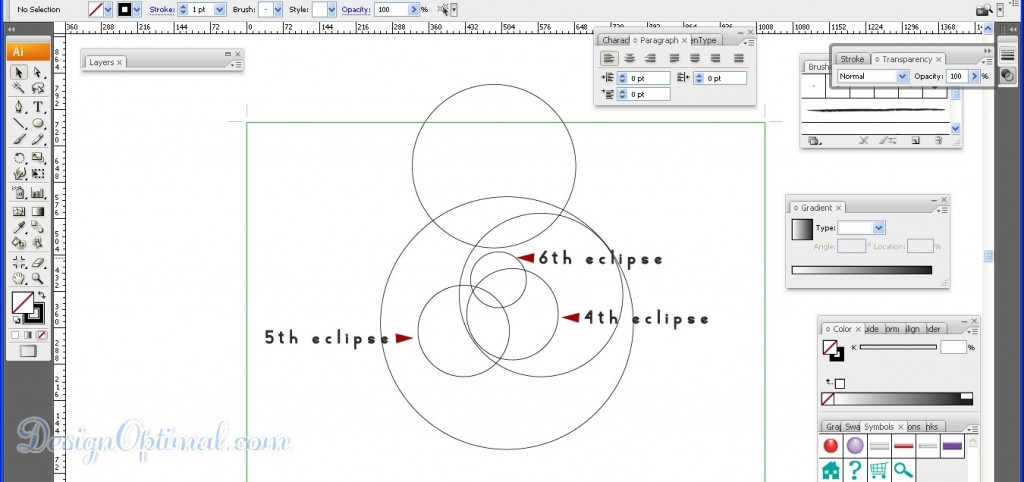
- Now make another eclipse shape but this time give it around 150px x 150px (4th) as the value. Then place it as the image shown below, duplicate the same 150px eclipse (5th) and now make another eclipse 50px x 50px (6th). Place those two as shown in the image. Note how the 4th, 5th and the 6th eclipses are positioned and about the sizes.
Step 04
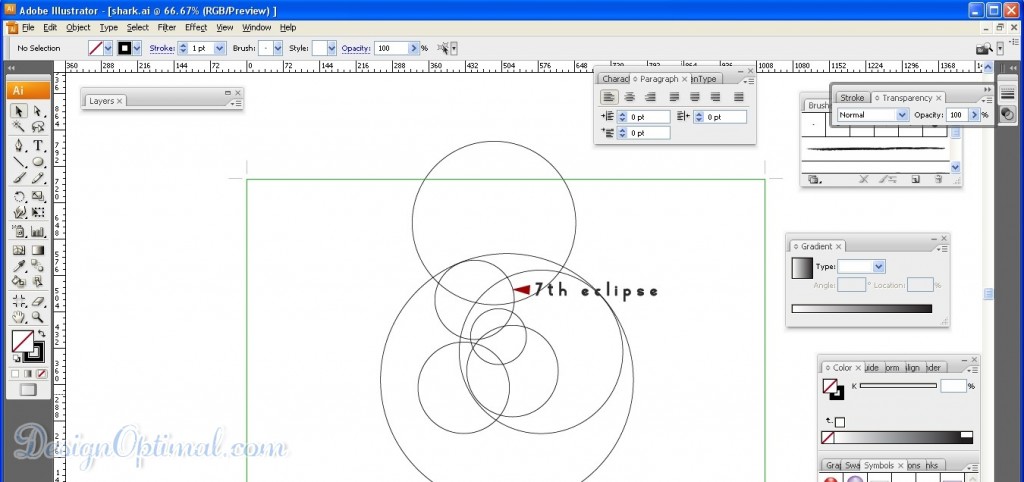
- Now to create the 7th the final eclipse because after that we are going to start drawing the shark using the eclipses as the margins.
Step 05
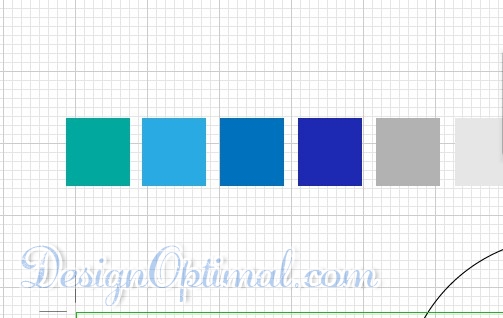
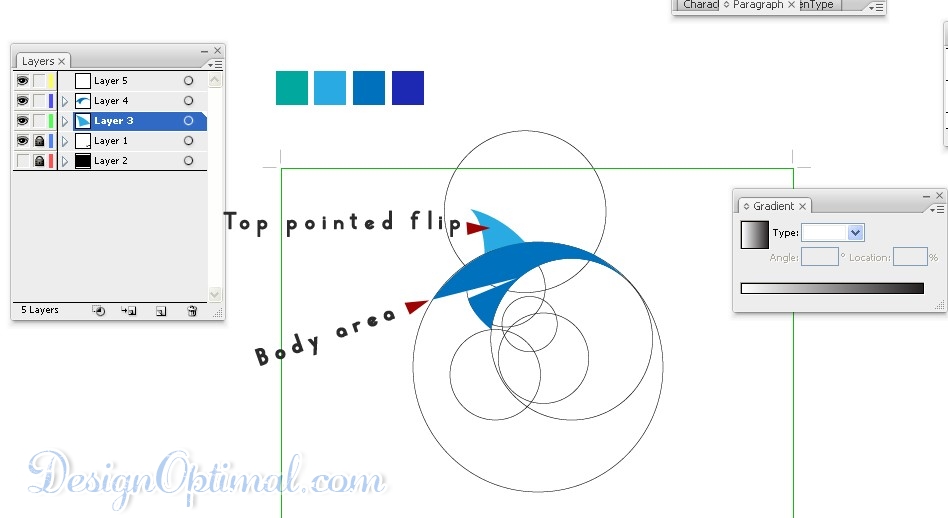
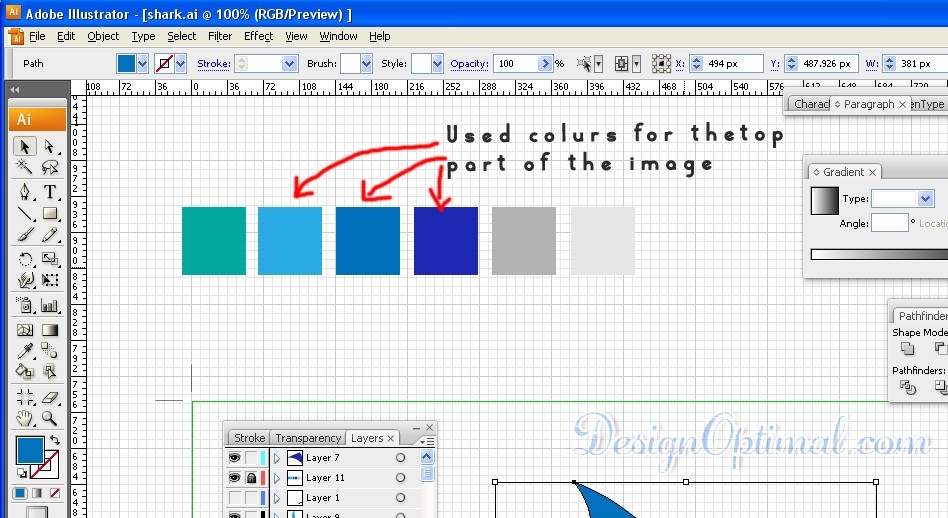
- Now to start drawing the shark, first we will draw the flip of the Shark as shown in the next reference images but before that, it is good to choose a color theme for the shark and mine is like this.
Step 06
- First select the Pen tool from the tools palette draw the top pointed flip of the Shark and next the body area as shown in the next reference image fill it with different color patches form the color theme that we selected because then it’s easy to see what are the parts that we created right now.
Step 07
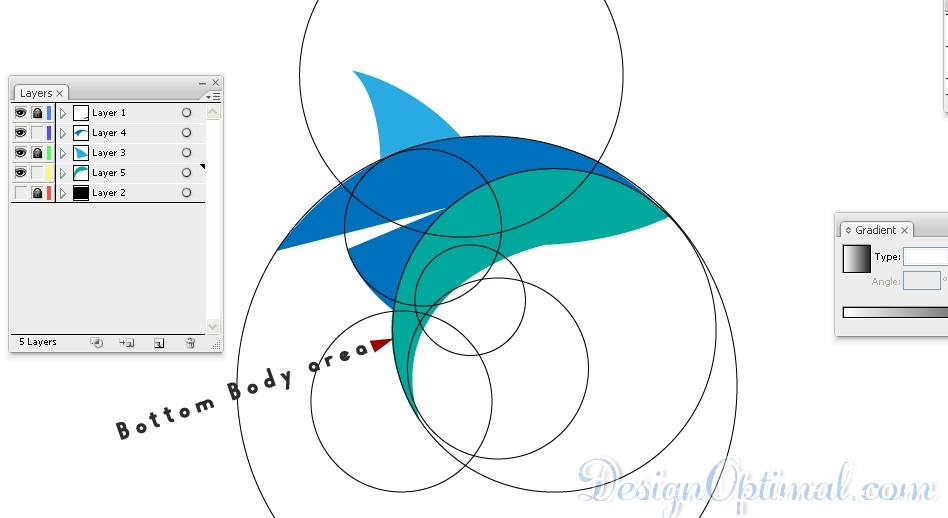
- Next, draw the underbody belly area of the shark using the pen tool as shown in the image.
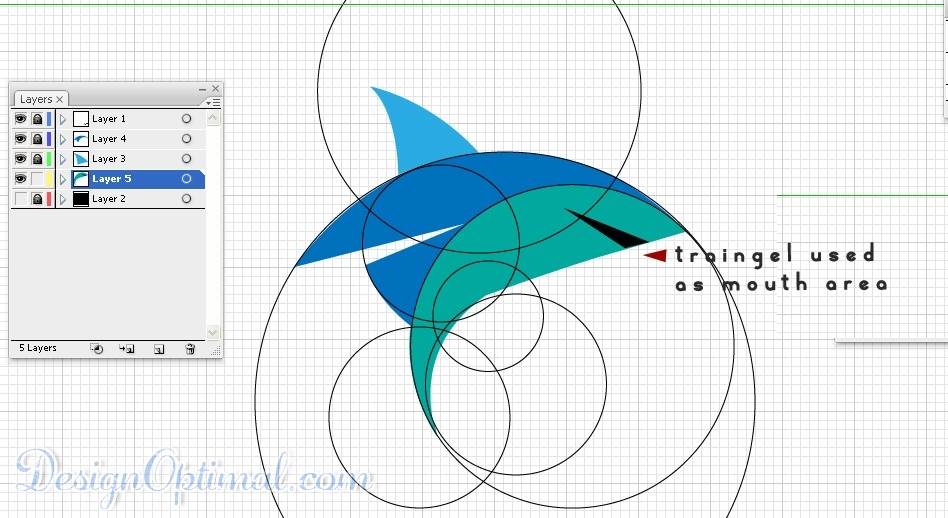
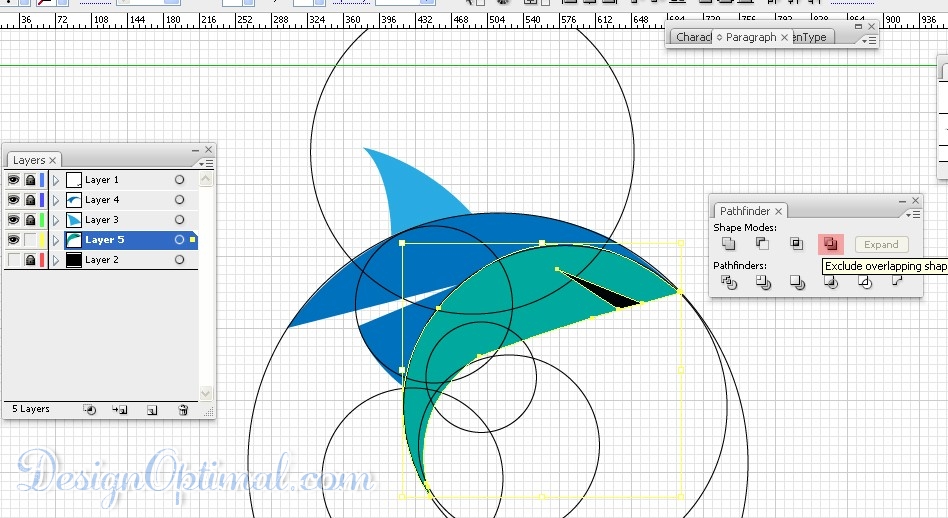
- After drawing it, create a triangle as shown in the next reference image and using pathfinder tool. Make the mouth of the Shark using that triangle shape. Note: the pathfinder action is used to make the mouth area clear from other body parts, which is selected in light red color as you can see on the reference image – Making the mouth area of the Shark using the Pathfinder tool.
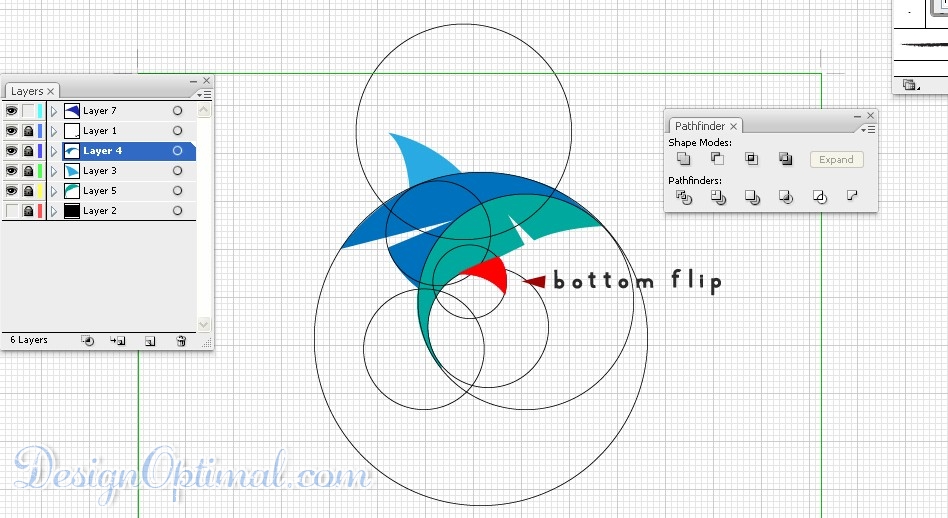
- Now to create the bottom flip of the Shark note the reference image below. The drawing of the bottom flip has been colored red to show it.
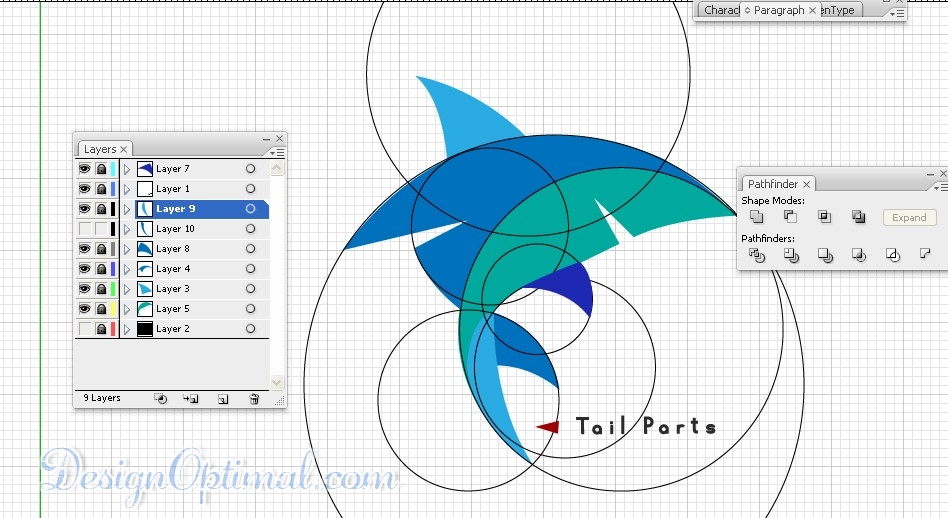
- Now to create the tail parts of the Shark draw them as the reference image and use different colors to see it clearly from the other body parts.
Step 08
- Now to add the proper color to the Shark that we recently created to make it more pleasant logo. For this, you will have to use the gradient tool in order to get the colors.
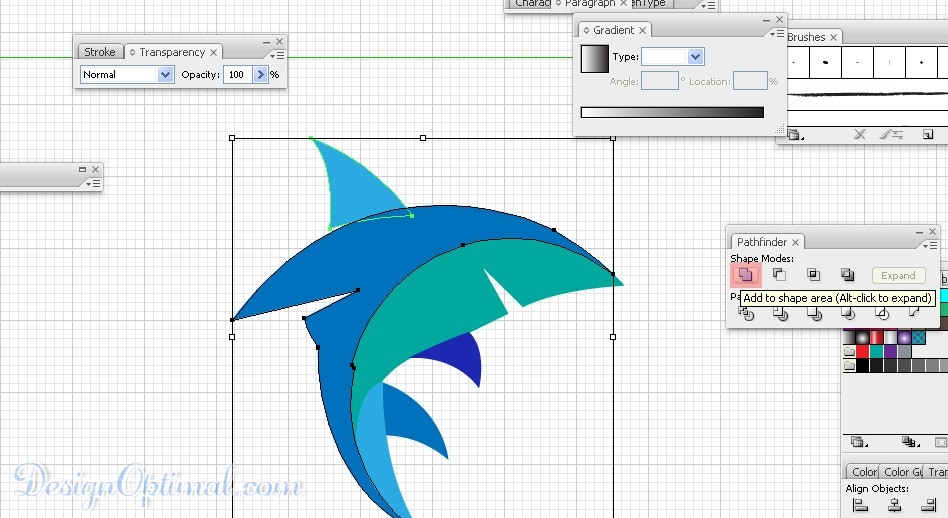
- Select all the top parts of the Shark as shown in the reference image and by using pathfinder tool make them a single object.
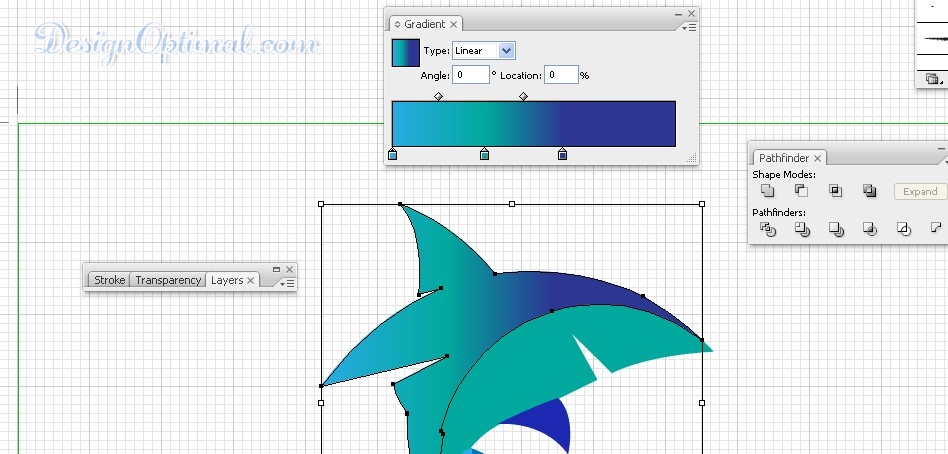
Step 09
- Now to add gradient for the below belly parts, see the reference image and see how the gradient has been set for the bottom belly area and for the one of the fin tails.
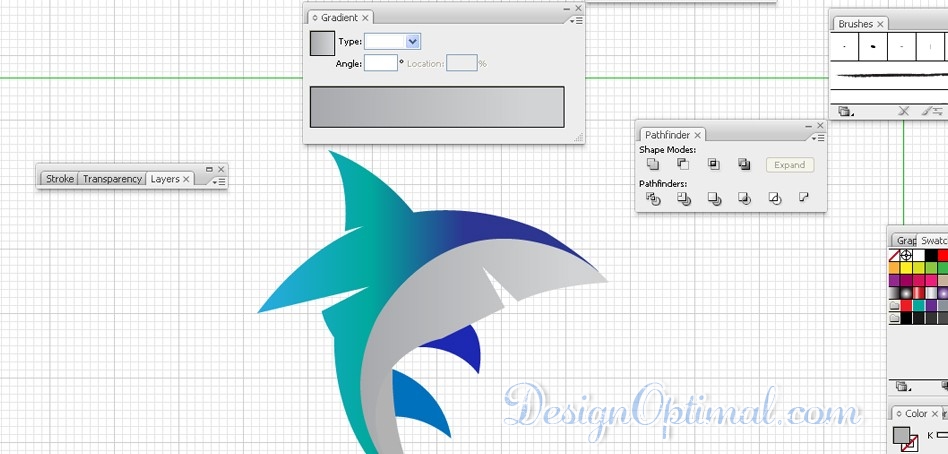
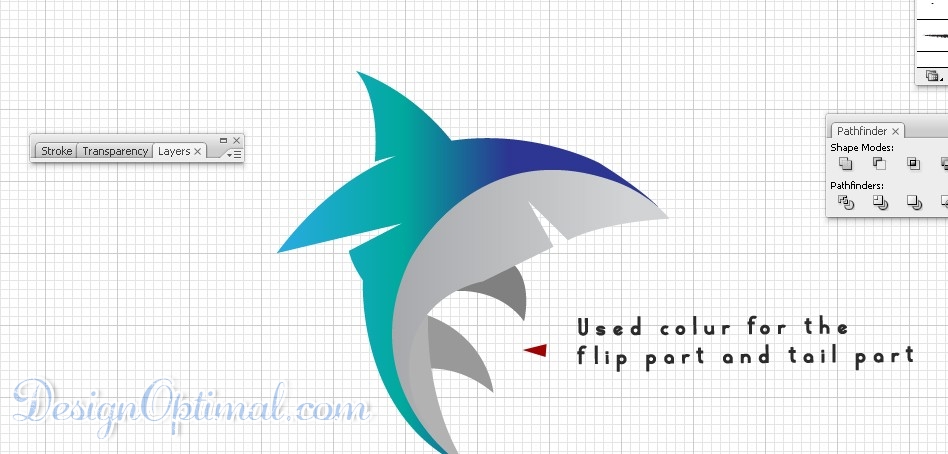
Step 10
- Make a rectangle as the size of the document size that you made for this tutorial, fill it with black, and place it in the bottom of all the layers. Then change the eclipse stroke color to white to see it clearly.
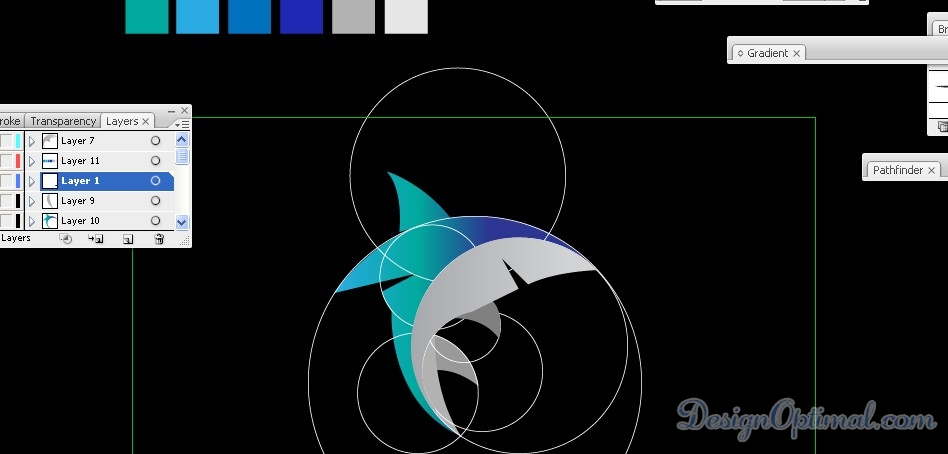
- Now the Shark logo is completed and now it’s time to add some text to make it more efficient logo, turn off the eclipse layer where the white stroked eclipse shapes are situated and type the text as shown in the reference image. I typed it as SHARK CONSULTANTS and place the txt as shown in the image
